
This time, we’ll demonstrate how to upgrade Zabbix to the latest version 8.0. The upgrade will be based on Zabbix version 7.0 and PostgreSQL 16 with its TimescaleDB extension.
Guide on how to update PostgreSQL can be found in our wiki article. You will also find instructions for updating TimescaleDB there.
Operating System Selection
The guide includes instructions for RHEL platforms on version 9 and Debian 13. Select the system already running Zabbix 7.0.
Also select the web server used by your existing installation:
Preparation Steps
- Read the “Release Notes” [Official release notes for Zabbix 8.0].
- Carefully review the “Upgrade Notes” document [Official upgrade notes for Zabbix 8.0]. Notes for skipped releases: 7.2, 7.4.
- Check and optimize the current database performance based on the vendor’s recommendations and considering the requirements of the Zabbix instance.
- Check the compatibility matrix: PHP 8.2–8.5, PostgreSQL 15–18 and TimescaleDB 2.20–2.29.x if used.
- Back up the configuration files for the Zabbix server and Zabbix proxy.
- Back up the Zabbix server database and, if applicable, the Zabbix proxy database. In a virtual environment, you can also use a consistent snapshot of the entire VM, including its database.
- Back up all customizations or manual changes made within Zabbix.
- This procedure is for a standalone server. For HA, follow the HA cluster upgrade procedure.
We recommend PHP 8.5 and PostgreSQL 18 with the latest patch releases. Zabbix 8.0 supports both branches.
Version Check
The first command displays the current PHP version; the second displays the PostgreSQL database server version. Check PHP before switching to another version.
Run the commands as root. Adjust the database name and connection to your installation.
php-fpm -v
sudo -u postgres psql -d zabbix -c 'SHOW server_version;'
Backup of Zabbix Configuration Files
Before proceeding to the next steps, back up all configuration files of the Zabbix server and Zabbix Proxy. In the commands, replace <backup directory> with the path to your existing backup directory.
cp -R /etc/zabbix/ /<backup directory>/
cp -R /usr/lib/zabbix/alertscripts/ /<backup directory>/
cp -R /usr/lib/zabbix/externalscripts/ /<backup directory>/
cp -R /usr/share/zabbix/ /<backup directory>/
cp /etc/httpd/conf/httpd.conf /<backup directory>/
cp /etc/httpd/conf.d/zabbix.conf /<backup directory>/
cp -R /etc/zabbix/ /<backup directory>/
cp -R /usr/lib/zabbix/alertscripts/ /<backup directory>/
cp -R /usr/lib/zabbix/externalscripts/ /<backup directory>/
cp -R /usr/share/zabbix/ /<backup directory>/
cp -R /etc/nginx/ /<backup directory>/
cp -R /etc/php-fpm.d/ /<backup directory>/Stopping Services
First, stop the Zabbix server and the web server to ensure that no data is being written to the database.
Database Update (Optional)
Upgrade to the recommended PostgreSQL 18 separately using the linked guide. The Zabbix upgrade itself can keep the supported PostgreSQL 16 with TimescaleDB 2.29.2 used in this procedure.
Detailed instructions for updating PostgreSQL can be found in our wiki.
Zabbix Update
We have successfully backed up all data and checked the requirements of the new Zabbix version for related components.
Now, we will proceed with updating Zabbix itself and all its components.
Zabbix 8.0 requires PHP 8.2 or later. If the version checked above is older, these commands switch to PHP 8.3 supplied by the operating system and display its version. Skip the switch if you already use a supported PHP version:
dnf module switch-to php:8.3
php-fpm -v
PHP 8.3 receives security fixes from the PHP project until 31 December 2027. Distribution packages have their own lifecycle; Red Hat lists support for the 8.3 stream until May 2029. We still recommend PHP 8.5; installing it requires a different package source and is handled separately.
First, download the installation packages for the repositories of the new Zabbix version and clear the installation cache:
rpm -Uvh https://repo.zabbix.com/zabbix/8.0/release/rocky/9/noarch/zabbix-release-latest.el9.noarch.rpm
dnf clean all
The repositories for the new version are now available, so we can update the Zabbix server packages. Upgrade proxies one at a time after verifying the server:
dnf upgrade zabbix-server-pgsql zabbix-web-pgsql zabbix-apache-conf zabbix-sql-scripts zabbix-agent2When prompted about modified configuration, preserve your database connection and other settings. Review .rpmnew or .dpkg-dist files and upgrade any other installed components, such as web service, Java gateway or agent plugins.
After successfully completing the update of Zabbix server packages and all its components, we can restart Zabbix to finalize the database structure upgrade.
systemctl start zabbix-serverThe step-by-step activities and the entire update process, including any modifications to the database schema structure, can be monitored in the Zabbix server log file:
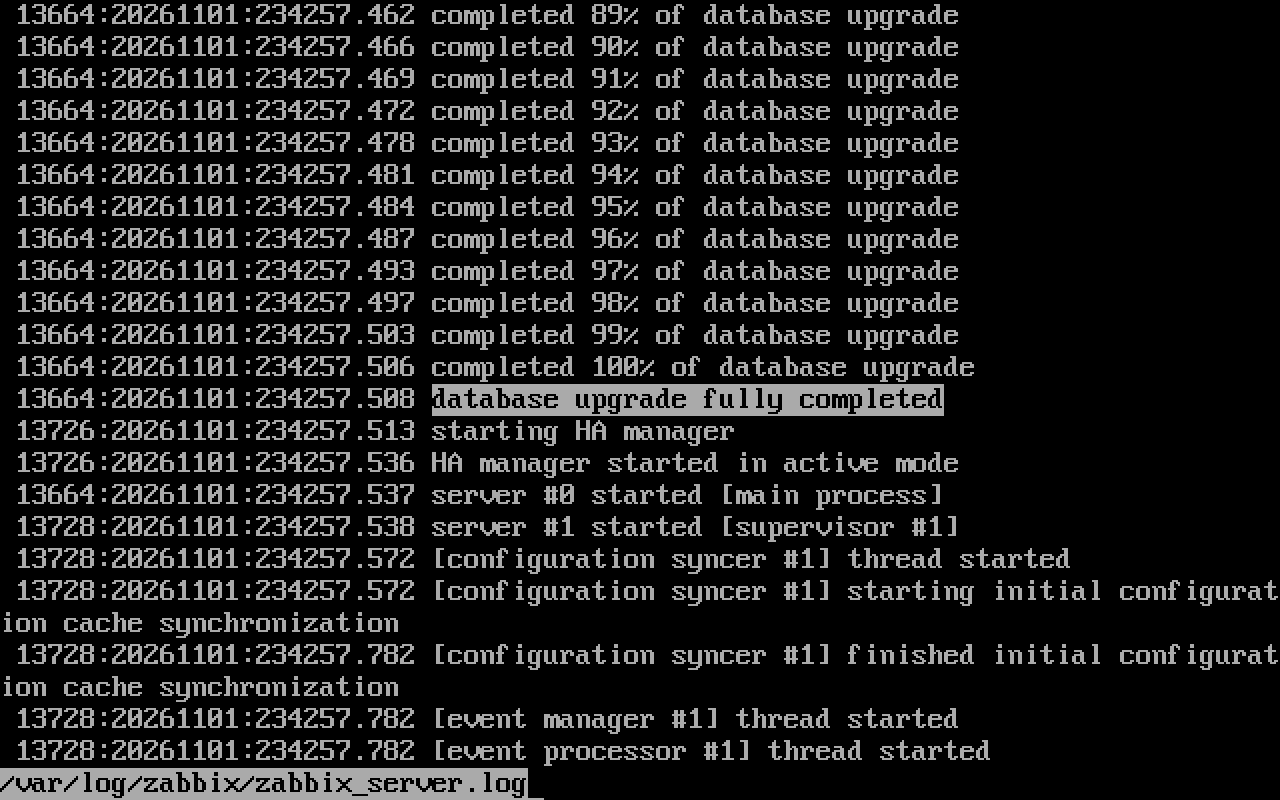
tail -f /var/log/zabbix/zabbix_server.logWait for database upgrade fully completed. Do not interrupt the upgrade. Then press Ctrl+C to stop following the log; this does not stop Zabbix.
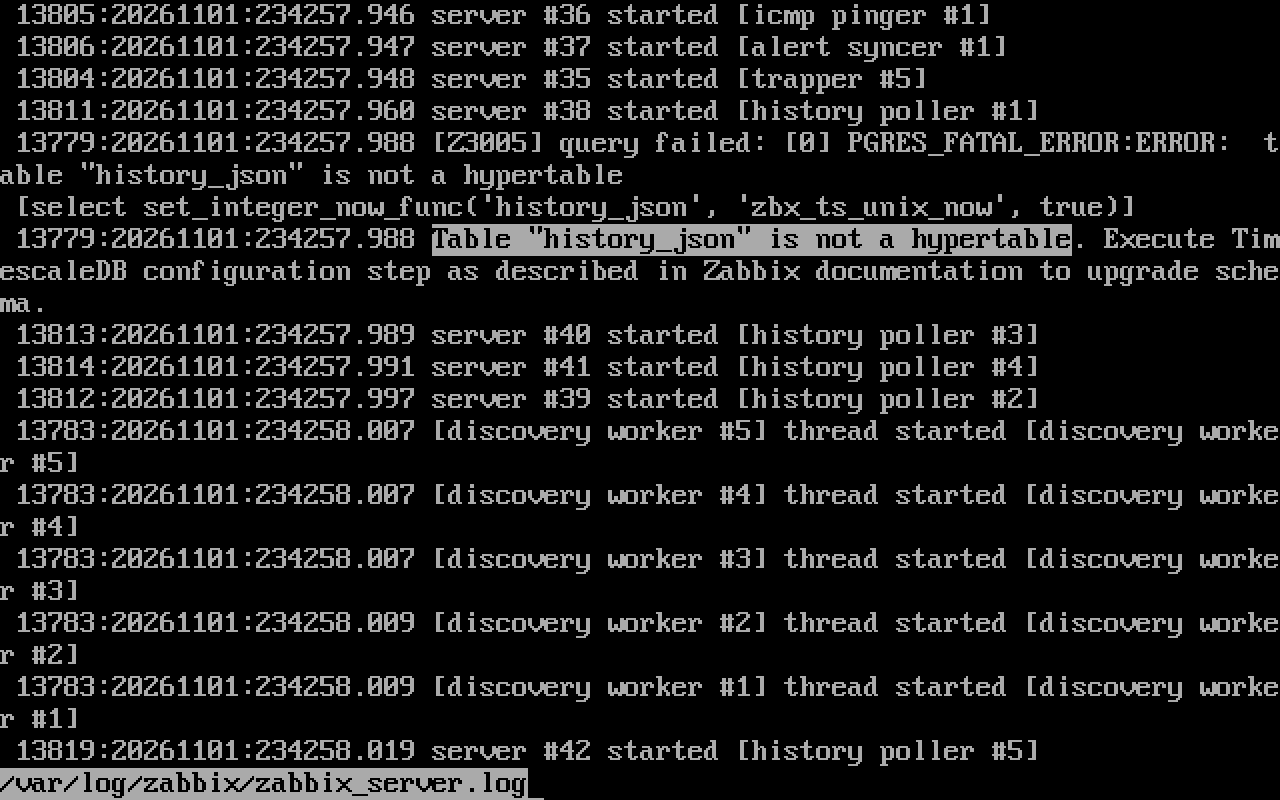
With TimescaleDB, this error may appear after the migration completes: Table "history_json" is not a hypertable. Execute TimescaleDB configuration step as described in Zabbix documentation to upgrade schema. The automatic migration has finished, but the new history_json table still needs to be converted to a hypertable. The next step fixes this.
If using TimescaleDB, also run this step. Skip this step for PostgreSQL without TimescaleDB:
systemctl stop zabbix-server
sudo -u zabbix psql -v ON_ERROR_STOP=1 -d zabbix -f /usr/share/zabbix/sql-scripts/postgresql/timescaledb/schema.sql
systemctl start zabbix-server
The script should report TimescaleDB is configured successfully. Messages saying already a hypertable, skipping for existing tables are normal.
Immediately after restarting Zabbix server, check the log. The history_json error should not recur on this new startup. Once startup succeeds, press Ctrl+C to stop following the log and continue with the frontend:
tail -f /var/log/zabbix/zabbix_server.logThe frontend has moved to /usr/share/zabbix/ui. Update the old path in the web server configuration before starting it. Preserve the credentials in /etc/zabbix/web/zabbix.conf.php; do not run a new frontend installation.
If Apache still uses the old path, it can display Manual intervention is required to complete upgrade!:
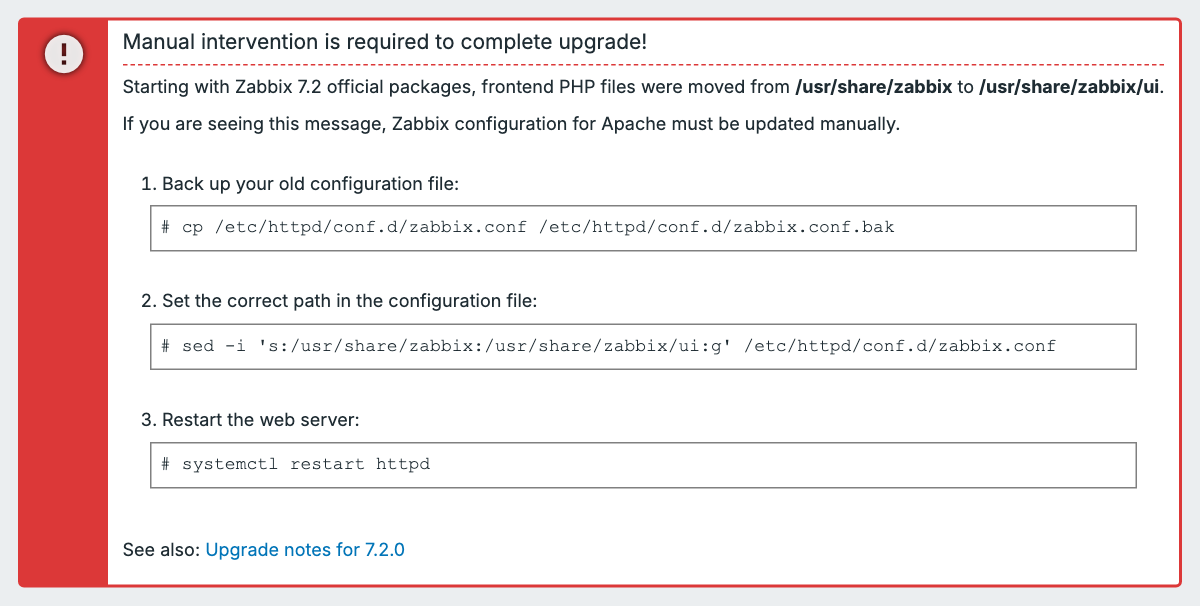
The following command updates the path in the Apache configuration, including custom virtual hosts. Paths already pointing to the new directory are kept:
find -L /etc/httpd -type f -name '*.conf' -exec sed -i --follow-symlinks -E \
's#/usr/share/zabbix(/ui)?([/"[:space:]]|$)#/usr/share/zabbix/ui\2#g' {} +
Now check the Apache configuration:
apachectl configtestThe check must report Syntax OK. If you see AH00558, Apache has no server name configured; add ServerName with the server’s actual DNS name to /etc/httpd/conf/httpd.conf. This notice alone does not block startup. After a successful check, start the services:
systemctl restart php-fpm httpd zabbix-agent2
systemctl is-active zabbix-server php-fpm httpd zabbix-agent2
All checked services should report active. Then open the frontend at its existing address in your browser.
If Nginx still uses the old path, it can display Manual intervention is required to complete upgrade!:
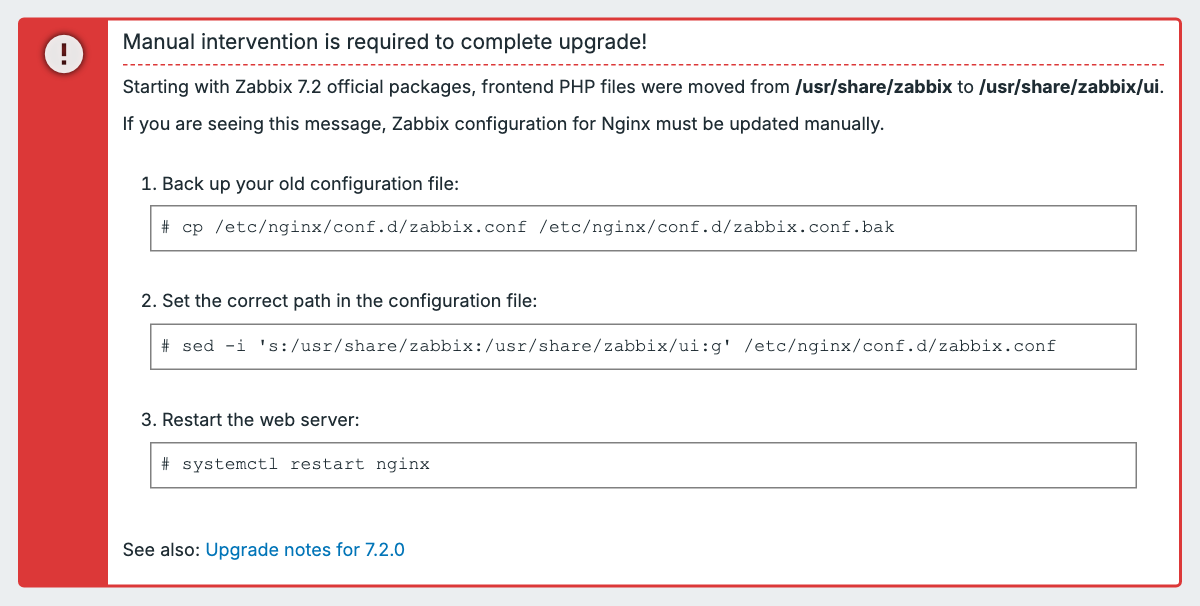
The following command updates the path in the Nginx configuration, including custom virtual hosts. Paths already pointing to the new directory are kept:
find -L /etc/nginx -type f -name '*.conf' -exec sed -i --follow-symlinks -E \
's#/usr/share/zabbix(/ui)?([/"$;[:space:]]|$)#/usr/share/zabbix/ui\2#g' {} +
Now check the Nginx configuration:
nginx -tThe check must report syntax is ok and test is successful. If it reports an error, fix it first. After a successful check, start the services:
systemctl restart php-fpm nginx zabbix-agent2
systemctl is-active zabbix-server php-fpm nginx zabbix-agent2
All checked services should report active. Then open the frontend at its existing address in your browser.
Restarting the agent may briefly produce first network error in the log. Once it starts, connection restored should follow. If errors keep recurring, check the agent connection and its service status shown above.
Update initMAX modules and widgets using RPM/DEB packages from our portal. Packages also deploy them to the new path; do not use the manual copying below for these modules. First check the portal for a release supporting Zabbix 8.0. If our repository is already configured, update the installed packages after upgrading Zabbix:
dnf upgrade 'zabbix-module-*'If you previously copied our modules manually, follow the package installation instructions for the product on the portal.
Other manually installed modules: these must support Zabbix 8.0. If they remain in the old /usr/share/zabbix/modules directory, the frontend can report Cannot load module at: modules/upgrade_check.:
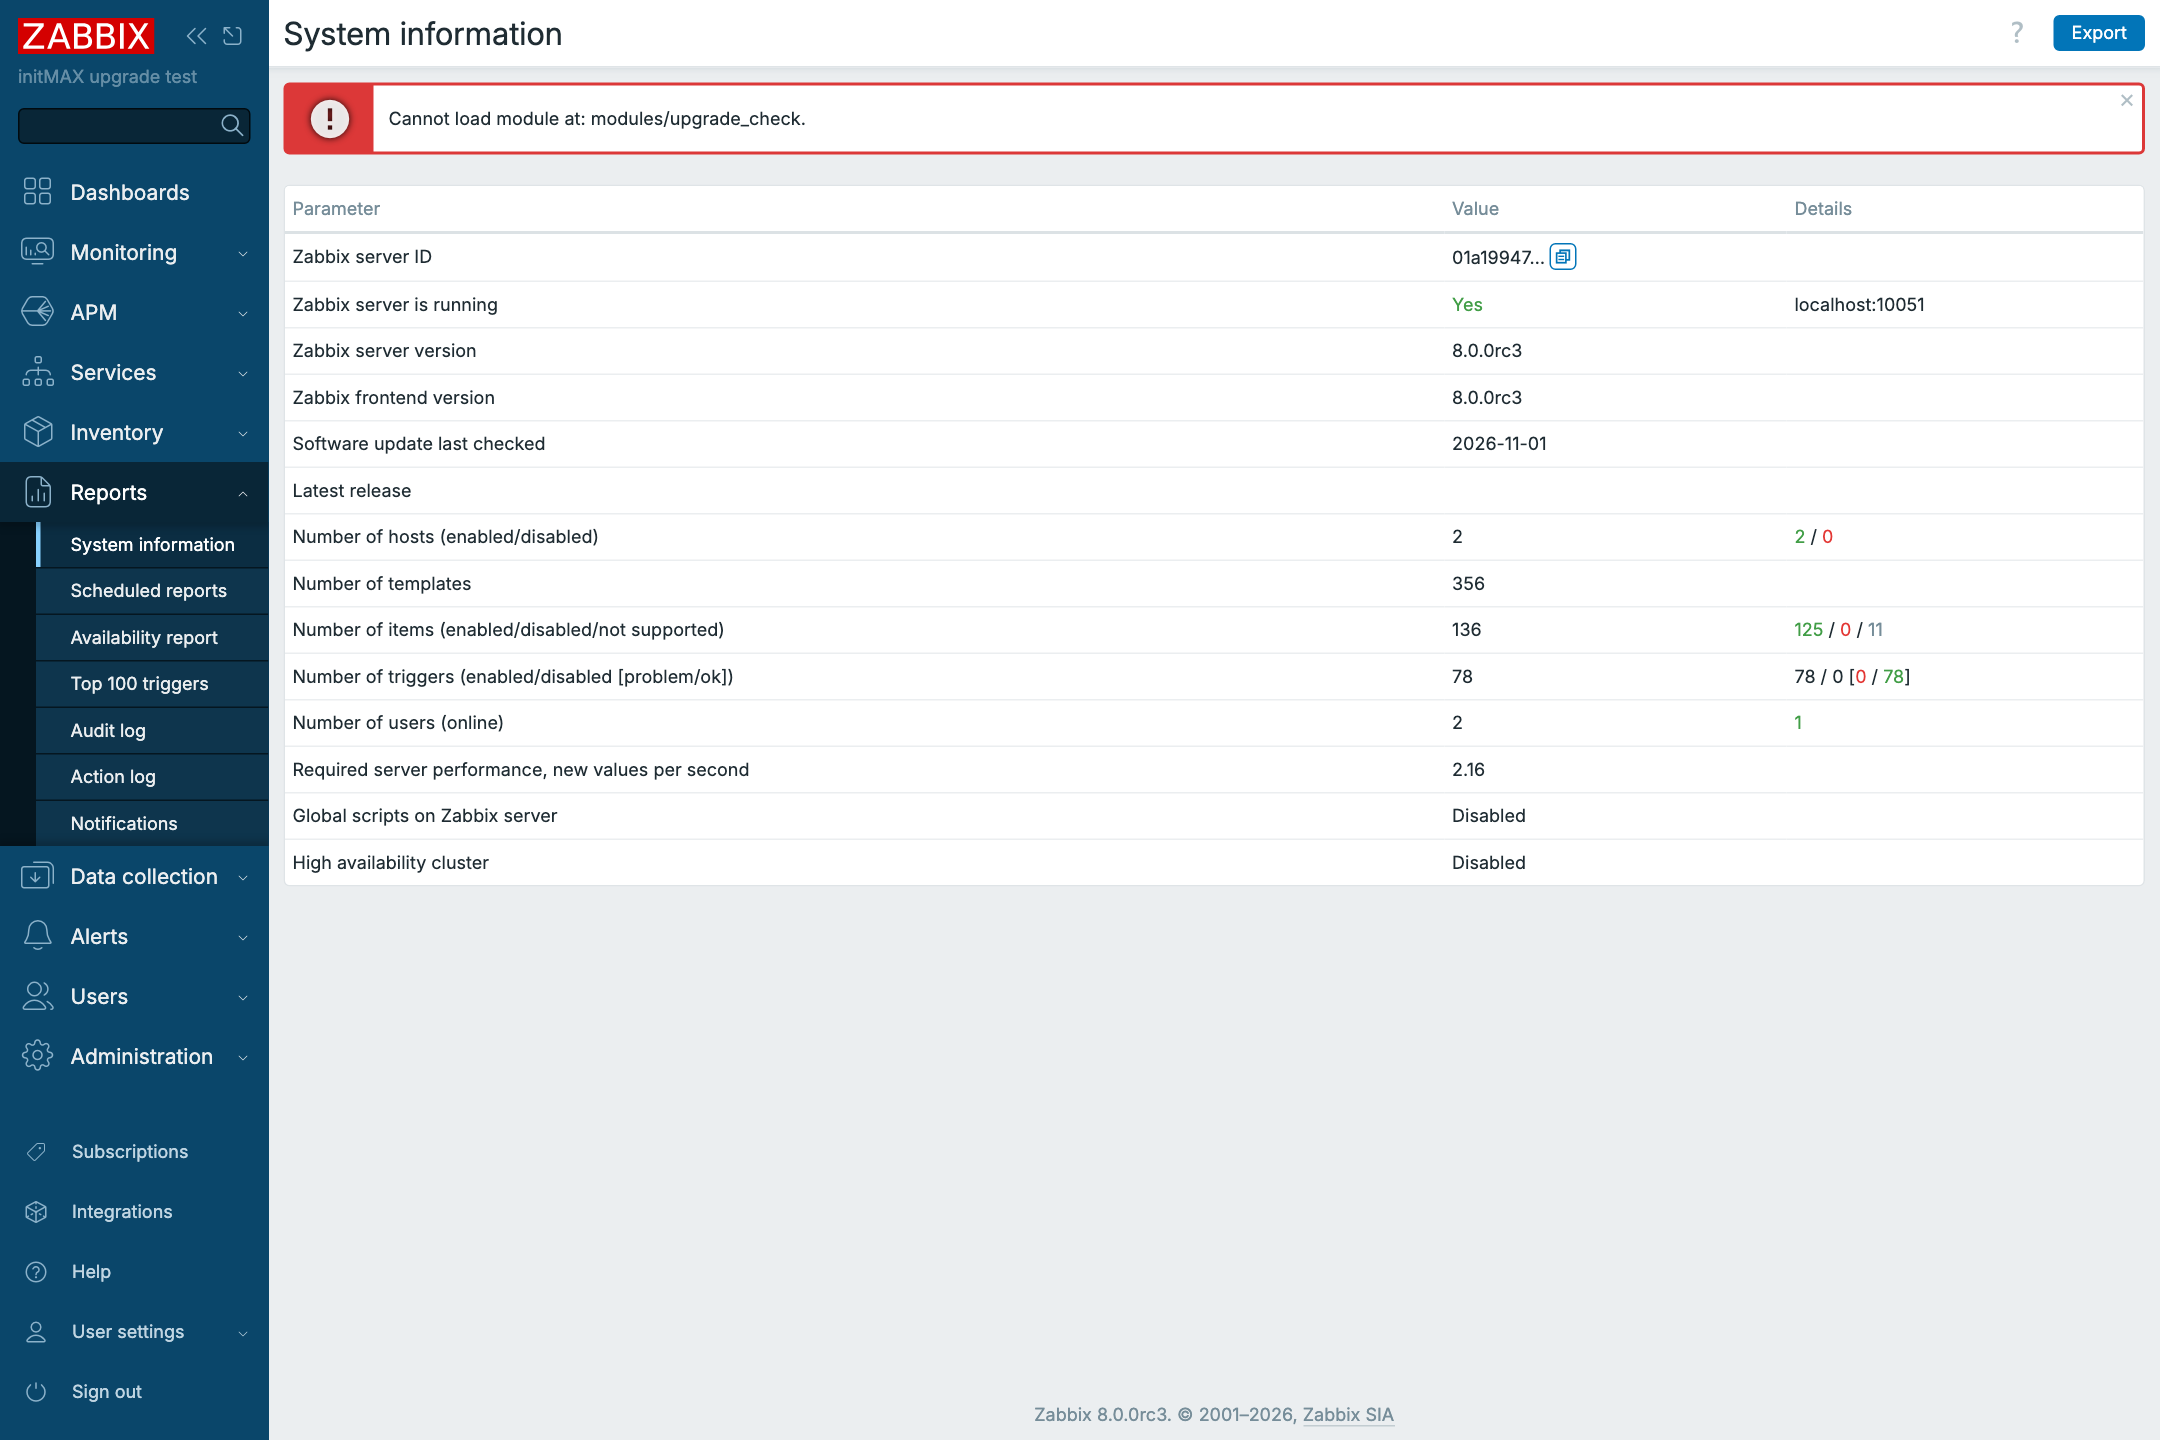
Copy the compatible module to the directory already created by the frontend package. Replace upgrade_check in the command with the module name from the error message. Do not overwrite newer versions already installed there with old files. Repeat the command for any other manually installed modules. Skip this step if you do not use them:
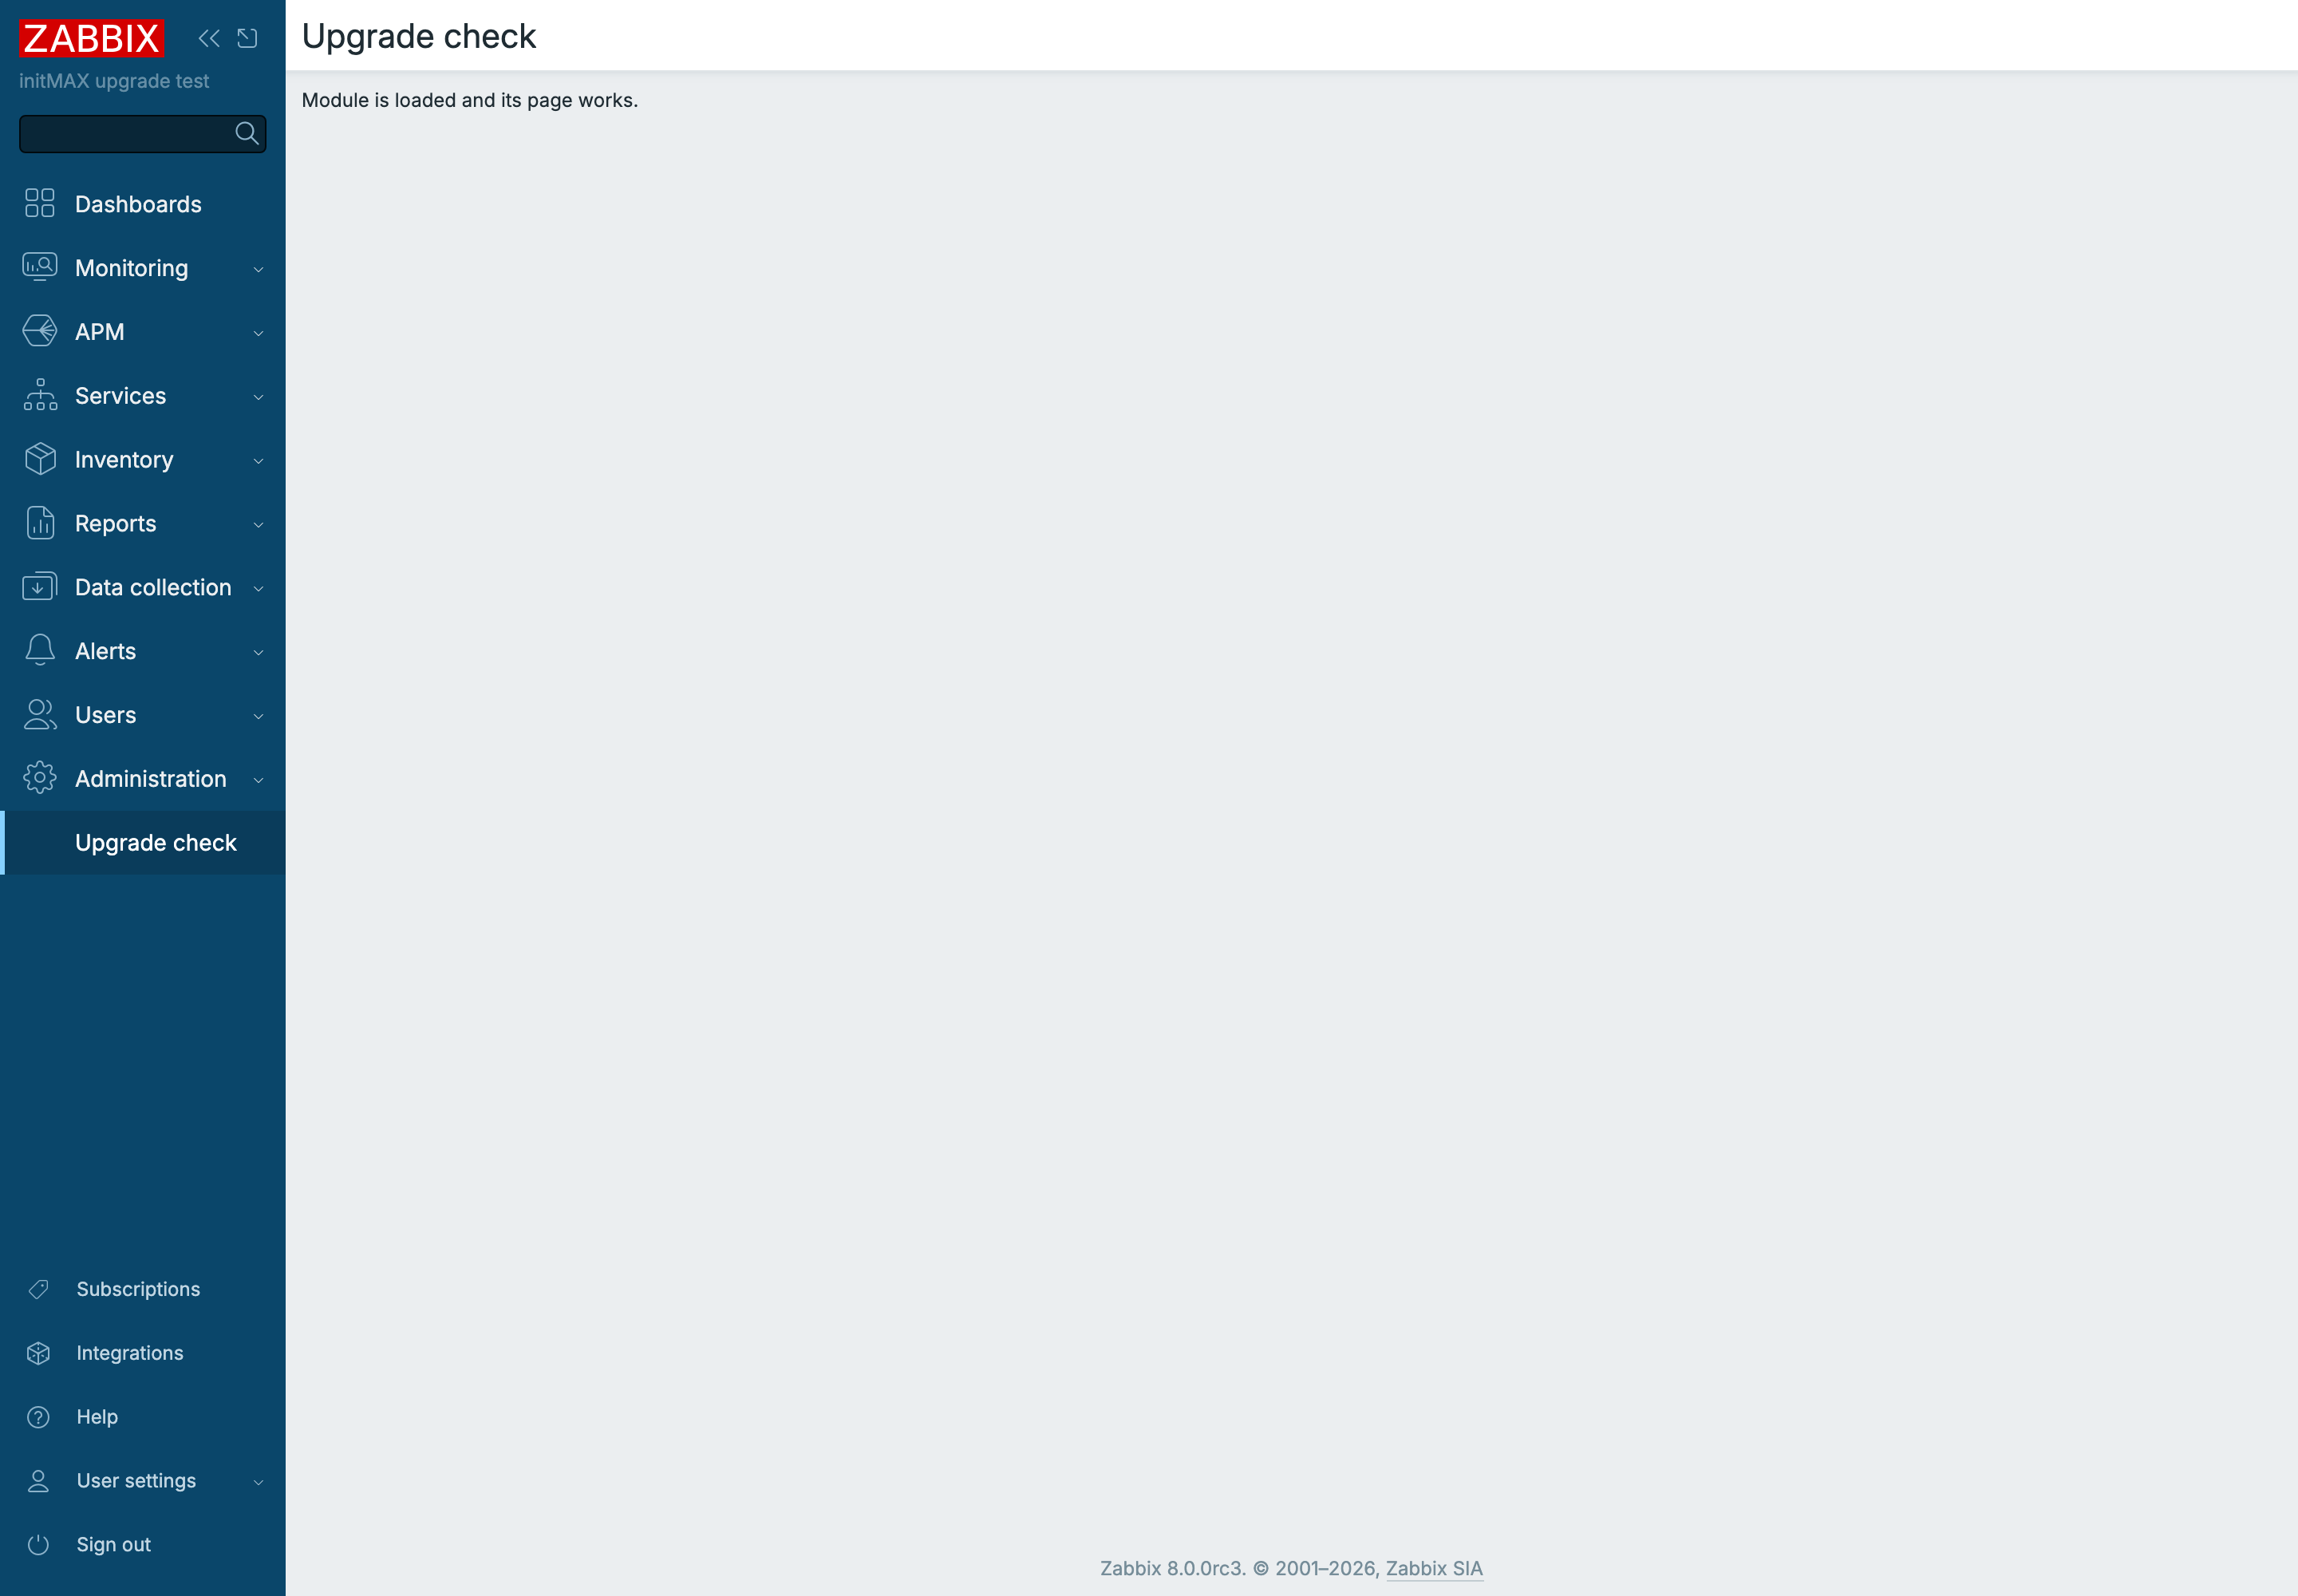
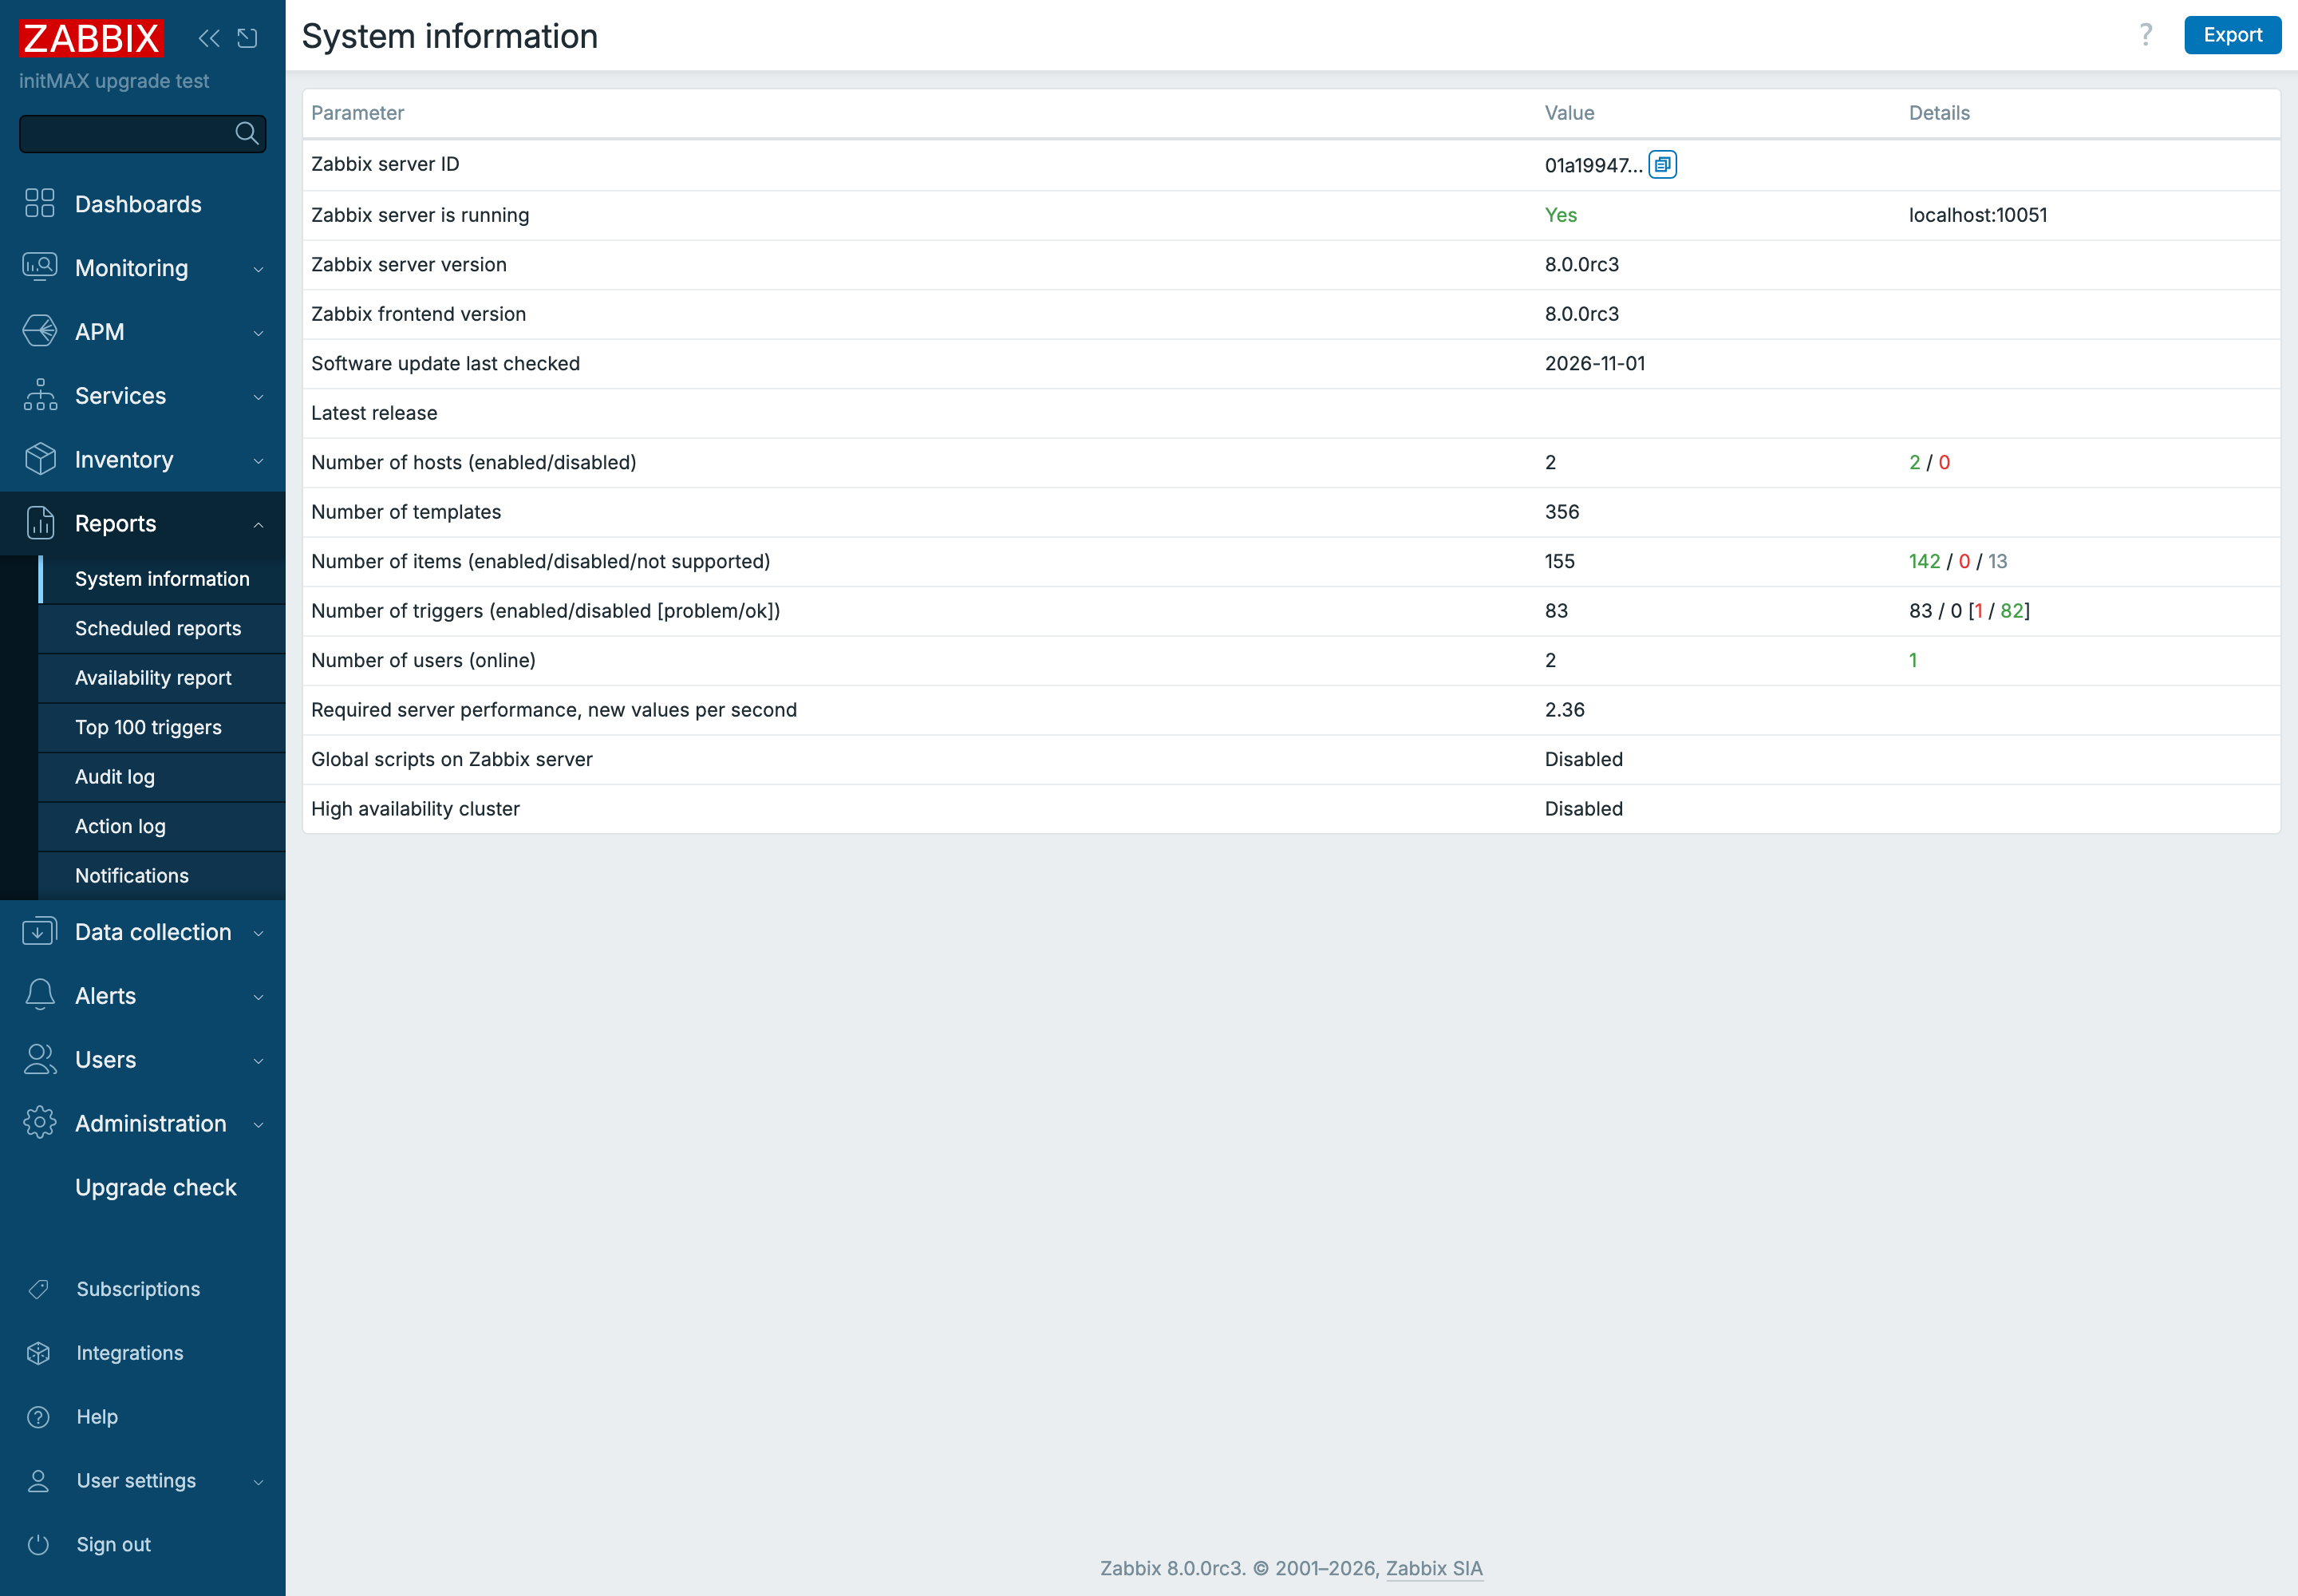
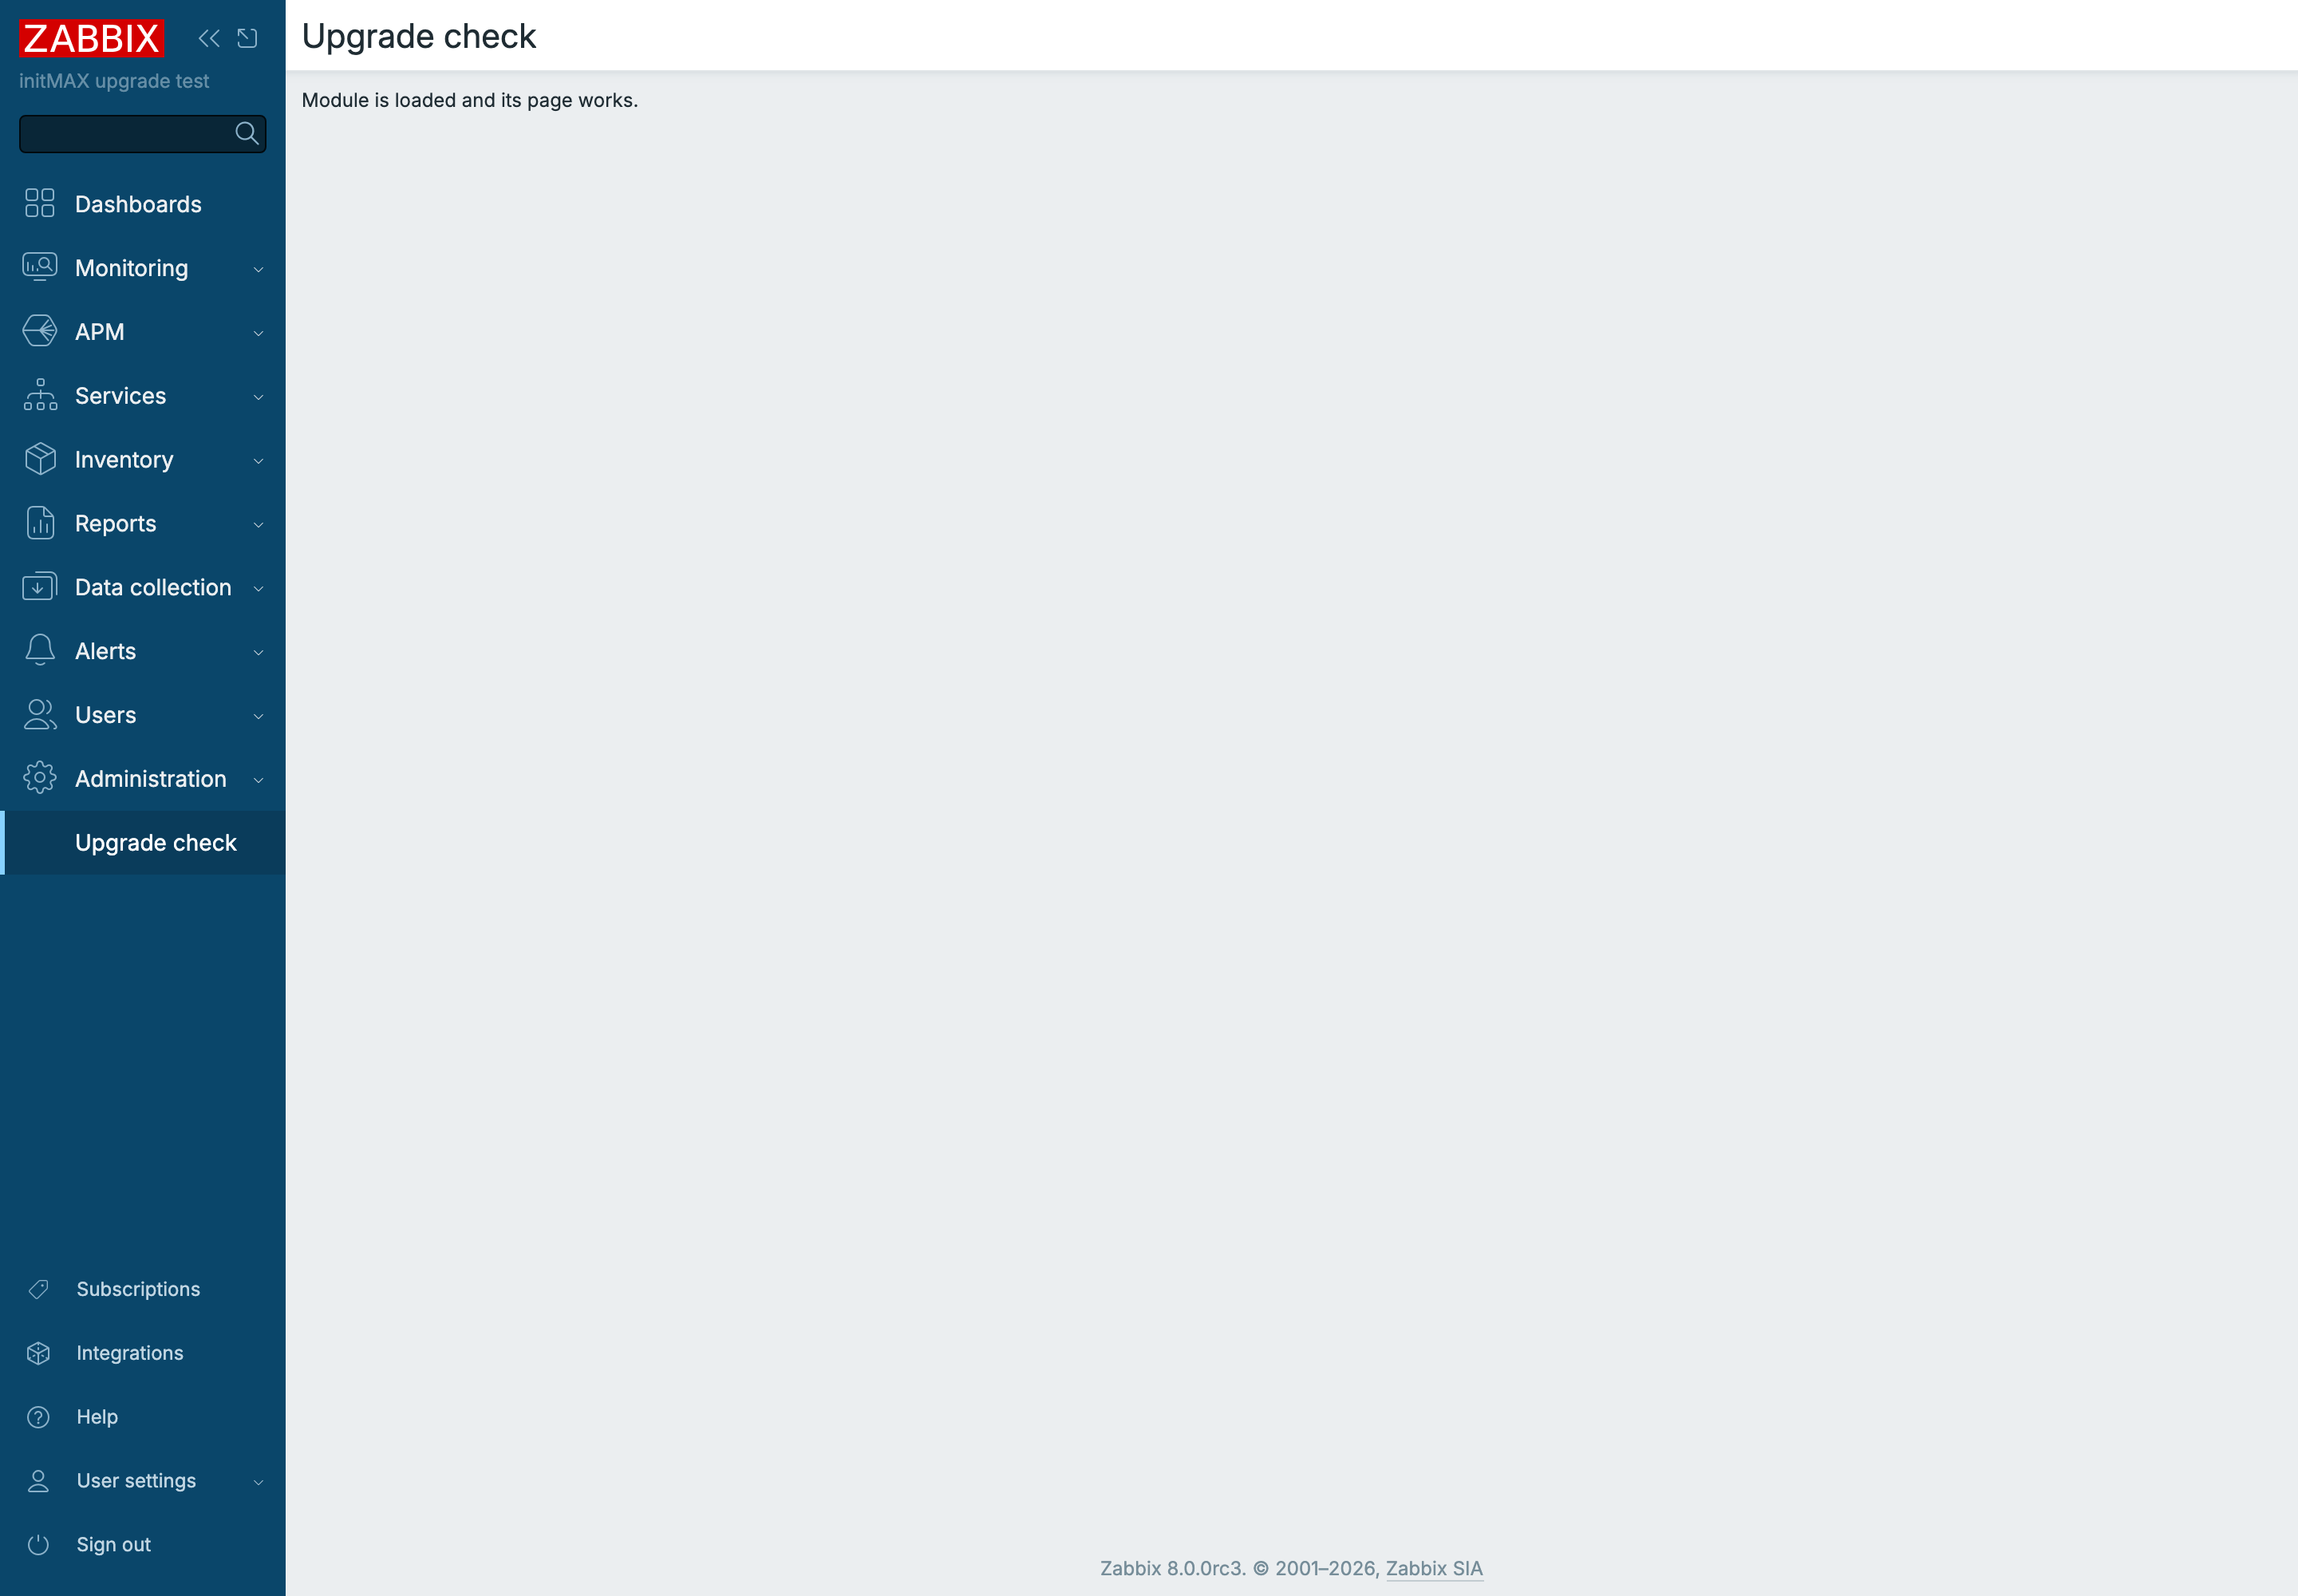
cp -a /usr/share/zabbix/modules/upgrade_check /usr/share/zabbix/ui/modules/Refresh the browser page. The error should disappear; check the status under Administration → General → Modules and open the module page or its widget.
php -v
sudo -u postgres psql -d zabbix -c 'SHOW server_version;'
The PHP-FPM paths and service name below match the default PHP 8.4 supplied by Debian 13. If using another PHP version, adjust them to match your installation.
Zabbix Configuration Backup
Before proceeding to the next steps, back up all configuration files of the Zabbix server and Zabbix Proxy. In the commands, replace <backup directory> with the path to your existing backup directory.
cp -R /etc/zabbix/ /<backup directory>/
cp -R /usr/lib/zabbix/alertscripts/ /<backup directory>/
cp -R /usr/lib/zabbix/externalscripts/ /<backup directory>/
cp -R /usr/share/zabbix/ /<backup directory>/
cp -R /etc/apache2/ /<backup directory>/
cp -R /etc/zabbix/ /<backup directory>/
cp -R /usr/lib/zabbix/alertscripts/ /<backup directory>/
cp -R /usr/lib/zabbix/externalscripts/ /<backup directory>/
cp -R /usr/share/zabbix/ /<backup directory>/
cp -R /etc/nginx/ /<backup directory>/
cp -R /etc/php/8.4/fpm/ /<backup directory>/Stopping Zabbix Services
First, stop the Zabbix server and the web server to ensure that no data is being written to the database.
Database Component Update (Optional)
Upgrade to the recommended PostgreSQL 18 separately using the linked guide. The Zabbix upgrade itself can keep the supported PostgreSQL 16 with TimescaleDB 2.29.2 used in this procedure.
Detailed instructions for updating PostgreSQL can be found in our wiki.
Updating Zabbix
We have successfully backed up all data and checked the requirements of the new Zabbix version for related components.
Now, we will proceed with updating Zabbix itself and all its components.
Debian 13 supplies PHP 8.4, which meets the Zabbix requirements. It does not need to be changed for the Zabbix upgrade.
First, download the installation packages for the repositories of the new Zabbix version and clear the installation cache:
for file in /etc/apt/sources.list.d/zabbix.list /etc/apt/sources.list.d/zabbix.sources /etc/apt/sources.list.d/zabbix-unstable.list /etc/apt/sources.list.d/zabbix-unstable.sources; do
    if [ -f "$file" ]; then mv "$file" "$file.bak"; fi
done
wget -O /tmp/zabbix-release-8.0.deb https://repo.zabbix.com/zabbix/8.0/release/debian/pool/main/z/zabbix-release/zabbix-release_latest_8.0+debian13_all.deb
dpkg --force-confnew -i /tmp/zabbix-release-8.0.deb
apt update
The repositories for the new version are now available, so we can update the Zabbix server packages. Upgrade proxies one at a time after verifying the server:
apt install --only-upgrade zabbix-server-pgsql zabbix-frontend-php zabbix-apache-conf zabbix-sql-scripts zabbix-agent2apt install --only-upgrade zabbix-server-pgsql zabbix-frontend-php zabbix-nginx-conf zabbix-sql-scripts zabbix-agent2If the installer asks whether to replace zabbix_server.conf or apache.conf, choose N to keep your configuration. We update the frontend path below.
If the installer asks whether to replace zabbix_server.conf or nginx.conf, choose N to keep your configuration. We update the frontend path below.
When prompted about modified configuration, preserve your database connection and other settings. Review .rpmnew or .dpkg-dist files and upgrade any other installed components, such as web service, Java gateway or agent plugins.
After successfully completing the update of Zabbix server packages and all its components, we can restart Zabbix to finalize the database structure upgrade.
systemctl start zabbix-serverThe step-by-step activities and the entire update process, including any modifications to the database schema structure, can be monitored in the Zabbix server log file:
tail -f /var/log/zabbix/zabbix_server.logWait for database upgrade fully completed. Do not interrupt the upgrade. Then press Ctrl+C to stop following the log; this does not stop Zabbix.
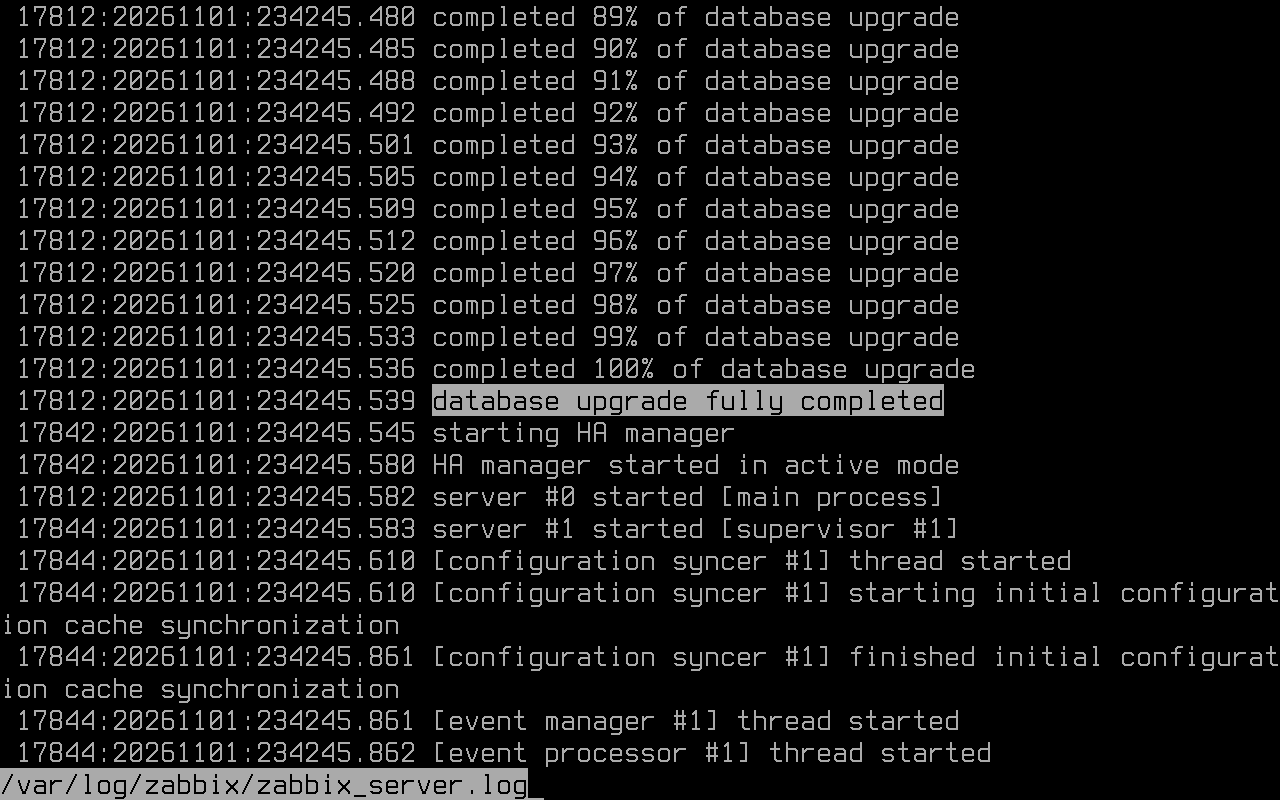
With TimescaleDB, this error may appear after the migration completes: Table "history_json" is not a hypertable. Execute TimescaleDB configuration step as described in Zabbix documentation to upgrade schema. The automatic migration has finished, but the new history_json table still needs to be converted to a hypertable. The next step fixes this.
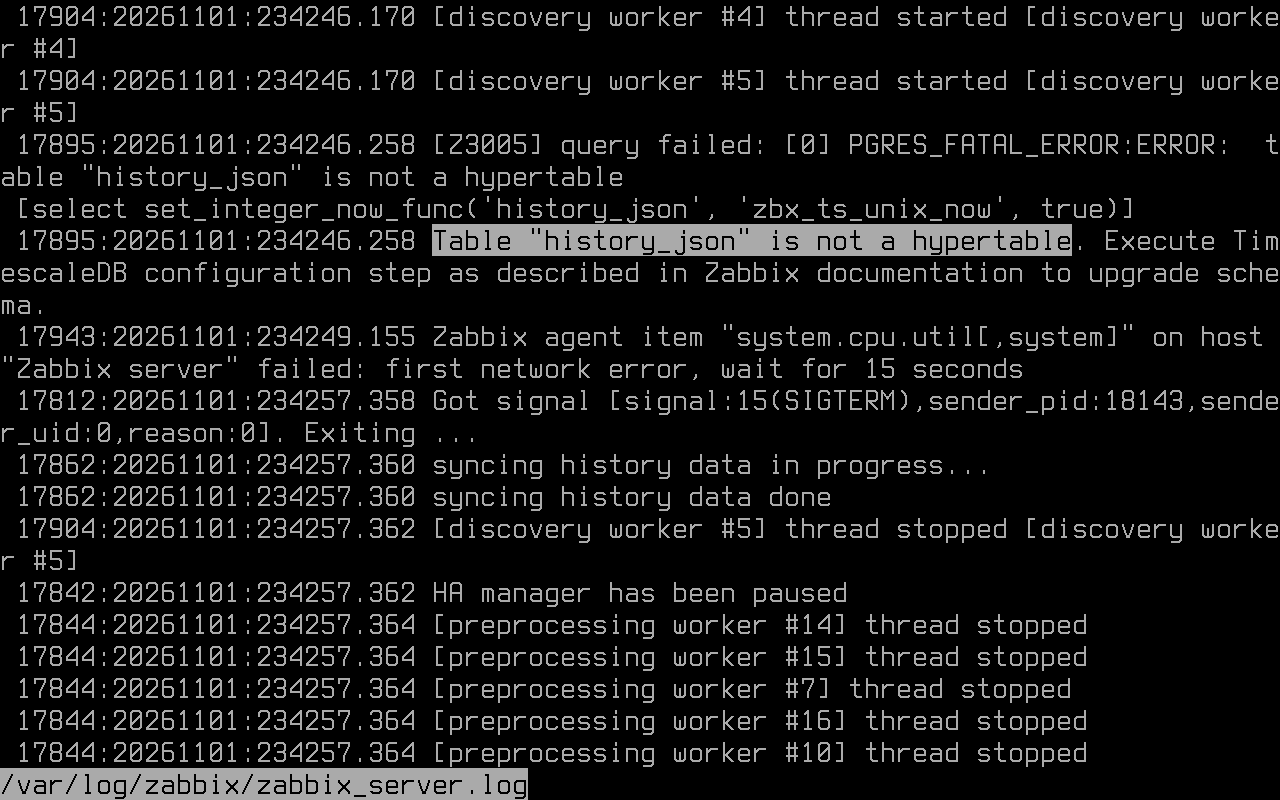
If using TimescaleDB, also run this step. Skip this step for PostgreSQL without TimescaleDB:
systemctl stop zabbix-server
sudo -u zabbix psql -v ON_ERROR_STOP=1 -d zabbix -f /usr/share/zabbix/sql-scripts/postgresql/timescaledb/schema.sql
systemctl start zabbix-server
The script should report TimescaleDB is configured successfully. Messages saying already a hypertable, skipping for existing tables are normal.
Immediately after restarting Zabbix server, check the log. The history_json error should not recur on this new startup. Once startup succeeds, press Ctrl+C to stop following the log and continue with the frontend:
tail -f /var/log/zabbix/zabbix_server.logThe frontend has moved to /usr/share/zabbix/ui. Update the old path in the web server configuration before starting it. Preserve the credentials in /etc/zabbix/web/zabbix.conf.php; do not run a new frontend installation.
If Apache still uses the old path, it can display Manual intervention is required to complete upgrade!:
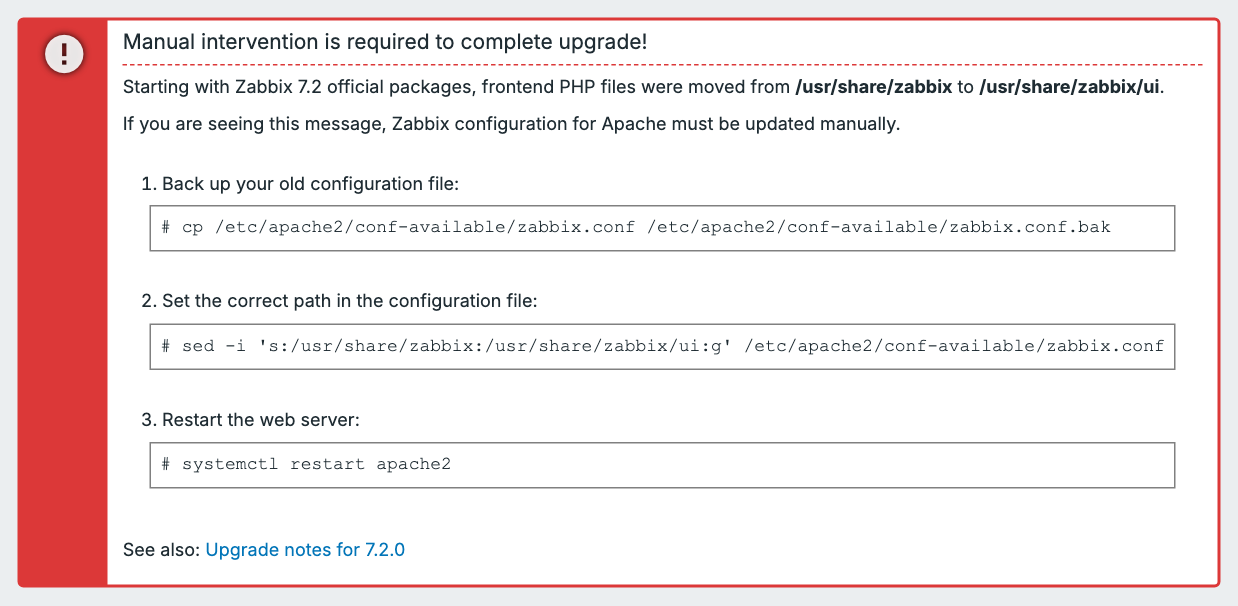
The following command updates the path in the Apache configuration, including custom virtual hosts. Paths already pointing to the new directory are kept:
find -L /etc/apache2 -type f -name '*.conf' -exec sed -i --follow-symlinks -E \
's#/usr/share/zabbix(/ui)?([/"[:space:]]|$)#/usr/share/zabbix/ui\2#g' {} +
Now check the Apache configuration:
apache2ctl configtestThe check must report Syntax OK. If you see AH00558, Apache has no server name configured; add ServerName with the server’s actual DNS name to /etc/apache2/apache2.conf. This notice alone does not block startup. After a successful check, start the services:
systemctl restart apache2 zabbix-agent2
systemctl is-active zabbix-server apache2 zabbix-agent2
All checked services should report active. Then open the frontend at its existing address in your browser.
If Nginx still uses the old path, it can display Manual intervention is required to complete upgrade!:
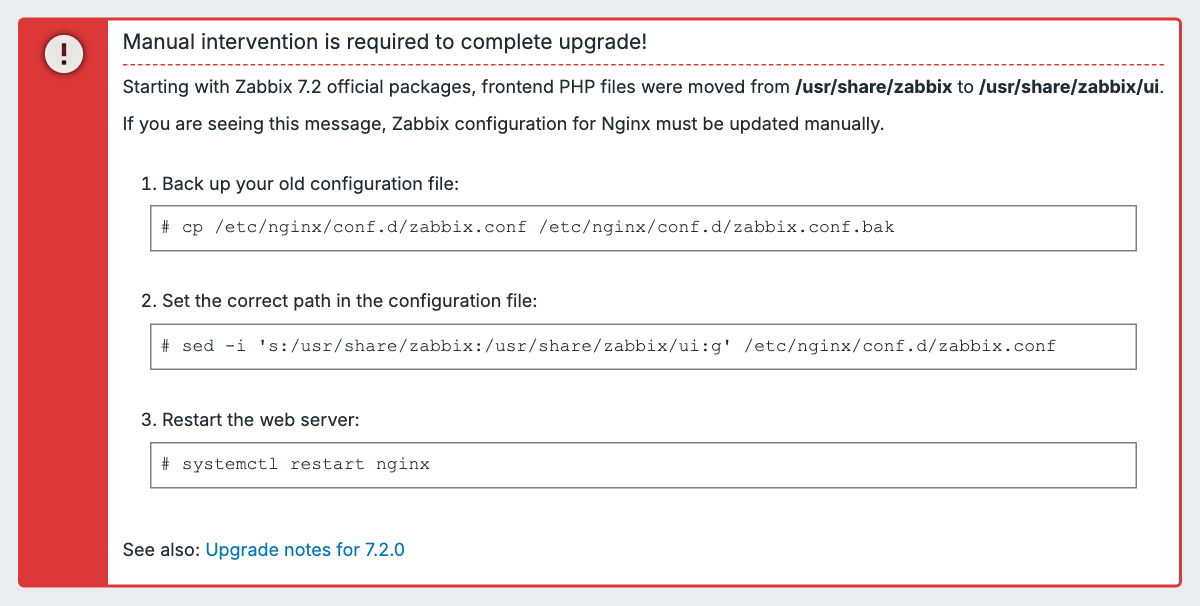
The following command updates the path in the Nginx configuration, including custom virtual hosts. Paths already pointing to the new directory are kept:
find -L /etc/nginx -type f -name '*.conf' -exec sed -i --follow-symlinks -E \
's#/usr/share/zabbix(/ui)?([/"$;[:space:]]|$)#/usr/share/zabbix/ui\2#g' {} +
Now check the Nginx configuration:
nginx -tThe check must report syntax is ok and test is successful. If it reports an error, fix it first. After a successful check, start the services:
systemctl restart php8.4-fpm nginx zabbix-agent2
systemctl is-active zabbix-server php8.4-fpm nginx zabbix-agent2
All checked services should report active. Then open the frontend at its existing address in your browser.
Restarting the agent may briefly produce first network error in the log. Once it starts, connection restored should follow. If errors keep recurring, check the agent connection and its service status shown above.
Update initMAX modules and widgets using RPM/DEB packages from our portal. Packages also deploy them to the new path; do not use the manual copying below for these modules. First check the portal for a release supporting Zabbix 8.0. If our repository is already configured, update the installed packages after upgrading Zabbix:
apt install --only-upgrade 'zabbix-module-*'If you previously copied our modules manually, follow the package installation instructions for the product on the portal.
Other manually installed modules: these must support Zabbix 8.0. If they remain in the old /usr/share/zabbix/modules directory, the frontend can report Cannot load module at: modules/upgrade_check.:
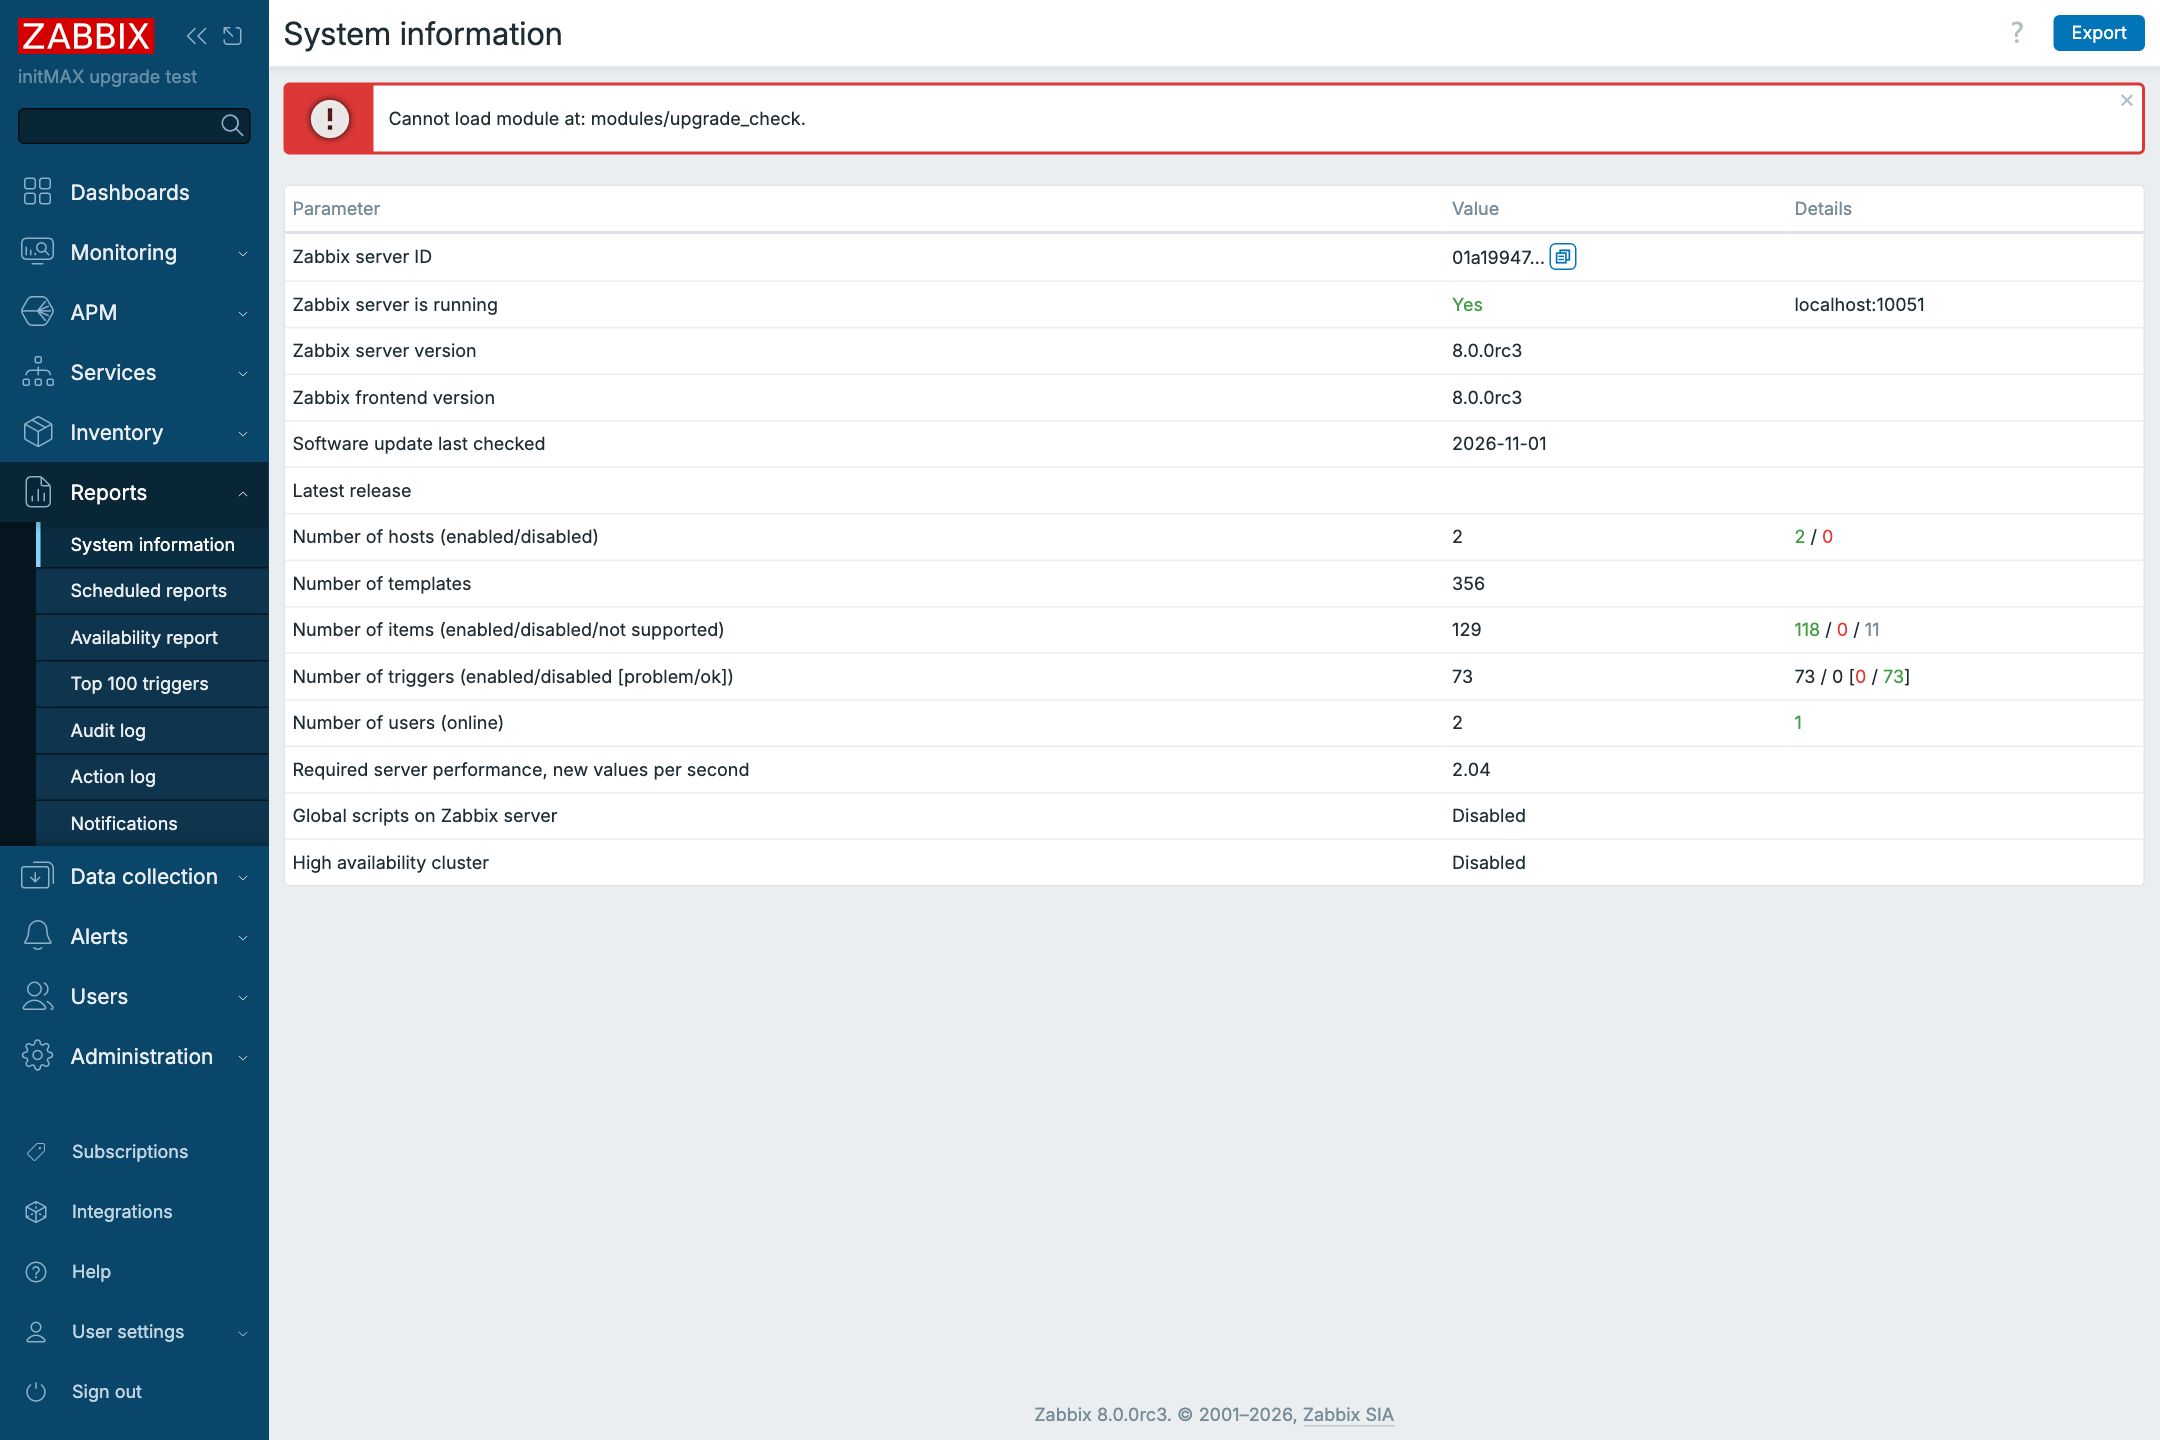
Copy the compatible module to the directory already created by the frontend package. Replace upgrade_check in the command with the module name from the error message. Do not overwrite newer versions already installed there with old files. Repeat the command for any other manually installed modules. Skip this step if you do not use them:
cp -a /usr/share/zabbix/modules/upgrade_check /usr/share/zabbix/ui/modules/Refresh the browser page. The error should disappear; check the status under Administration → General → Modules and open the module page or its widget.
Finishing Tasks
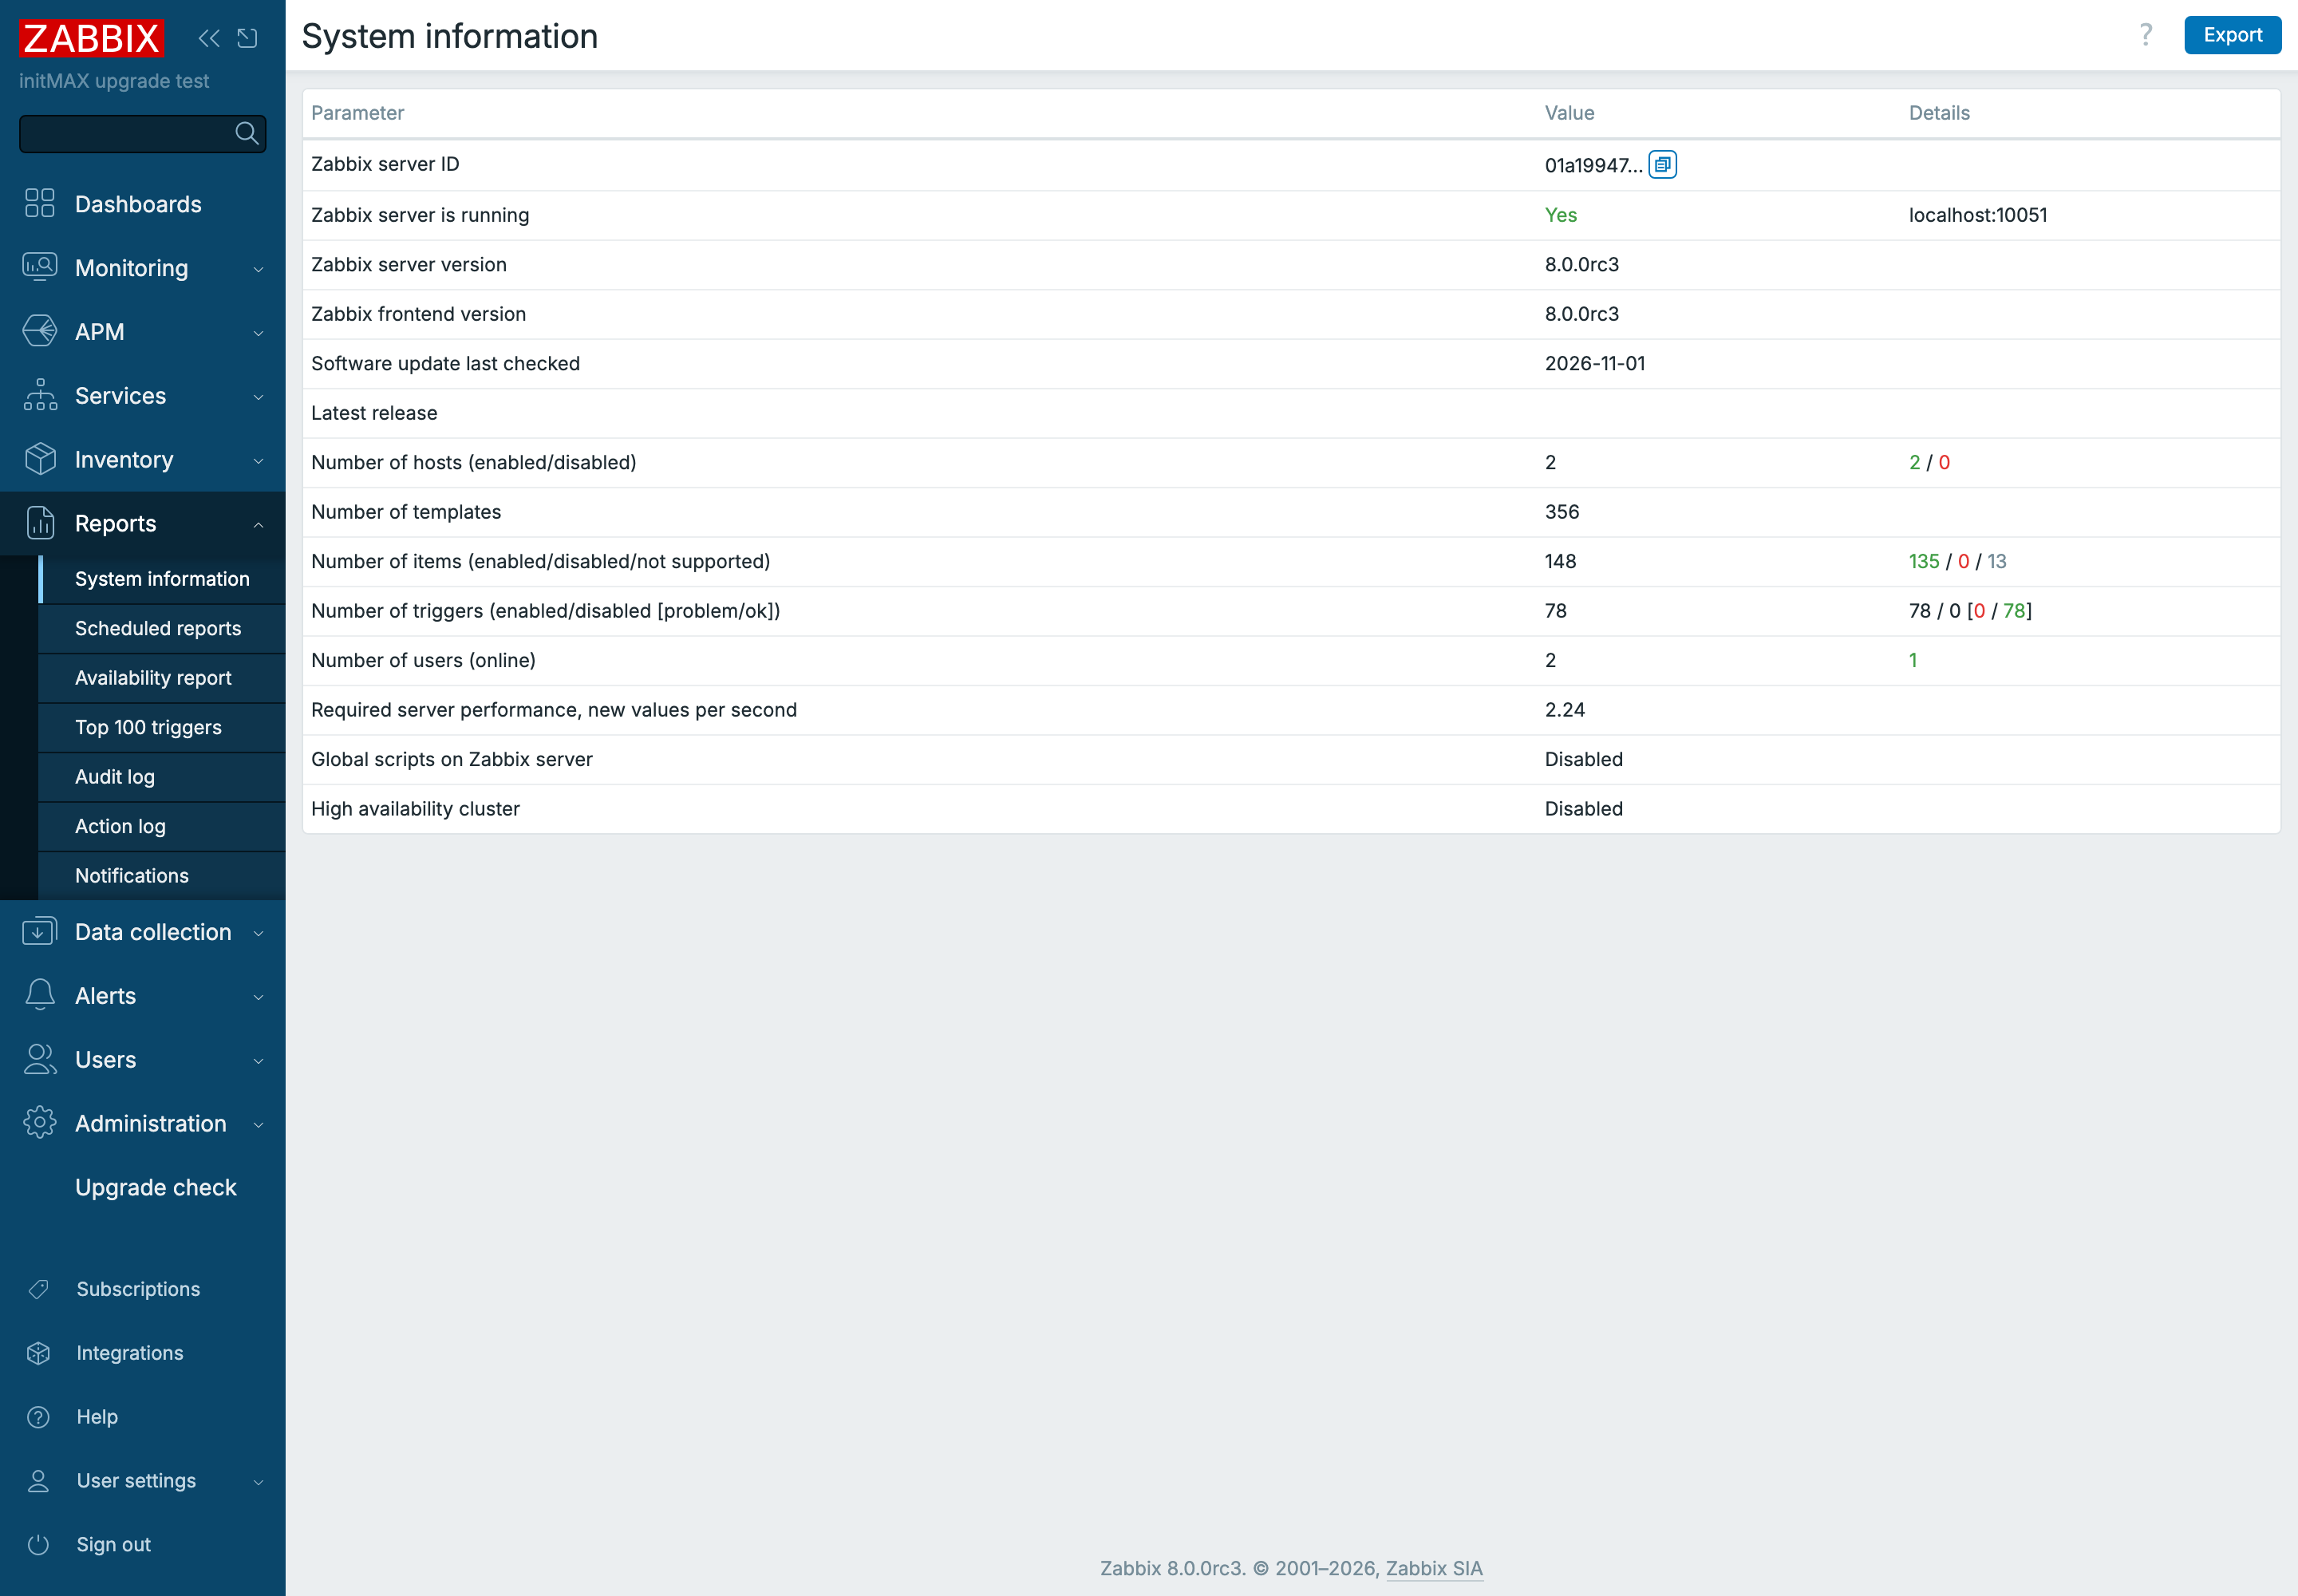
- Verify that the Zabbix server and database server are running correctly and have the correct versions.
- Also, check if the following error appears in the system during the startup of the server or proxy:
...the user limit of 1024 file descriptors is insufficient. The maximum number of concurrent checks per worker has been reduced...Instructions for resolving this issue can be found in our wiki. - Ensure that all Zabbix proxies are running and have the correct versions. Backward compatibility (partial) is provided for version 7.0. However, we strongly recommend using the same version as the Zabbix server. Older versions are not supported.
- Check the status of the Zabbix server and Zabbix proxies (log files, unsupported items, queues, monitoring scripts, etc.).
- Verify that your servers are assigned the latest versions of official Zabbix templates. [Zabbix GIT]
After signing in, also check dashboards, Monitoring → Latest data, older history and new values. If using scheduled reports, verify PDF generation. If problems occur, restore the prepared backup or snapshot.
What’s New in Zabbix 8.0
You can find information about what’s new in Zabbix 8.0 in our article, or you can watch our webinar, which focuses specifically on these updates.
And that’s it! You can now start using your newly updated Zabbix version 8.0 with all its fixes and new features.
Give us a Like, share us, or follow us 😍
So you don’t miss anything: