This time, we will show you how to update Zabbix to the latest version 7.0 LTS. We will base the update on Zabbix version 6.0, PHP version 8.0, and PostgreSQL 13 with its TimescaleDB extension.
Preparation Steps
- Read the “release notes” [Official release notes for Zabbix 7.0 LTS].
- Thoroughly read the “upgrade notes” [Official upgrade notes for Zabbix 7.0 LTS].
- Check and optimize the performance of the current database according to vendor recommendations and the requirements of the Zabbix instance.
- Ensure that the versions of all components match the compatibility matrix of the new Zabbix version.
- Back up the configuration files of the Zabbix server and Zabbix proxy.
- Back up the databases of the Zabbix server, and if applicable, the Zabbix proxy.
- Back up all custom modifications that have been manually made at the Zabbix level.
- You must disable HA on the Zabbix server side.
Version Check
First, we will check the versions of all components that the operation of Zabbix and its parts depend on, to ensure they precisely match the official compatibility matrix for Zabbix 7.0.
php-fpm -v
psql -V
Backup of Zabbix Configuration Files
Before proceeding with the next steps, we will back up all configuration files of the Zabbix server and Zabbix Proxy.
cp -R /etc/zabbix/ /<backup directory>/
cp -R /usr/lib/zabbix/alertscripts/ /<backup directory>/
cp -R /usr/lib/zabbix/externalscripts/ /<backup directory>/
cp -R /usr/share/zabbix/ /<backup directory>/
cp /etc/httpd/conf/httpd.conf /<backup directory>/
cp /etc/httpd/conf.d/zabbix.conf /<backup directory>/
Stopping Services
First, we will stop the Zabbix server and web server to prevent any further writing to the database.
systemctl stop zabbix-server
systemctl stop httpd
PHP Update
The new version Zabbix 7.0 requires PHP versions ranging from 8.0.0 to 8.3.x. Currently, we have version 8.0 on the server, but we will perform an update nonetheless.
We will carry out the update by changing the package management system settings using dnf at the OS level. We have had good experiences with the penultimate version, as using the latest version may introduce a bug directly in PHP, which could cause usage issues.
dnf module switch-to php:8.2 -yDatabase Update
First, we will stop the currently running PostgreSQL service:
systemctl stop postgresql-13Next, we will install the specifically supported version, in our case PostgreSQL version 16:
dnf install -y postgresql16-serverNext, we will install the TimescaleDB extension, but we must install it in the same version as your old database! If it is not in the same version, the upgrade command will not work. Using the following command, you can compare the currently installed version for PostgreSQL 13 and install the same version of the packages for PostgreSQL 16:
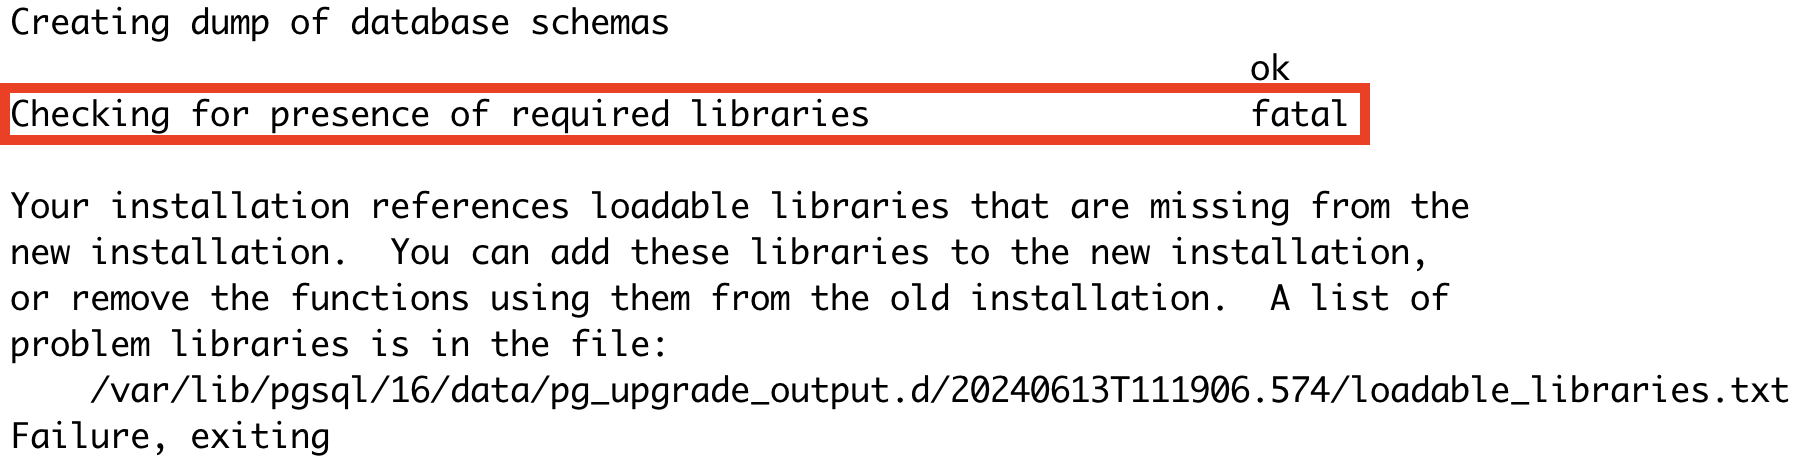
VERSION=$(rpm -qa | grep timescaledb-2-postgresql-13 | head -1 | sed -n 's/.*-\([0-9]\+\.[0-9]\+\.[0-9]\+\)-.*/\1/p') && dnf install -y timescaledb-2-loader-postgresql-16-$VERSION-0.el9.x86_64 timescaledb-2-postgresql-16-$VERSION-0.el9.x86_64Note: If the version of the TimescaleDB extension is not the same, you will see the following error during the upgrade:
Now we can proceed with the initialization of the new version of the PostgreSQL database:
/usr/pgsql-16/bin/postgresql-16-setup initdbAfter successfully installing all dependencies, we will run the provided update script, which will check for compatibility and, if necessary, fix internal tables and schemas according to changes between versions (as the postgres user):
su - postgresWe will transfer the configuration of permissions (pg_hba.conf) from the old version to the new one:
cat /var/lib/pgsql/13/data/pg_hba.conf > /var/lib/pgsql/16/data/pg_hba.confOptionally, we will also transfer the configuration of the database server itself (ensure the compatibility of individual configuration directives between versions beforehand):
cat /var/lib/pgsql/13/data/postgresql.conf > /var/lib/pgsql/16/data/postgresql.confWe will start the database migration.
/usr/pgsql-16/bin/pg_upgrade -b /usr/pgsql-13/bin -B /usr/pgsql-16/bin -d /var/lib/pgsql/13/data -D /var/lib/pgsql/16/data -kWe will log out from the postgres user:
logoutNow, we can disable the automatic startup of the old service:
systemctl disable postgresql-13.serviceAnd start the new version of the PostgreSQL database server, including enabling it to start automatically at system boot:
systemctl enable postgresql-16.service --nowAfter successfully starting the PostgreSQL server, the first step is to check and, if necessary, update our TimescaleDB within the Zabbix database:
su - postgres
psql -X\c zabbixIn the next step, we will update the state within the PostgreSQL database itself:
ALTER EXTENSION timescaledb UPDATE;After the successful update, we will safely exit the psql console:
exitAfter the successful update, we recommend performing VACUUM and reindexing the databases. This can be done with the following commands:
/usr/pgsql-16/bin/vacuumdb --all --analyze-in-stages
reindexdb
The next step is to delete the old PostgreSQL cluster:
./delete_old_cluster.sh
rm -rf 13 delete_old_cluster.sh
Now we can remove the old package versions. We will log out from the postgres user and remove the unnecessary packages. The TimescaleDB packages have been replaced, so they are no longer present on the system and do not need to be removed:
logoutdnf remove postgresql13-*In the final step, we can delete the folder containing the configuration files of the old version:
rm -rf /usr/pgsql-13/Updating Zabbix
We have successfully backed up everything and updated all dependent component versions according to the official compatibility matrix for the new version of Zabbix.
Now we will proceed with updating Zabbix itself and all its components.
First, we will download the installation packages for the repositories of the new Zabbix version and clear the installation cache:
rpm -Uvh https://repo.zabbix.com/zabbix/7.0/rocky/9/x86_64/zabbix-release-latest.el9.noarch.rpm
dnf clean all
After this step, we have the repositories for the new version available, and we can update all other Zabbix components, including all Zabbix Proxies, sequentially:
dnf update zabbix-* -yAfter successfully completing the update of the Zabbix server packages and all its components, we can restart Zabbix to complete the database structure upgrade, which is essential for the next steps, as the upgrade includes the creation of the history_bin table. The existence of this table is necessary for the subsequent steps involving TimescaleDB functionality updates.
systemctl start zabbix-server.serviceAfter the successful update, it is necessary to stop Zabbix again to proceed with the next steps involving the TimescaleDB update.
Note: If a database compatibility error appears after restarting the Zabbix server, simply adjust the following directive in the Zabbix server configuration file.
In this version of Zabbix, this is not a compatibility error but rather a missing TimescaleDB version number in the Zabbix source code itself!

Always refer to the compatibility matrix in the official Zabbix documentation for your specific version to find the appropriate database and extension versions.
Open the Zabbix server configuration file:
nano /etc/zabbix/zabbix_server.confHere, we will adjust the following parameter:
AllowUnsupportedDBVersions=1And finally, we restart the Zabbix server service:
systemctl restart zabbix-server.serviceThe step-by-step activities and the entire update process, including any modifications to the database schema, can be monitored in the Zabbix server log file:
tail -f /var/log/zabbix/zabbix_server.log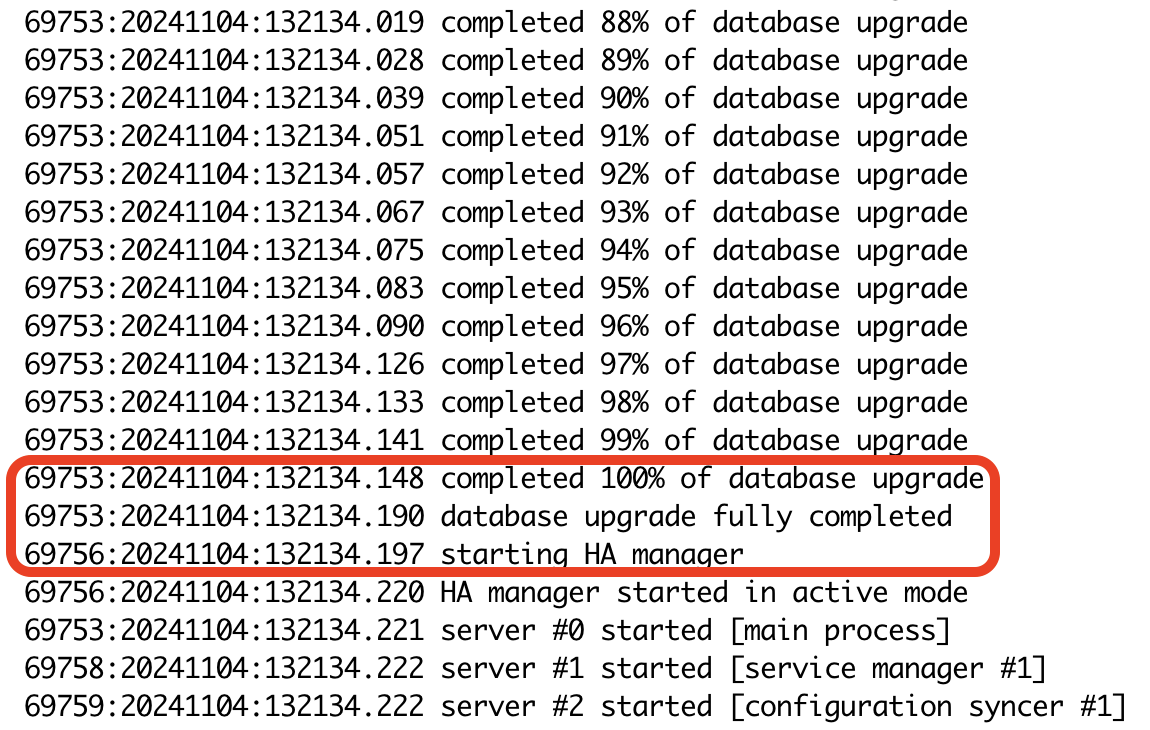
Once we see that the upgrade has completed and Zabbix has started running, we stop it and proceed to the next step.
You can ignore the error related to the history_bin and auditlog tables, as it will be resolved in the following step. This is also why we need to stop Zabbix immediately after the structure upgrade.
 69771:20241104:132134.582 [Z3005] query failed: [0] PGRES_FATAL_ERROR:ERROR:  table "history_bin" is not a hypertable
 [select set_integer_now_func('history_bin', 'zbx_ts_unix_now', true)]
 69771:20241104:132134.582 Table "history_bin" is not a hypertable. Execute TimescaleDB configuration step as described in Zabbix documentation to upgrade schema.
 69802:20241104:132134.585 server #29 started [unreachable poller #1]
 69771:20241104:132134.589 [Z3005] query failed: [0] PGRES_FATAL_ERROR:ERROR:  unrecognized parameter namespace "timescaledb"
 [alter table auditlog set (timescaledb.compress,timescaledb.compress_segmentby='auditid',timescaledb.compress_orderby='clock')]
 69771:20241104:132134.590 [Z3005] query failed: [0] PGRES_FATAL_ERROR:ERROR:  "auditlog" is not a hypertable or a continuous aggregate
 [select add_compression_policy('auditlog', compress_created_before => interval '612000')]
 69771:20241104:132134.590 failed to add compression policy to table 'auditlog'
systemctl stop zabbix-server.serviceSince our Zabbix database uses the TimescaleDB extension, we must run the SQL script for initializing hypertables again. A new feature in version 7.0 is the hypertabled auditlog and history_bin tables.
Note that this step can only be performed after the automatic update of the Zabbix database following the first startup of the Zabbix server.
- OPTIONALLY: The
auditlogtable may contain a large amount of data, which can slow down the update process. Consider clearing it using the command `TRUNCATE TABLE auditlog;`, which can significantly speed up the migration process to TimescaleDB tables. This command should be executed on the Zabbix database.
cat /usr/share/zabbix-sql-scripts/postgresql/timescaledb/schema.sql | sudo -u zabbix psql zabbixAfter successfully completing the update of the Zabbix server packages and all its components, we can restart the service:
systemctl start zabbix-server.service
systemctl start httpd
I will verify the server startup by checking the Zabbix server log:
tail -f /var/log/zabbix/zabbix_server.logPerformance Tuning After PostgreSQL Upgrade
After successfully starting the Zabbix server, we can take an additional optional step by running the timescaledb-tune script again to fine-tune the database after the upgrade.
For this command, we will specify the path to the PostgreSQL configuration file and increase the limit on the maximum number of incoming connections to the database, which is implicitly too low for monitoring needs:
timescaledb-tune --pg-config=/usr/pgsql-16/bin/pg_config --max-conns=100To apply the newly set configuration parameters, we will restart the PostgreSQL service (ideally, stop the Zabbix server during this process, but it is not necessary):
systemctl restart postgresql-16.serviceFinal Steps
- Verify that the Zabbix server and database server are running correctly and have the correct version.
- Also, check if the following error appears during the server or proxy startup: ‘…the user limit of 1024 file descriptors is insufficient. The maximum number of concurrent checks per worker has been reduced…’. You can find the instructions for resolving this issue on our wiki.
- Check that all Zabbix proxies are running and have the correct version. (From version 6.0, there is backward compatibility, but we still recommend using the same version as the Zabbix server).
- Check the status of the Zabbix server and Zabbix proxies (log files, unsupported items, queues, monitoring scripts, etc.).
- Ensure that your servers are assigned the latest versions of the official Zabbix templates. [Zabbix GIT]
Support for the New Item Browser
All necessary steps can be found in a separate guide on our wiki HERE.
Installation of Components and Configuration for Reporting
All necessary steps can be found in a separate guide on our wiki HERE.
And that’s it! You can now start using your newly updated Zabbix version 7.0 LTS with all its fixes and new features.
Give us a Like, share us, or follow us 😍
So you don’t miss anything: