This time we will show you how to install and configure Zabbix 6.4 with PostgreSQL 15 database and its TimescaleDB plugin on Debian 11 Linux distribution.
Front-end will be running on nginx using php-fpm version 7.4, and all that in five minutes!

Before we start
First let’s start with installation of GNU PG using the following command.
apt install gnupg2PostgreSQL installation
To install the database server, first create a APT repository configuration file for the official PostgreSQL repositories:
sh -c 'echo "deb http://apt.postgresql.org/pub/repos/apt $(lsb_release -cs)-pgdg main" > /etc/apt/sources.list.d/pgdg.list'Then download the verification key and update the cache of all existing repositories:
wget --quiet -O - https://www.postgresql.org/media/keys/ACCC4CF8.asc | sudo apt-key add -
apt update
Install the PostgreSQL database server packages next, in this case version 15:
apt-get -y install postgresql-15TimescaleDB installation
Start by installing all the packages needed for the subsequent installation:
apt install gnupg postgresql-common apt-transport-https lsb-release wgetAnd with the following command, create the configuration file of the official TimescaleDB repositories.
echo "deb https://packagecloud.io/timescale/timescaledb/debian/ $(lsb_release -c -s) main" | sudo tee /etc/apt/sources.list.d/timescaledb.listDownload a valid authentication key for this repository and update the APT cache:
wget --quiet -O - https://packagecloud.io/timescale/timescaledb/gpgkey | sudo apt-key add -
apt update
We can proceed now to the actual installation of TimescaleDB for PostgreSQL 15.
apt install timescaledb-2-postgresql-15After the successful installation of all dependent packages, we will run the optimization program timescaledb-tune, which will help us set the PostgreSQL parameters for TimescaleDB in relation to the currently used hardware.
timescaledb-tune --quiet --yesThe above-mentioned PostgreSQL optimization command for TimescaleDB limits the number of incoming database connections to 25 by default, unfortunately.
However, this is completely unsuitable for the needs of Zabbix, so (for the purposes of this example) we will adjust this value to 125 .
This can also be modified by specifying the --max-conns parameter with the wanted value, for example --max-conns=125.
Number of database connections must always be set corresponding to your infrastructure, as well as your requirements for monitoring provided by Zabbix.
nano /etc/postgresql/15/main/postgresql.conf

max_connections = 125
After this, restart the PostgreSQL service to apply these changes:
systemctl restart postgresqlInstallation of Zabbix server and all of its components
We have the database installed, so let’s move on to installing the Zabbix server and its components.
Download the installation package containing Zabbix repositories, manually install it and update the APT cache:
wget https://repo.zabbix.com/zabbix/6.4/debian/pool/main/z/zabbix-release/zabbix-release_6.4-1+debian11_all.deb
dpkg -i zabbix-release_6.4-1+debian11_all.deb
apt update
Now we can proceed with installation of the Zabbix server itself including dependencies:
apt install zabbix-server-pgsql zabbix-frontend-php php7.4-pgsql zabbix-nginx-conf zabbix-sql-scripts zabbix-agent2Database initialization
In this step, we will create a user for Zabbix at the database server level.
You will be prompted to enter a password.
cd /tmp
sudo -u postgres createuser --pwprompt zabbix
Then create the database itself for Zabbix. You will be prompted to enter the password created in the previous step.
sudo -u postgres createdb -O zabbix zabbixImport the schema and default data into this newly created database. This SQL script is supplied by Zabbix itself in the zabbix-sql-scripts package for each specific database.
Attention! In older versions of Zabbix, this path is different, that is /usr/share/doc/zabbix-sql-scripts/ !
zcat /usr/share/zabbix-sql-scripts/postgresql/server.sql.gz | sudo -u zabbix psql zabbixAll that remains is to activate TimescaleDB and upload the supplied script, which will create a database schema for us.
Attention! In older versions of Zabbix, this path is different, that is /usr/share/doc/zabbix-sql-scripts/ !
echo "CREATE EXTENSION IF NOT EXISTS timescaledb CASCADE;" | sudo -u postgres psql zabbix
cat /usr/share/zabbix-sql-scripts/postgresql/timescaledb.sql | sudo -u zabbix psql zabbix
Zabbix server configuration
For working Zabbix front-end functionality, you need to set the password to the database that we created in the previous steps in its configuration file.
Open the Zabbix server configuration file in the path:
nano /etc/zabbix/zabbix_server.confAnd modify the following directive:
DBPassword=<heslo do databáze>nginx configuration
For the purposes of this example, we will use the nginx proxy server together with php-fpm as an application server for running the Zabbix front-end itself.
For this scenario, the Zabbix installation also includes a preset configuration file for nginx. It resides in the following path:
nano /etc/zabbix/nginx.confIn this file, we will set the hostname of the server, as well as the TCP port on which nginx will listen for incoming connections.
For example, set this up as follows:
listen 80;
server_name initmax.cz;
Save the file, close it and then delete the default nginx configuration file so that there is no conflict between these.
rm /etc/nginx/sites-enabled/defaultNow all you have to do is restart both the Zabbix server and the Zabbix agent, as well as nginx and php-fpm, which is used to run the Zabbix front-end.
systemctl restart zabbix-server zabbix-agent2 nginx php7.4-fpmNot forget to setup the automatic launch of these services after startup:
systemctl enable zabbix-server zabbix-agent2 nginx php7.4-fpmConfiguration of Zabbix front-end
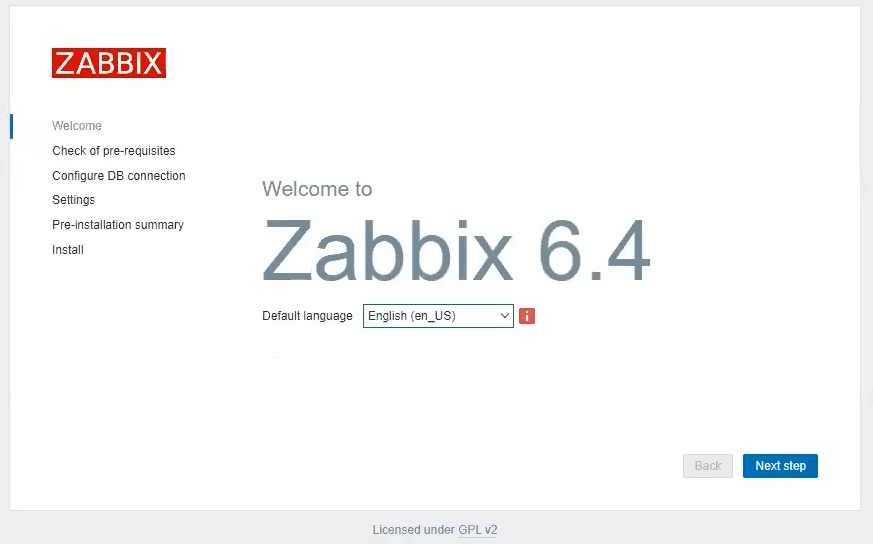
In the browser window, open the URL on which Zabbix is running and you will see the installation wizard. For example http://172.23.0.175/.
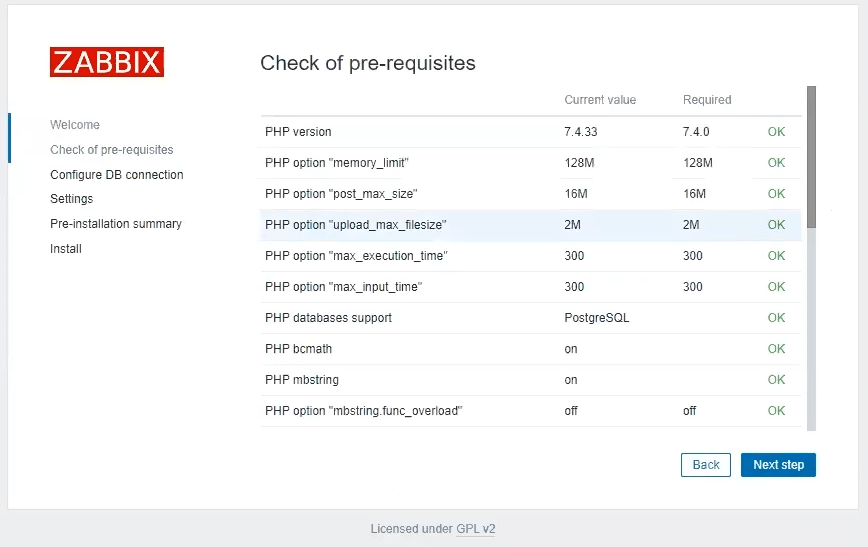
By clicking on the Next step button, move to the minimum requirements check page.
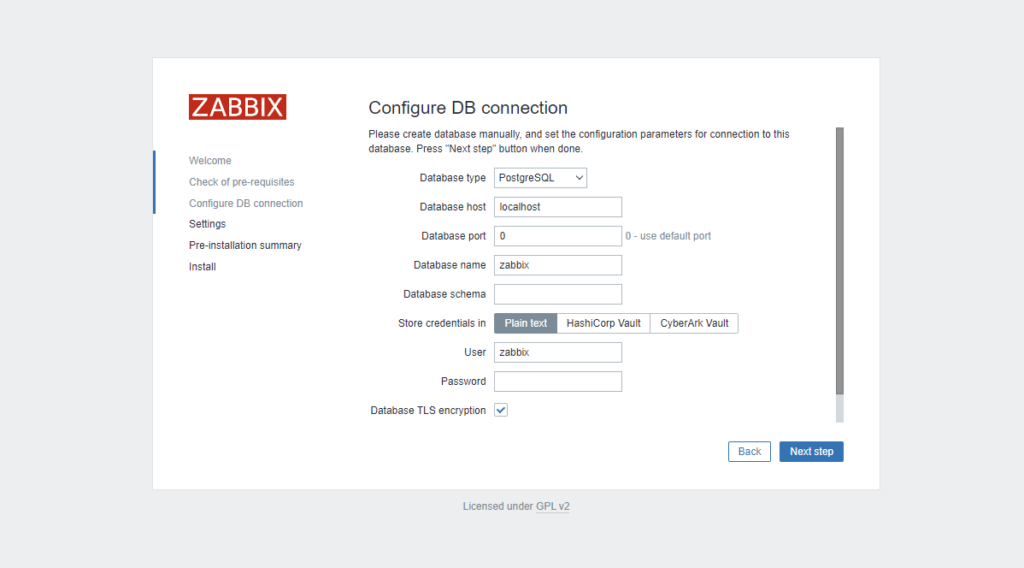
Everything is fine, so click on Next step button and move to the next page with the database connection settings.
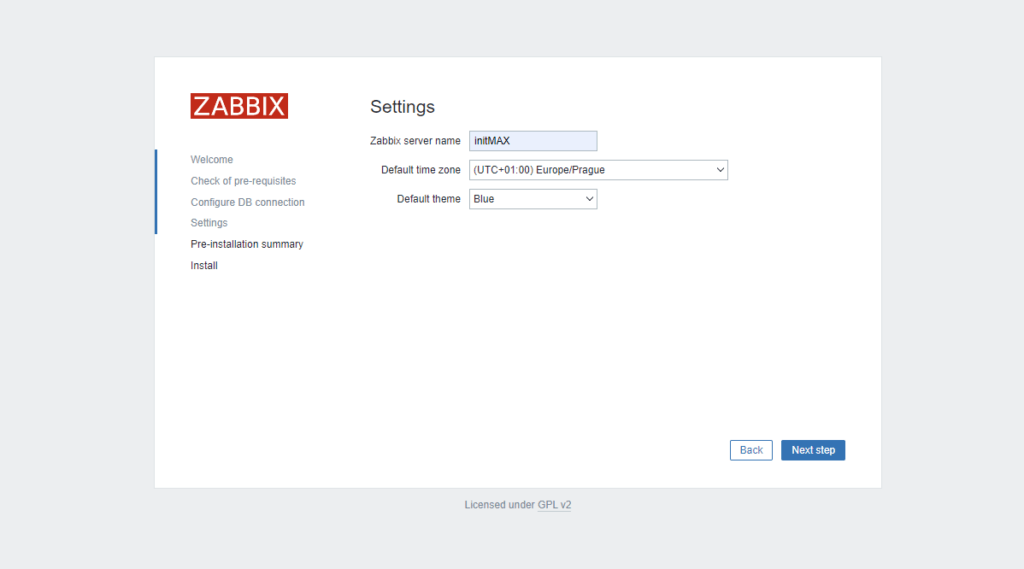
On this page, fill in the Password field. Nothing else needs to be changed, so click on Next step.
Here fill in the basic settings, i.e. server name and time zone, and click on Next step to continue to the configuration summary.
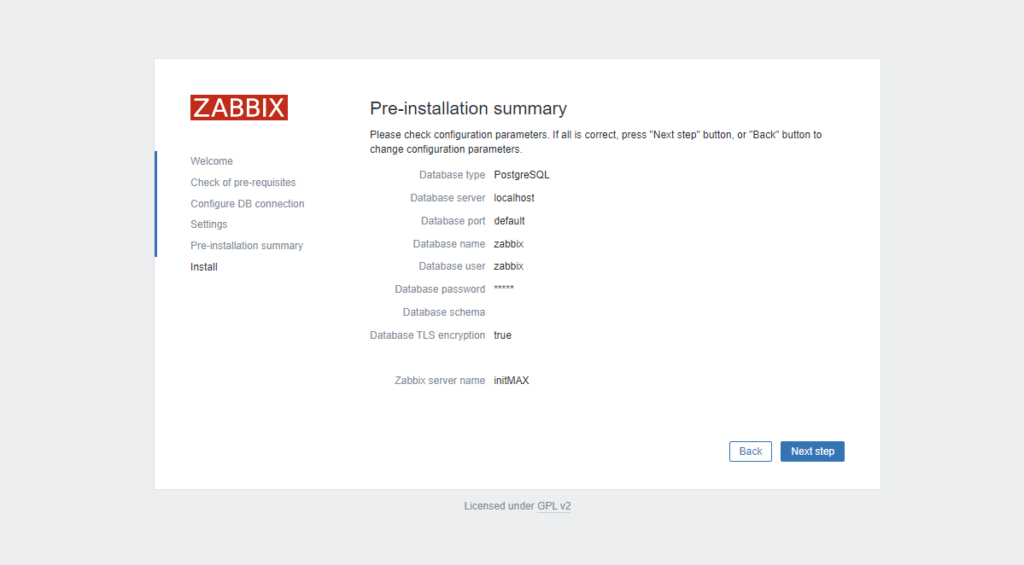
Check the entered values and click on Next step to complete the installation.
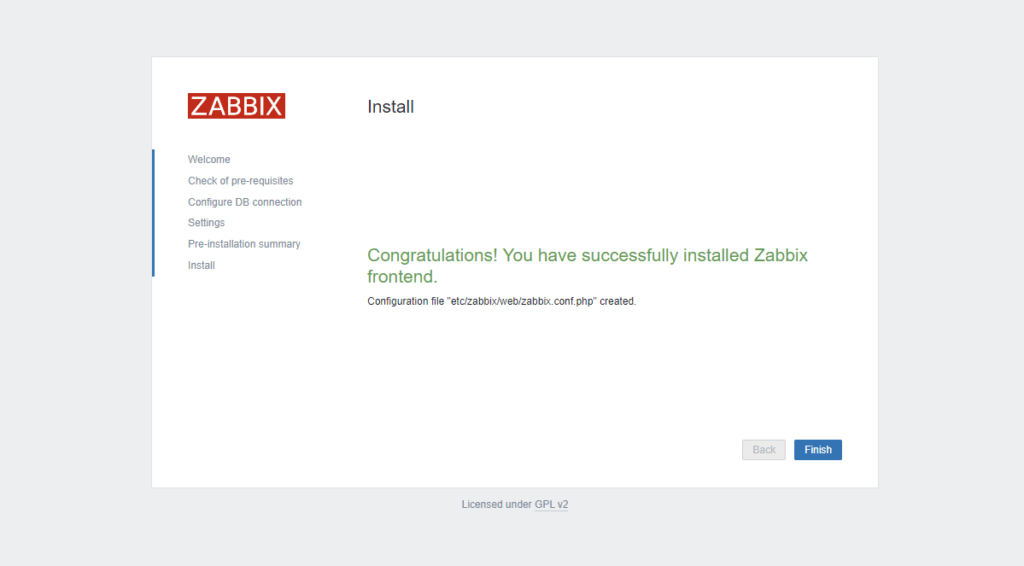
Next, click on Finish to go to the login screen.
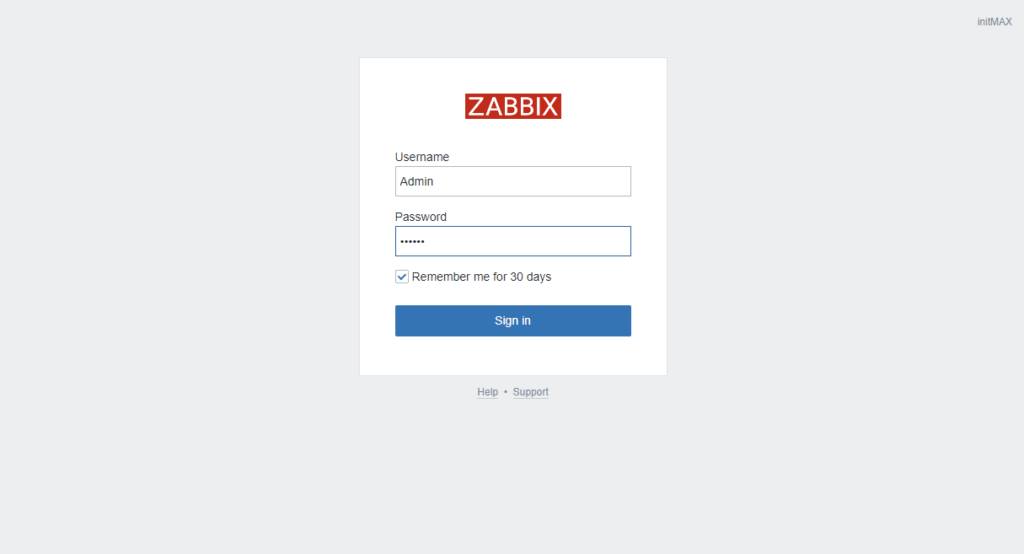
You can now log in and start using Zabbix 6.4.
The default login credentials are: Admin/zabbix
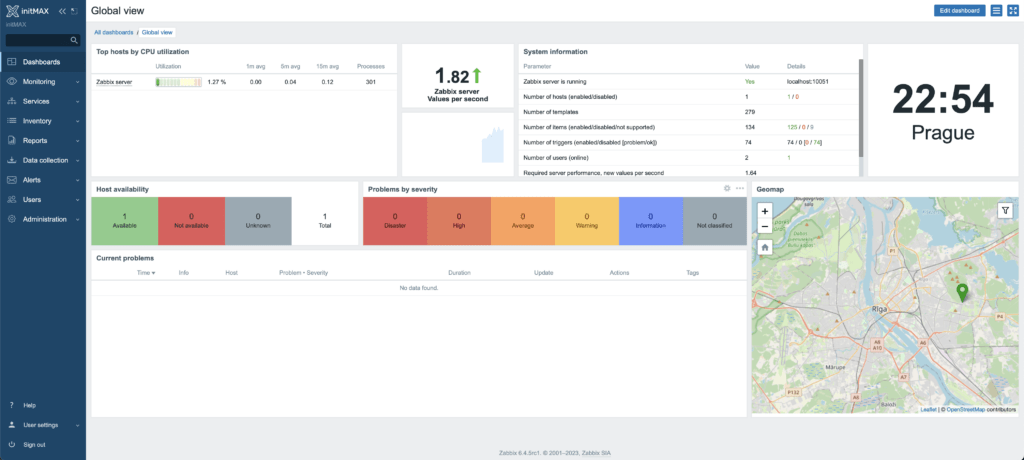
After logging in, the new Zabbix 6.4 is waiting for you.
Give us a Like, share us, or follow us 😍
So you don’t miss anything: