How to Change the Logo in Zabbix to Your Own and Customize the Entire System?
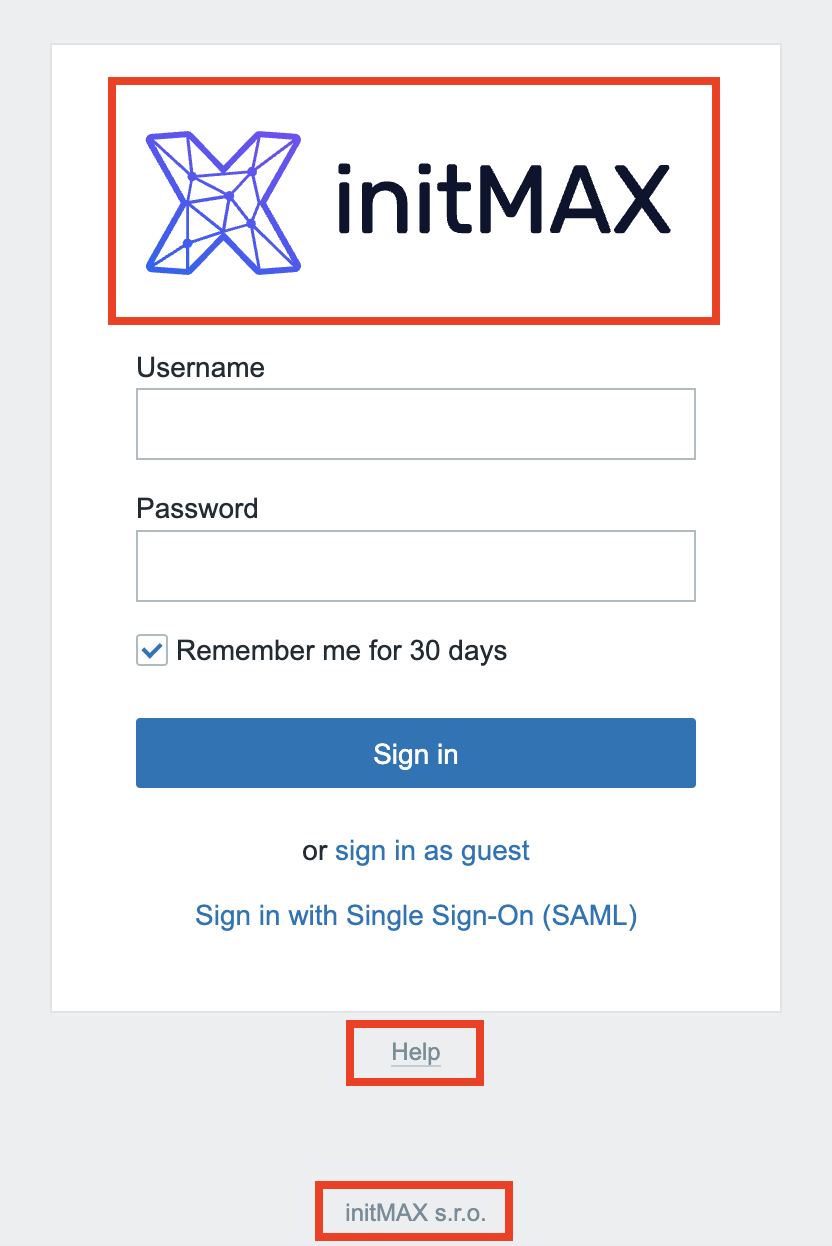
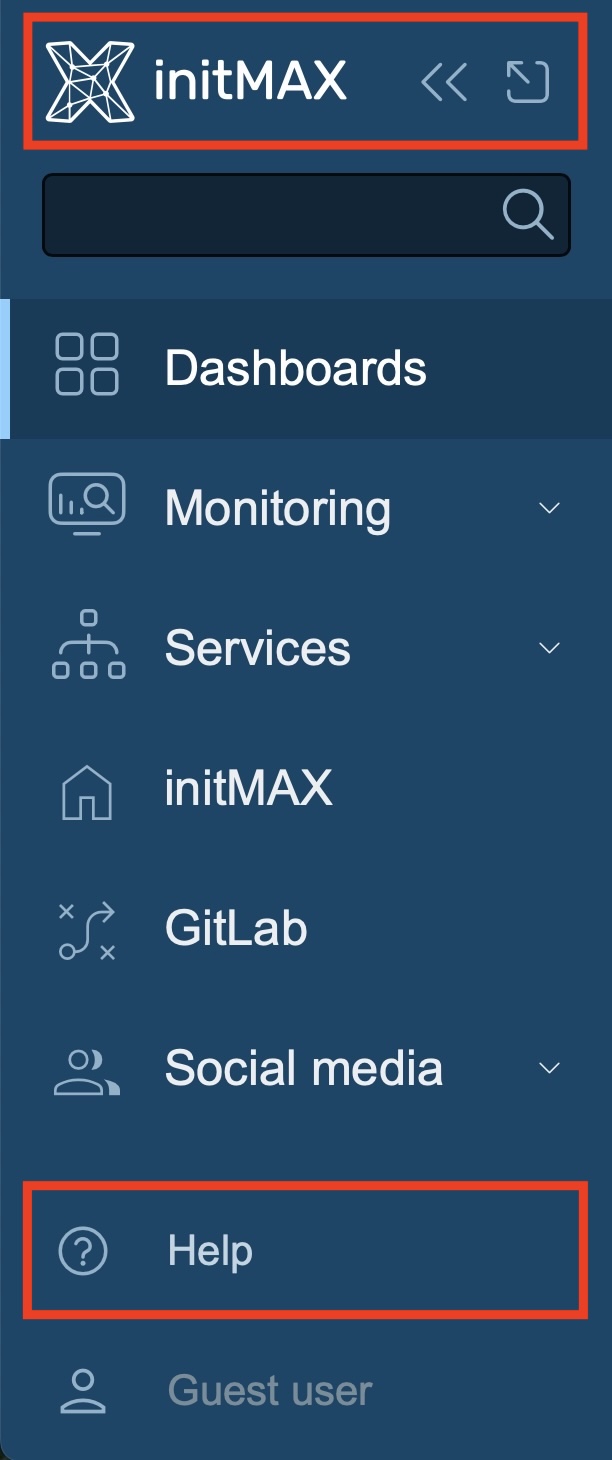
That’s exactly what this article will cover. Zabbix natively allows you to change the login screen logo and both menu logos. This rebranding can easily be done using a hidden setting in the brand.conf.php file.
If you want to rebrand Zabbix, follow these steps:
Creating the Directory Structure and Files
First, ensure you have the required directory structure. Create the conf and rebranding directories:
For version 7.0 and older
sudo mkdir -p /usr/share/zabbix/local/conf
sudo mkdir -p /usr/share/zabbix/rebranding
For version 7.2 and newer
sudo mkdir -p /usr/share/zabbix/ui/local/conf
sudo mkdir -p /usr/share/zabbix/ui/rebranding
Uploading Custom Logos
Prepare logos with the following dimensions:
- Main logo: 114×30 px
- Sidebar logo: 91×24 px
- Compact sidebar logo: 24×24 px
Recommended file formats are SVG or PNG with a transparent background. Other formats will also work but may have borders.
You can optionally use our test data (images and config) for testing.
Upload your images to the /usr/share/zabbix/rebranding directory. You can use the scp or rsync command if uploading from another server, or simply copy the files directly:
For version 7.0 and older
sudo cp /path/to/your/images/*.svg /usr/share/zabbix/rebranding/For version 7.2 and newer
sudo cp /path/to/your/images/*.svg /usr/share/zabbix/ui/rebranding/We’ll address file permissions later.
Configuring brand.conf.php
Create or edit the brand.conf.php file:
For version 7.0 and older
sudo nano /usr/share/zabbix/local/conf/brand.conf.phpFor version 7.2 and newer
sudo nano /usr/share/zabbix/ui/local/conf/brand.conf.phpExample file content:
<?php
return [
    'BRAND_LOGO' => './rebranding/initMAX_Zabbix_Logo_Colors_114x30.svg',
    'BRAND_LOGO_SIDEBAR' => './rebranding/initMAX_Zabbix_Logo_White_91x24.svg',
    'BRAND_LOGO_SIDEBAR_COMPACT' => './rebranding/initMAX_Zabbix_Symbol_White_24x24.svg',
    'BRAND_FOOTER' => 'initMAX s.r.o.',
    'BRAND_HELP_URL' => 'https://www.initmax.com/'
];
Ensure that the file names match the settings in `brand.conf.php`.
If needed, you can comment out individual sections using double slashes //.
What Do the Individual Parts in the PHP Code Mean?
- BRAND_LOGO – The main logo displayed on the login screen.
- BRAND_LOGO_SIDEBAR – The logo that appears in the left menu.
- BRAND_LOGO_SIDEBAR_COMPACT – The logo for the left menu in compact mode (icon).
- BRAND_FOOTER – Option to add custom text in the footer.
- BRAND_HELP_URL – The URL that opens when the “Help” button is clicked.
Setting Permissions
Ensure that files and folders have the correct permissions and ownership (usually www-data or apache, depending on your web server configuration):
For version 7.0 and older
sudo chown -R www-data:www-data /usr/share/zabbix/local/conf
sudo chmod 755 /usr/share/zabbix/local/conf
sudo chmod 644 /usr/share/zabbix/local/conf/brand.conf.php
sudo chown -R www-data:www-data /usr/share/zabbix/rebranding
sudo chmod 755 /usr/share/zabbix/rebranding
sudo chmod 644 /usr/share/zabbix/rebranding/*
For version 7.2 and newer
sudo chown -R www-data:www-data /usr/share/zabbix/ui/local/conf
sudo chmod 755 /usr/share/zabbix/ui/local/conf
sudo chmod 644 /usr/share/zabbix/ui/local/conf/brand.conf.php
sudo chown -R www-data:www-data /usr/share/zabbix/ui/rebranding
sudo chmod 755 /usr/share/zabbix/ui/rebranding
sudo chmod 644 /usr/share/zabbix/ui/rebranding/*
Rebranding Check
Open the Zabbix web interface and check if the new logo and other rebranding elements are displayed correctly. You may need to clear your browser cache for the changes to take full effect.


Additional Tip: If the icon appears twice in compact mode, this is a known bug see ZBX-23676 that has been resolved in versions from:
pre-7.2.0alpha2 (master) – commit 6f04c309093
pre-7.0.6rc1 – commit 0026d10fee4
Additional Ideas for Enhancing Rebranding
For better customization of Zabbix, you can add custom icons and a favicon to ensure a consistent look in browser tabs and on mobile devices. Simply upload the icons to the directory where Zabbix web files are located.
If you need to generate icons quickly, you can use RealFaviconGenerator—just upload your logo and download the ready-made icon package.
Tip: We recommend uploading icons to the rebranding directory. However, to make them permanent, you may need to adjust the Apache or Nginx configuration to prevent files like favicon.ico from being overwritten during updates. Feel free to contact us for assistance if needed.

Give us a Like, share us, or follow us 😍
So you don’t miss anything: