In this tutorial, we’ll show you how to set up Google Maps for use in Zabbix and its Geomap widget, while going through all the individual settings.
Global settings for geographical maps
First, configure the use of Google maps in the global settings.
Attention: This setting is uniform for the entire instance of Zabbix and will therefore affect all used map layers!
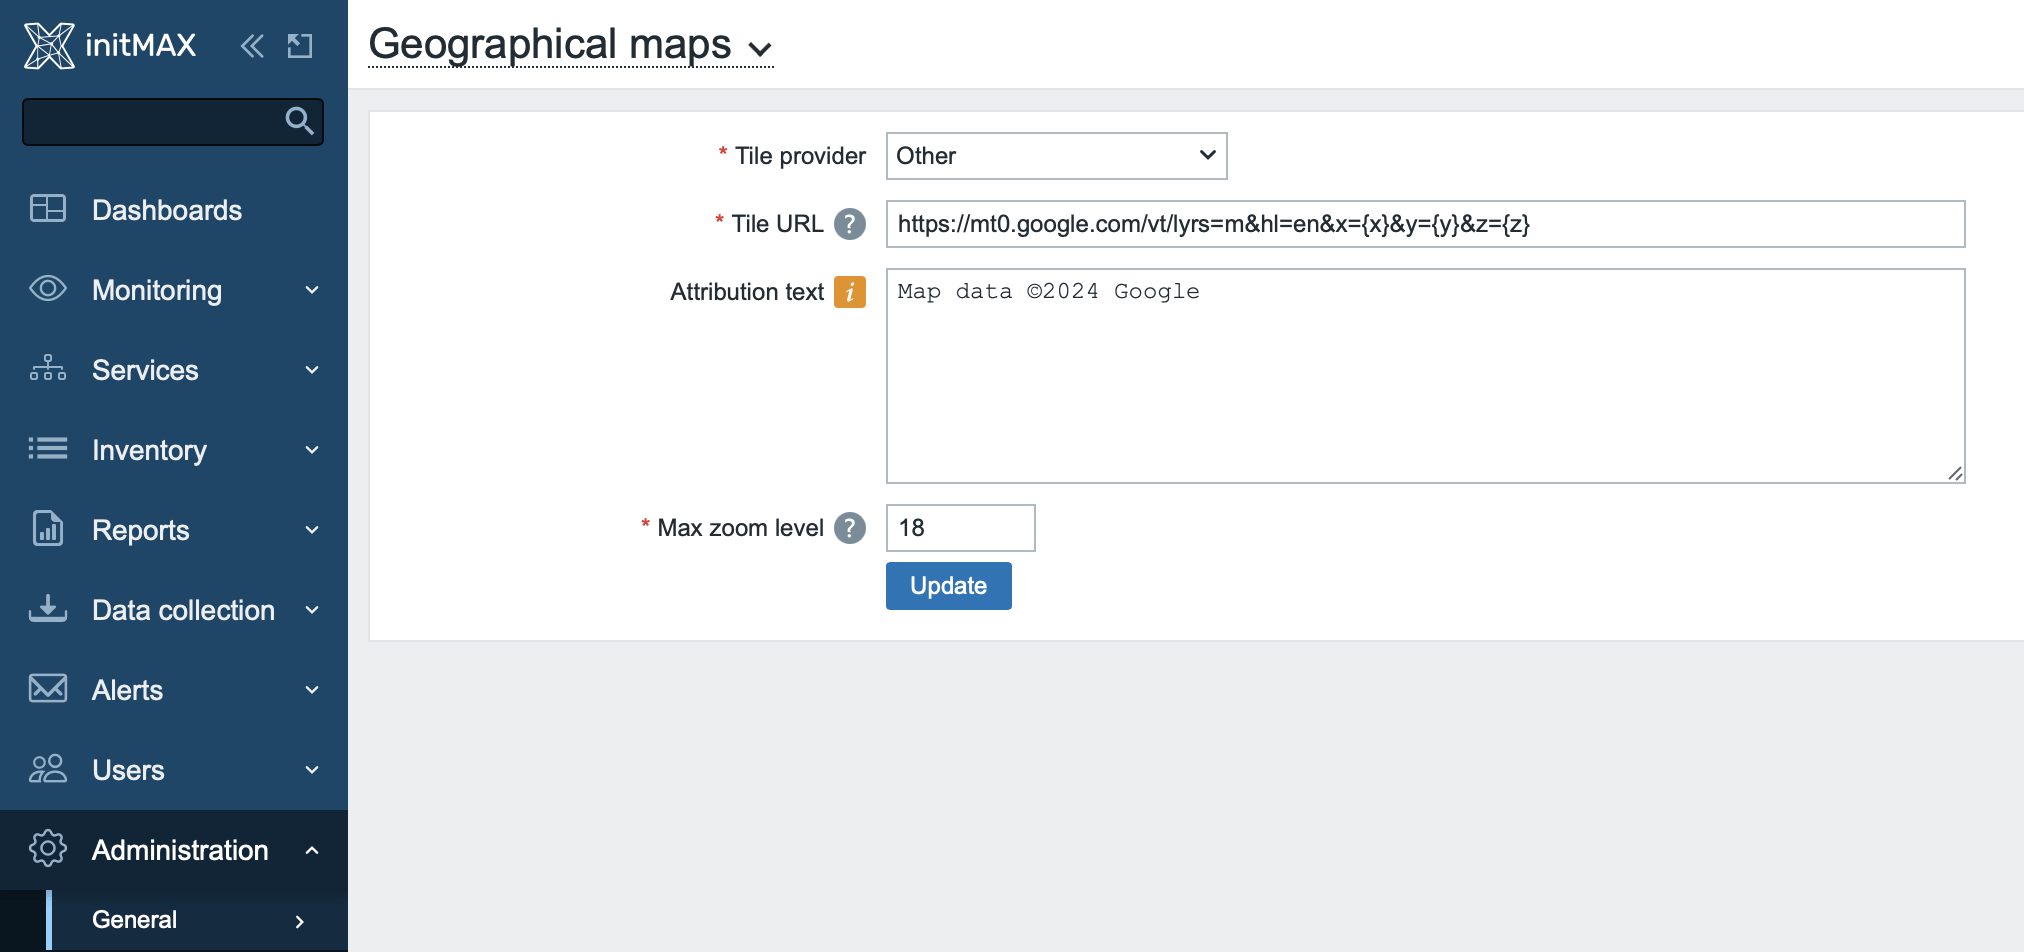
Configure the settings under a user with “Superdamin” rights, in the section Administration -> General -> Geographical maps.
In section called Tile provider choose the option Other.
In the Tile URL section, put the following address exactly like this – including the wildcards for the variables in the parameters of this URL:
https://mt0.google.com/vt/lyrs=m&hl=en&x={x}&y={y}&z={z}The x and y parameters are used to define the coordinates of the location displayed on the map background, and the z parameter is the default zoom level.
Specific values of these parameters will then be defined directly in the dashboard, at the level of the Geomap widget itself.
The language of the map layer can be changed with the hl parameter, i.e. hl=en for English, hl=cs for Czech and hl=sk for Slovak.
You can also choose which type of background layer should be displayed in the preview.
This is done by the lyrs (layers) parameter, which has the following options:
- h (roads only)
- m (standard roadmap)
- p (terrain)
- r (altered standard roadmap)
- s (satellite only)
- t (terrain only)
- y (hybrid)
In the Attribution text section, put the Google corporation copyright:
Map data ©2025 GoogleIn the Max zoom level section, enter the maximum zoom level of the geomap. The official Google documentation mentions information about the range of this value being 0 – 18, so choose the recommended maximum limit, i.e. the value 18.
This completes the global geomap settings for Google Maps. Save the settings by clicking the Update button and you can move on to creating the widget.
Creating a dashboard with Geomap widget
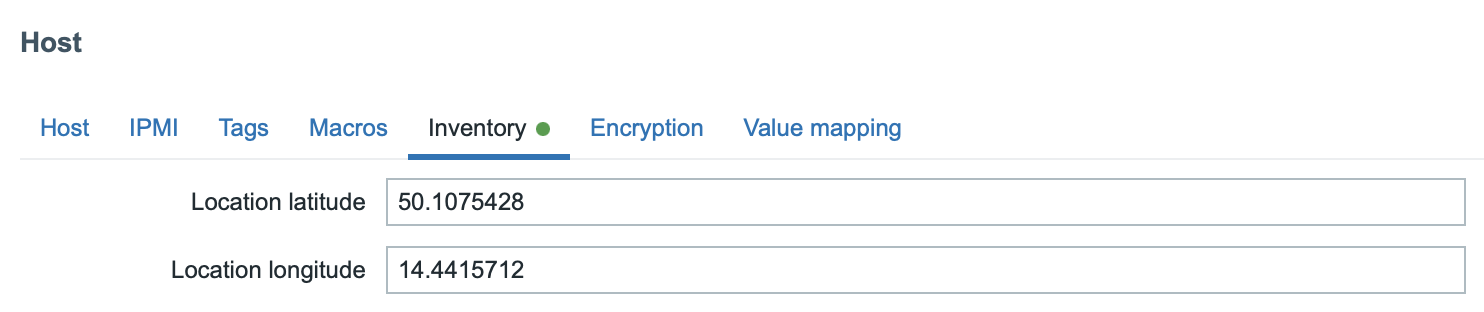
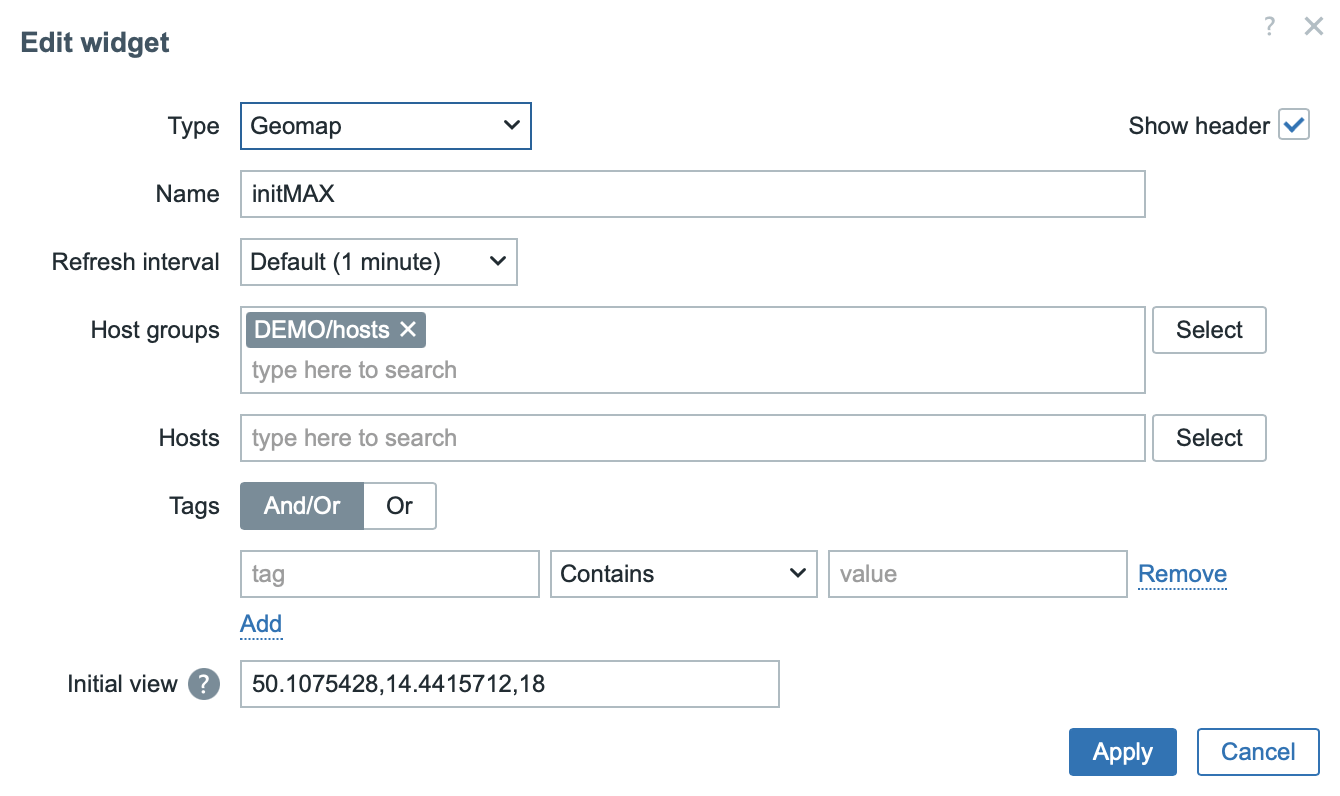
The Geomap widget can get its location data from the host’s inventory (“Latitude” and “Longitude” fields). But you can also set this manually – directly in the configuration of the widget itself.
In the widget settings, in the Initial view section, you set the coordinates in the format of decimal degrees, and in the order latitude and longitude, separated by a comma.
The third parameter in this section is optional and is the initial zoom level of the preview. In our case, we will set it to the maximum available, the value 18.
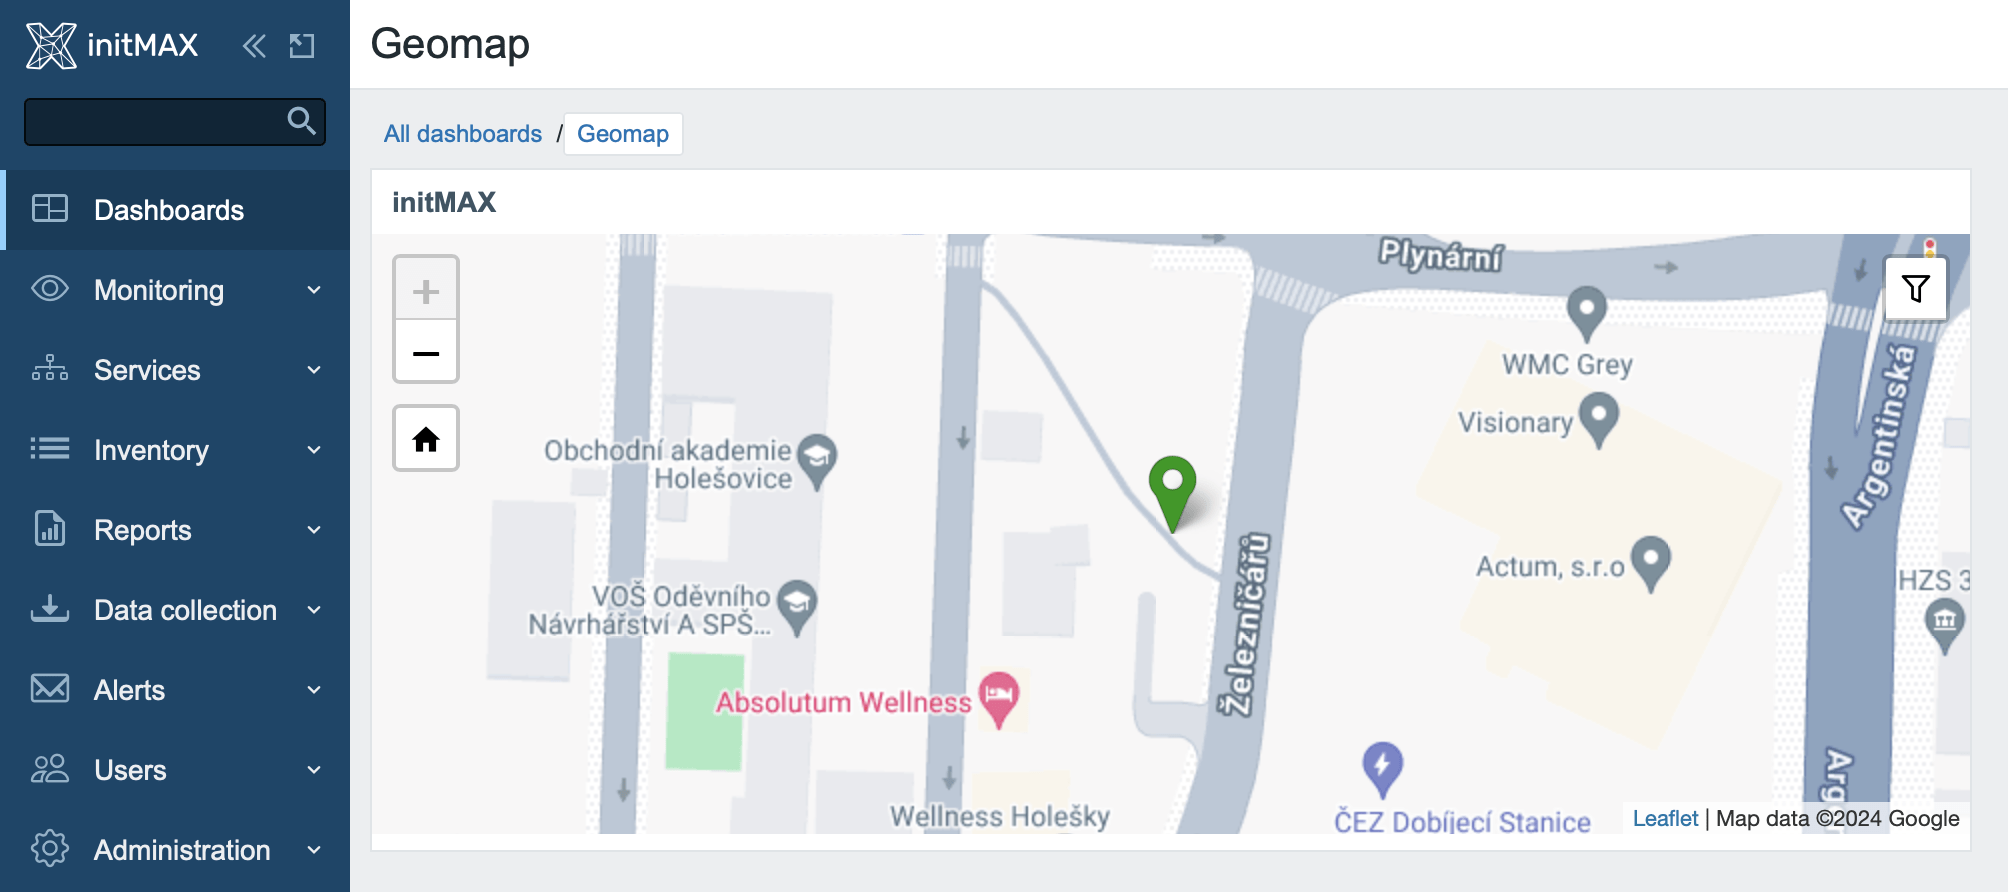
Here you can see the final dashboard with the configured geomap widget.
Give us a Like, share us, or follow us 😍
So you don’t miss anything: