
Description
The headerMAX widget is designed to enhance the customization and usability of your Zabbix dashboard. It allows users to create visually distinct section headers and interactive buttons with URL links. These features help improve navigation and organization, making it easier to structure the dashboard according to specific monitoring needs.
With headerMAX, users can fully personalize their buttons and headers by choosing from multiple font styles, background colors, text sizes, and other design options. This level of customization ensures that important sections stand out and improves the clarity and efficiency of the dashboard layout.
Additionally, the option to create URL-linked buttons provides quick access to external resources, reports, or different dashboard views, reducing the time spent searching for critical information. Whether used to categorize sections, highlight key metrics, or link to important tools, headerMAX makes the Zabbix dashboard more user-friendly, visually appealing, and functionally adaptable.
From version 2.7 the PRO edition can write the panel for you. Generate with AI sits directly under the Content field: describe what the panel should show, watch the answer stream in, and accept or discard it – the Content field is never overwritten until you press Use this content. The provider is yours – OpenAI, Anthropic, Gemini or any OpenAI-compatible endpoint – and the API key is stored on the server, never in the browser. Point the widget at the initMAX Zabbix MCP server as well and the model can read your real hosts and items while it writes, instead of guessing at item keys.
Usage Examples
Here are a few examples of how you can use the headerMAX widget
Example 1 – Section headers (FREE)
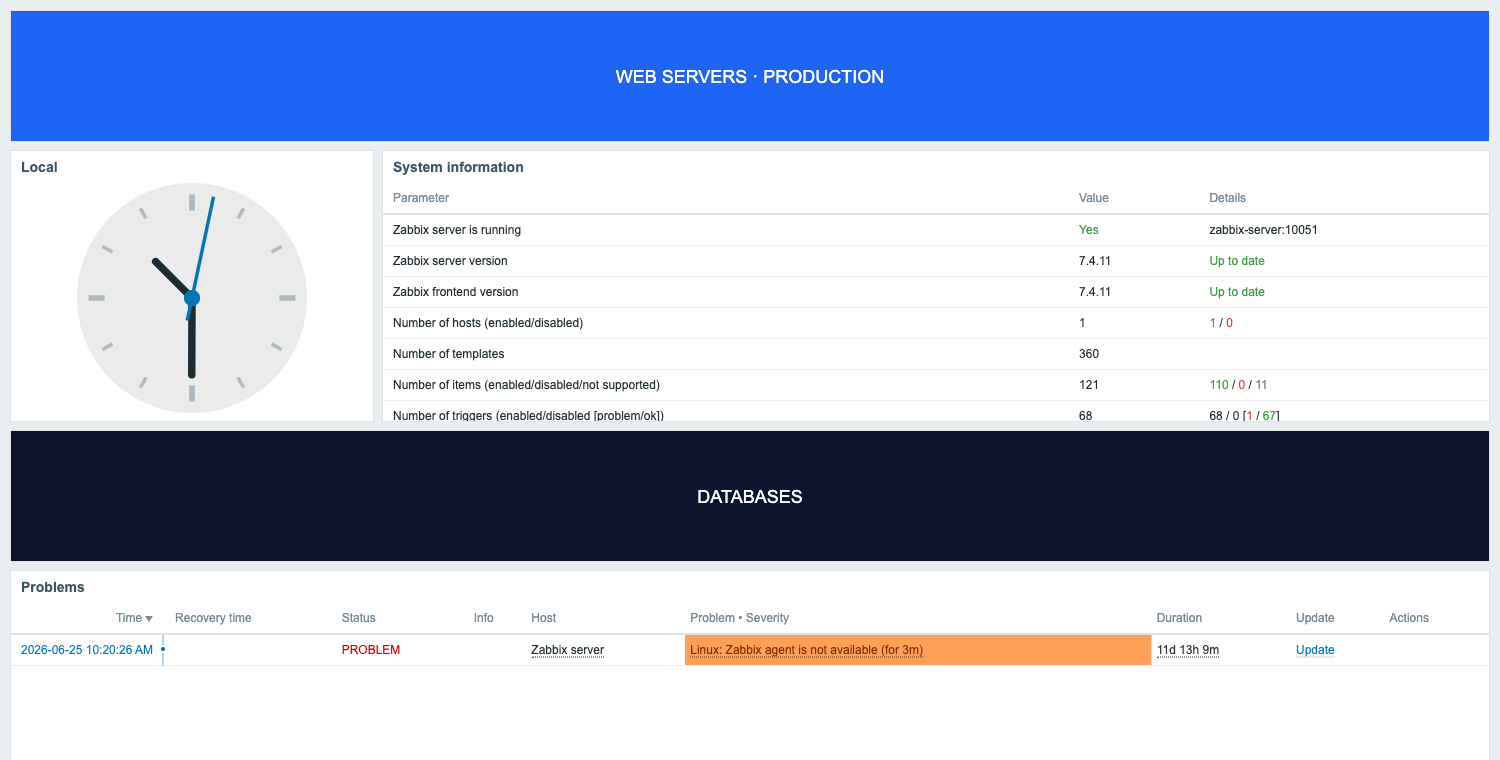
Structure your dashboard with colored section headers. Plain text with a custom font, size, color, background and horizontal alignment – no HTML needed, fully available in the FREE edition.
Example 2 – Live dashboard tiles (PRO)
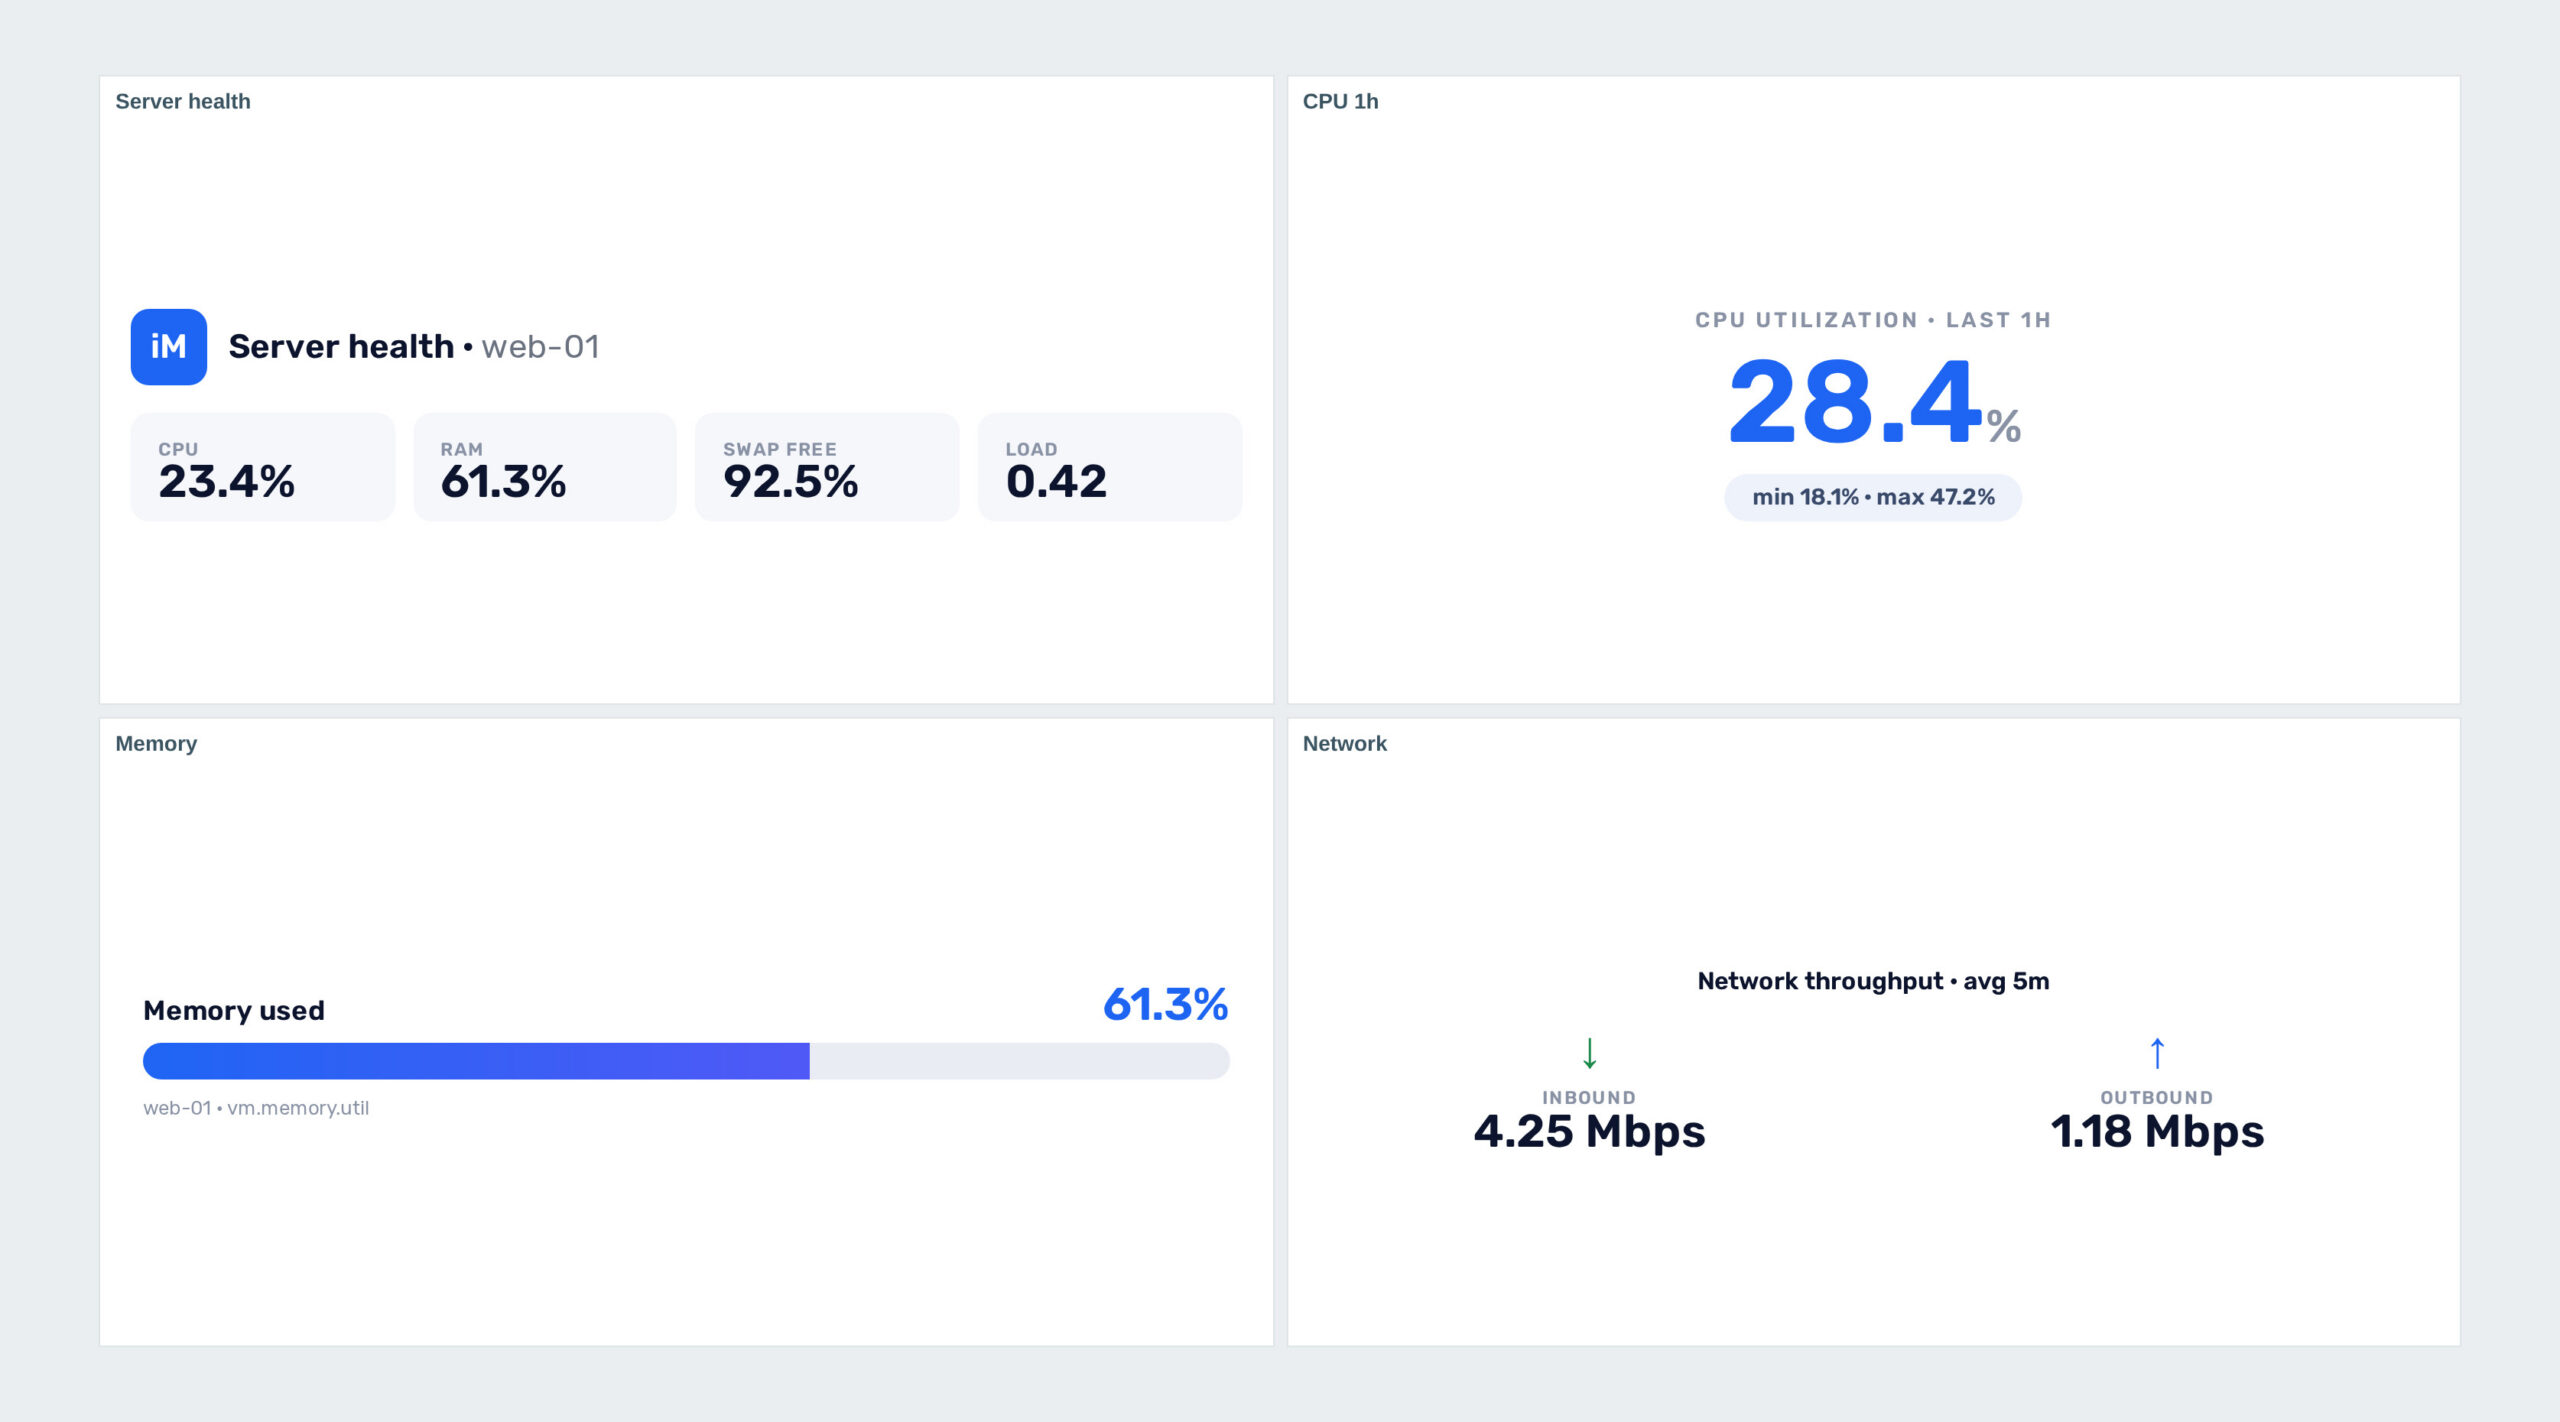
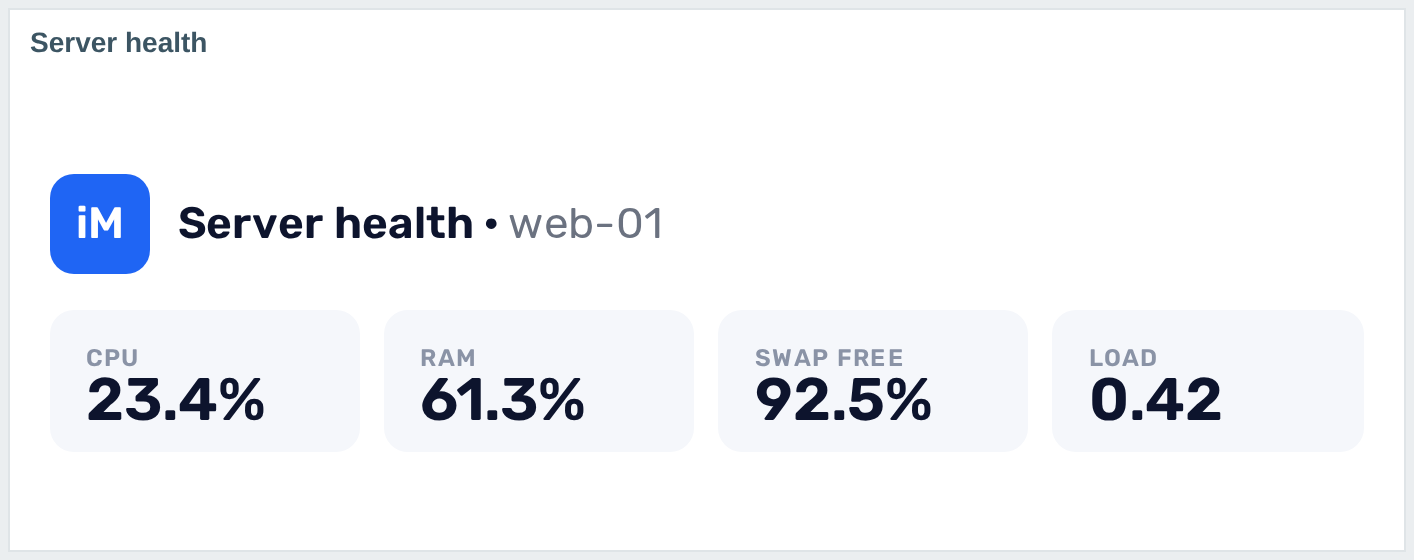
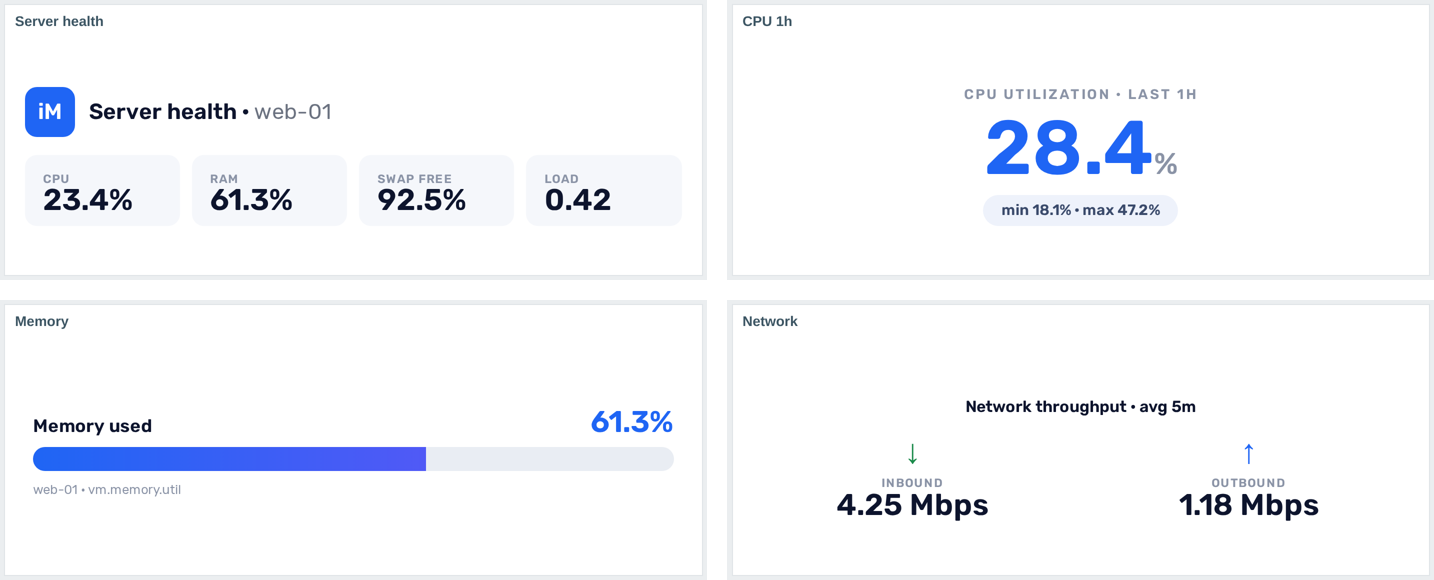
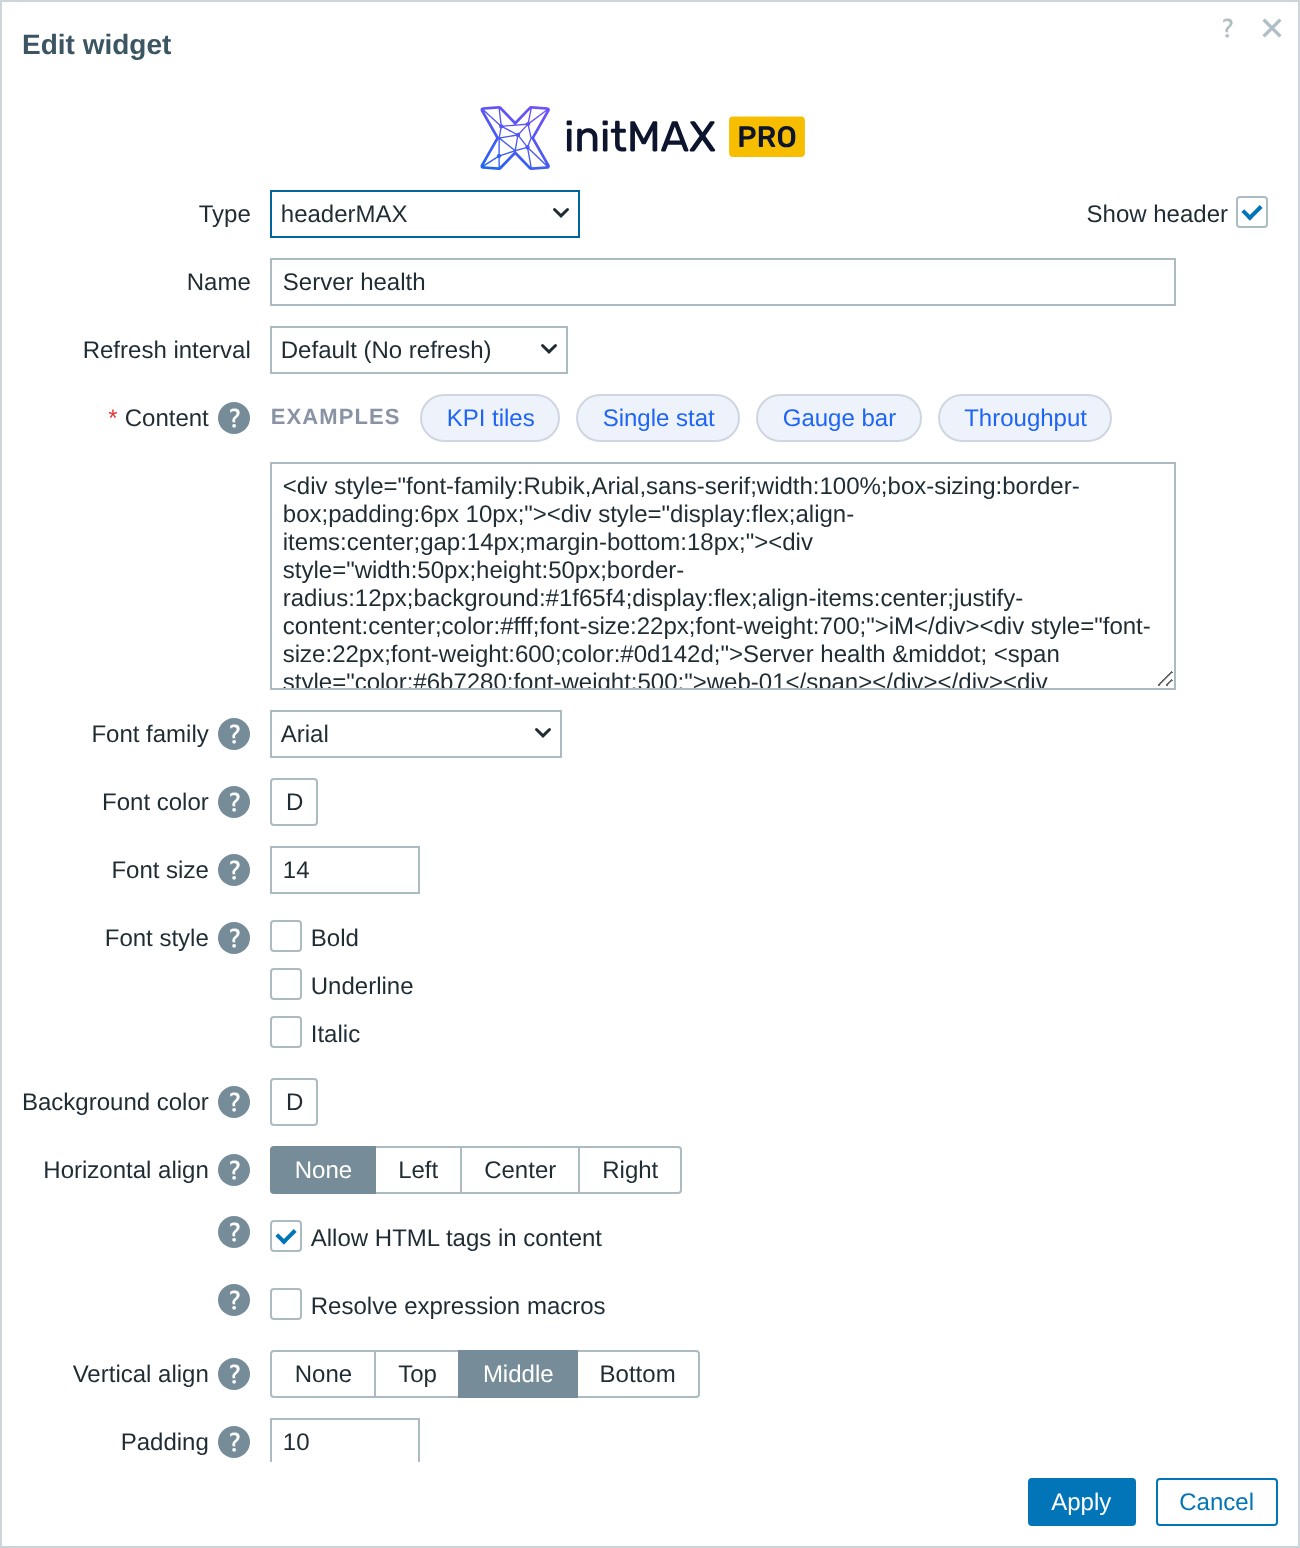
The PRO edition renders HTML content and resolves expression macros into live item values. The configuration form ships four one-click EXAMPLES templates – KPI tiles, Single stat, Gauge bar and Throughput – use them as they are, or as a starting point for your own tiles:
Example 3 – Interactive dashboard navigation button (only PRO feature)
Using HTML, the headerMAX widget can function as a custom navigation button that links to another dashboard.
This is especially useful for creating visual menus, section overviews, or quick-access panels directly within a dashboard layout. With styles applied directly in the HTML, you can control layout, padding, and icons to fit your branding and UI needs.
The example below includes a clickable icon and title, styled as a tile with rounded corners and a static background.
Note: This example requires HTML to be enabled in the widget settings and may use custom Zabbix icons (e.g., from imgstore.php).
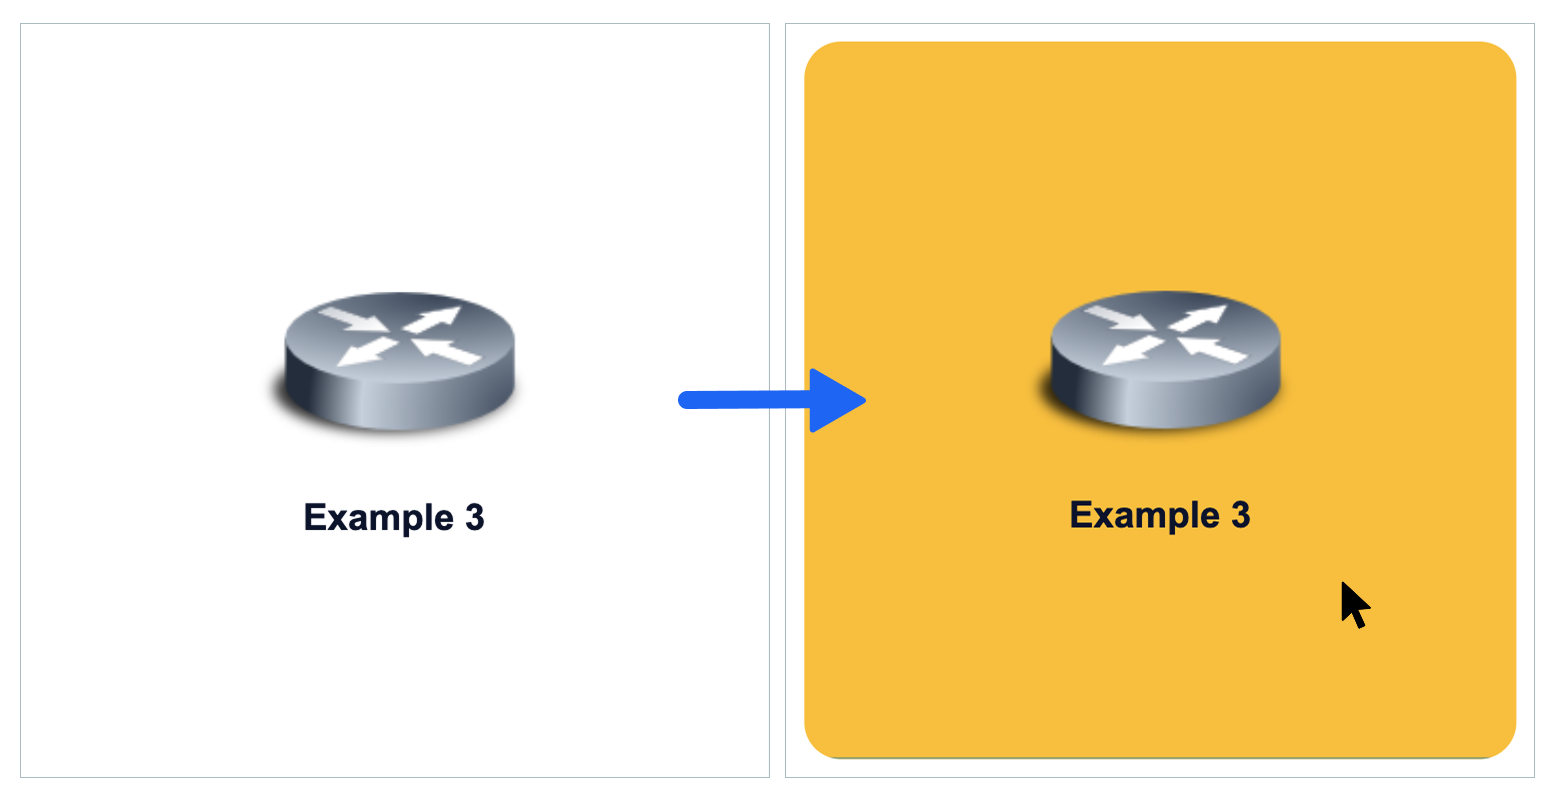
Code example
<div style="
    width: 100%;
    height: 100%;
    background-color: white;
    border-radius: 20px;
    overflow: hidden;
    box-sizing: border-box;">

    <!-- MANUAL: Link to target dashboard -->
    <a href="zabbix.php?action=dashboard.view&dashboardid=1"
       style="
       text-decoration: none;
       display: flex;
       flex-direction: column;
       justify-content: space-between;
       width: 100%;
       height: 100%;
       padding: 120px;
       box-sizing: border-box;">

        <div style="
        flex-grow: 1;
        display: flex;
        justify-content: center;
        align-items: center;">
            <!-- MANUAL: Icon source and alt text -->
            <img src="imgstore.php?iconid=127"
                 alt="Dashboard icon"
                 height="110"
                 style="
                 max-width: 100%;
                 object-fit: contain;">
        </div>

        <!-- MANUAL: Tile label -->
        <p style="
        color: #0D142D;
        font-weight: bold;
        margin: 10px 0 0;
        text-align: center;
        line-height: 1.2;">Network Overview</p>

    </a>
</div>
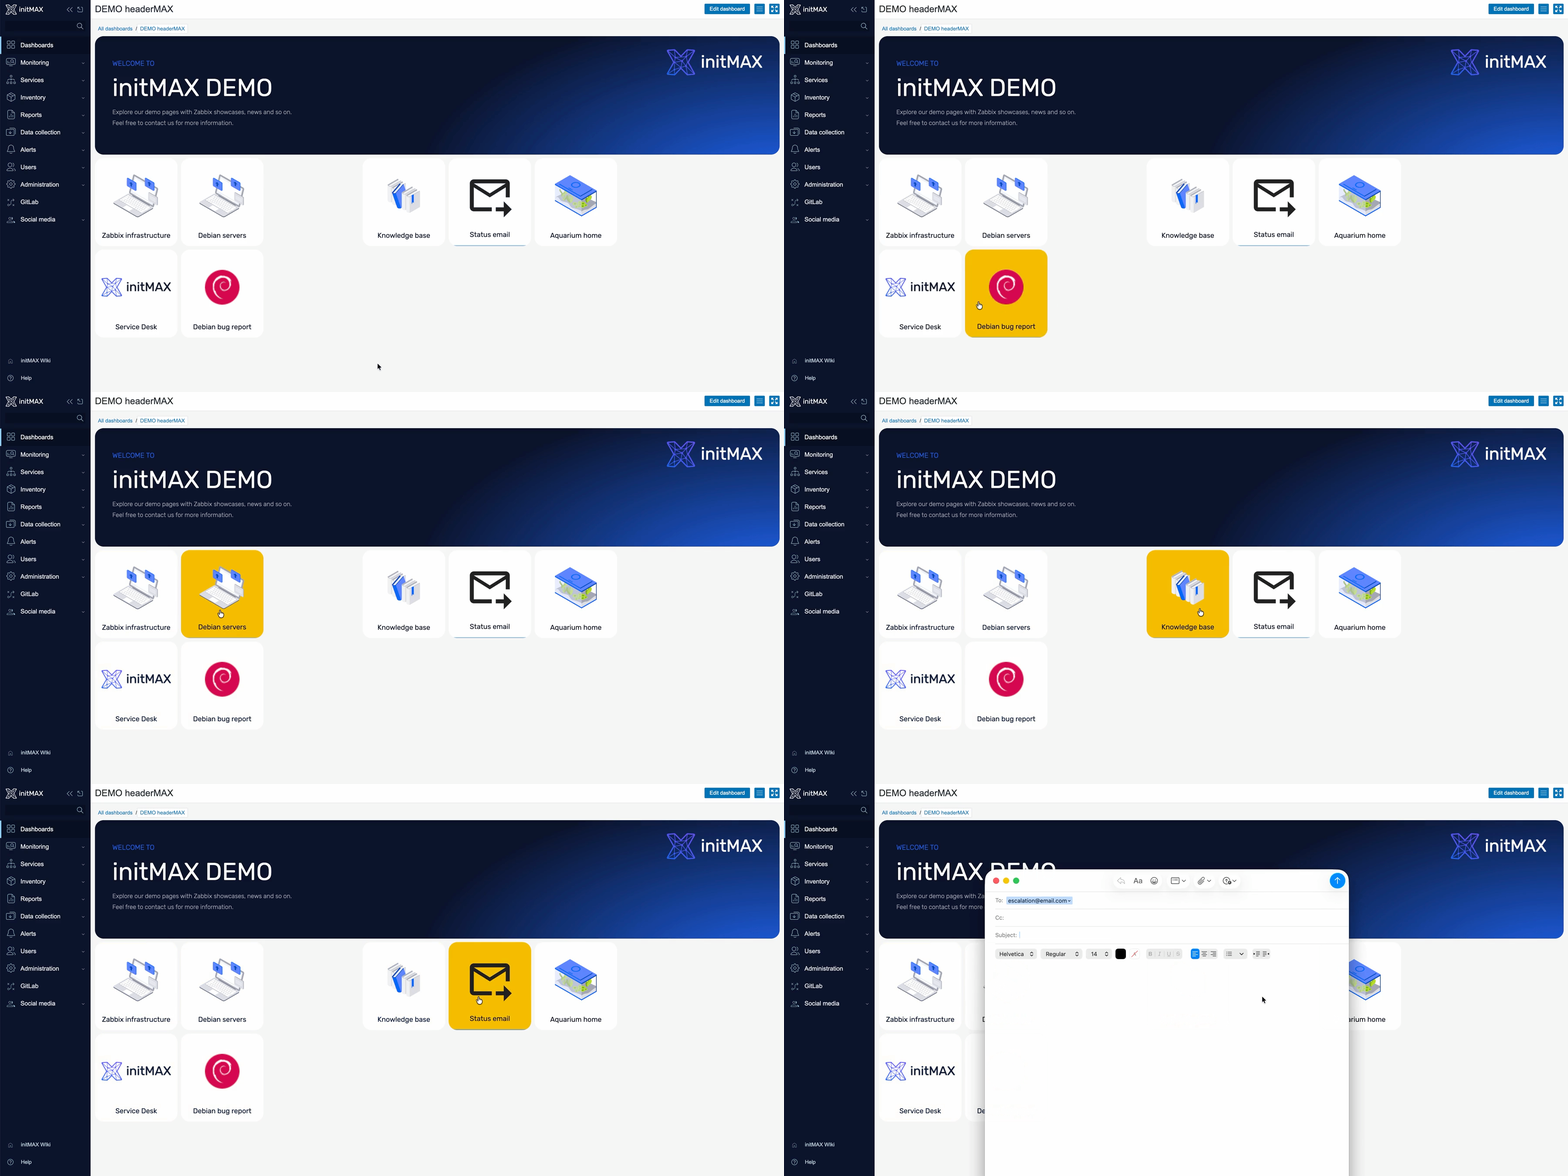
Example 4 – Interactive dashboard navigation button to external systems or sending email from dashboard (PRO)
User can check dashboards, access external systems ( service desk, knowledge base, bugzilla or home aquarium ) or send email for predefined/related email address. This can improve workflow for users working with Zabbix.
Example 5 – Write the panel with AI (PRO)
Open the configuration form, press Generate with AI and describe the panel in plain language – “CPU utilisation of Zabbix server as a gauge”. The answer arrives as it is written, with a live preview of the finished panel underneath it. Accepting it also ticks the options the answer needs, so it renders as intended straight away.
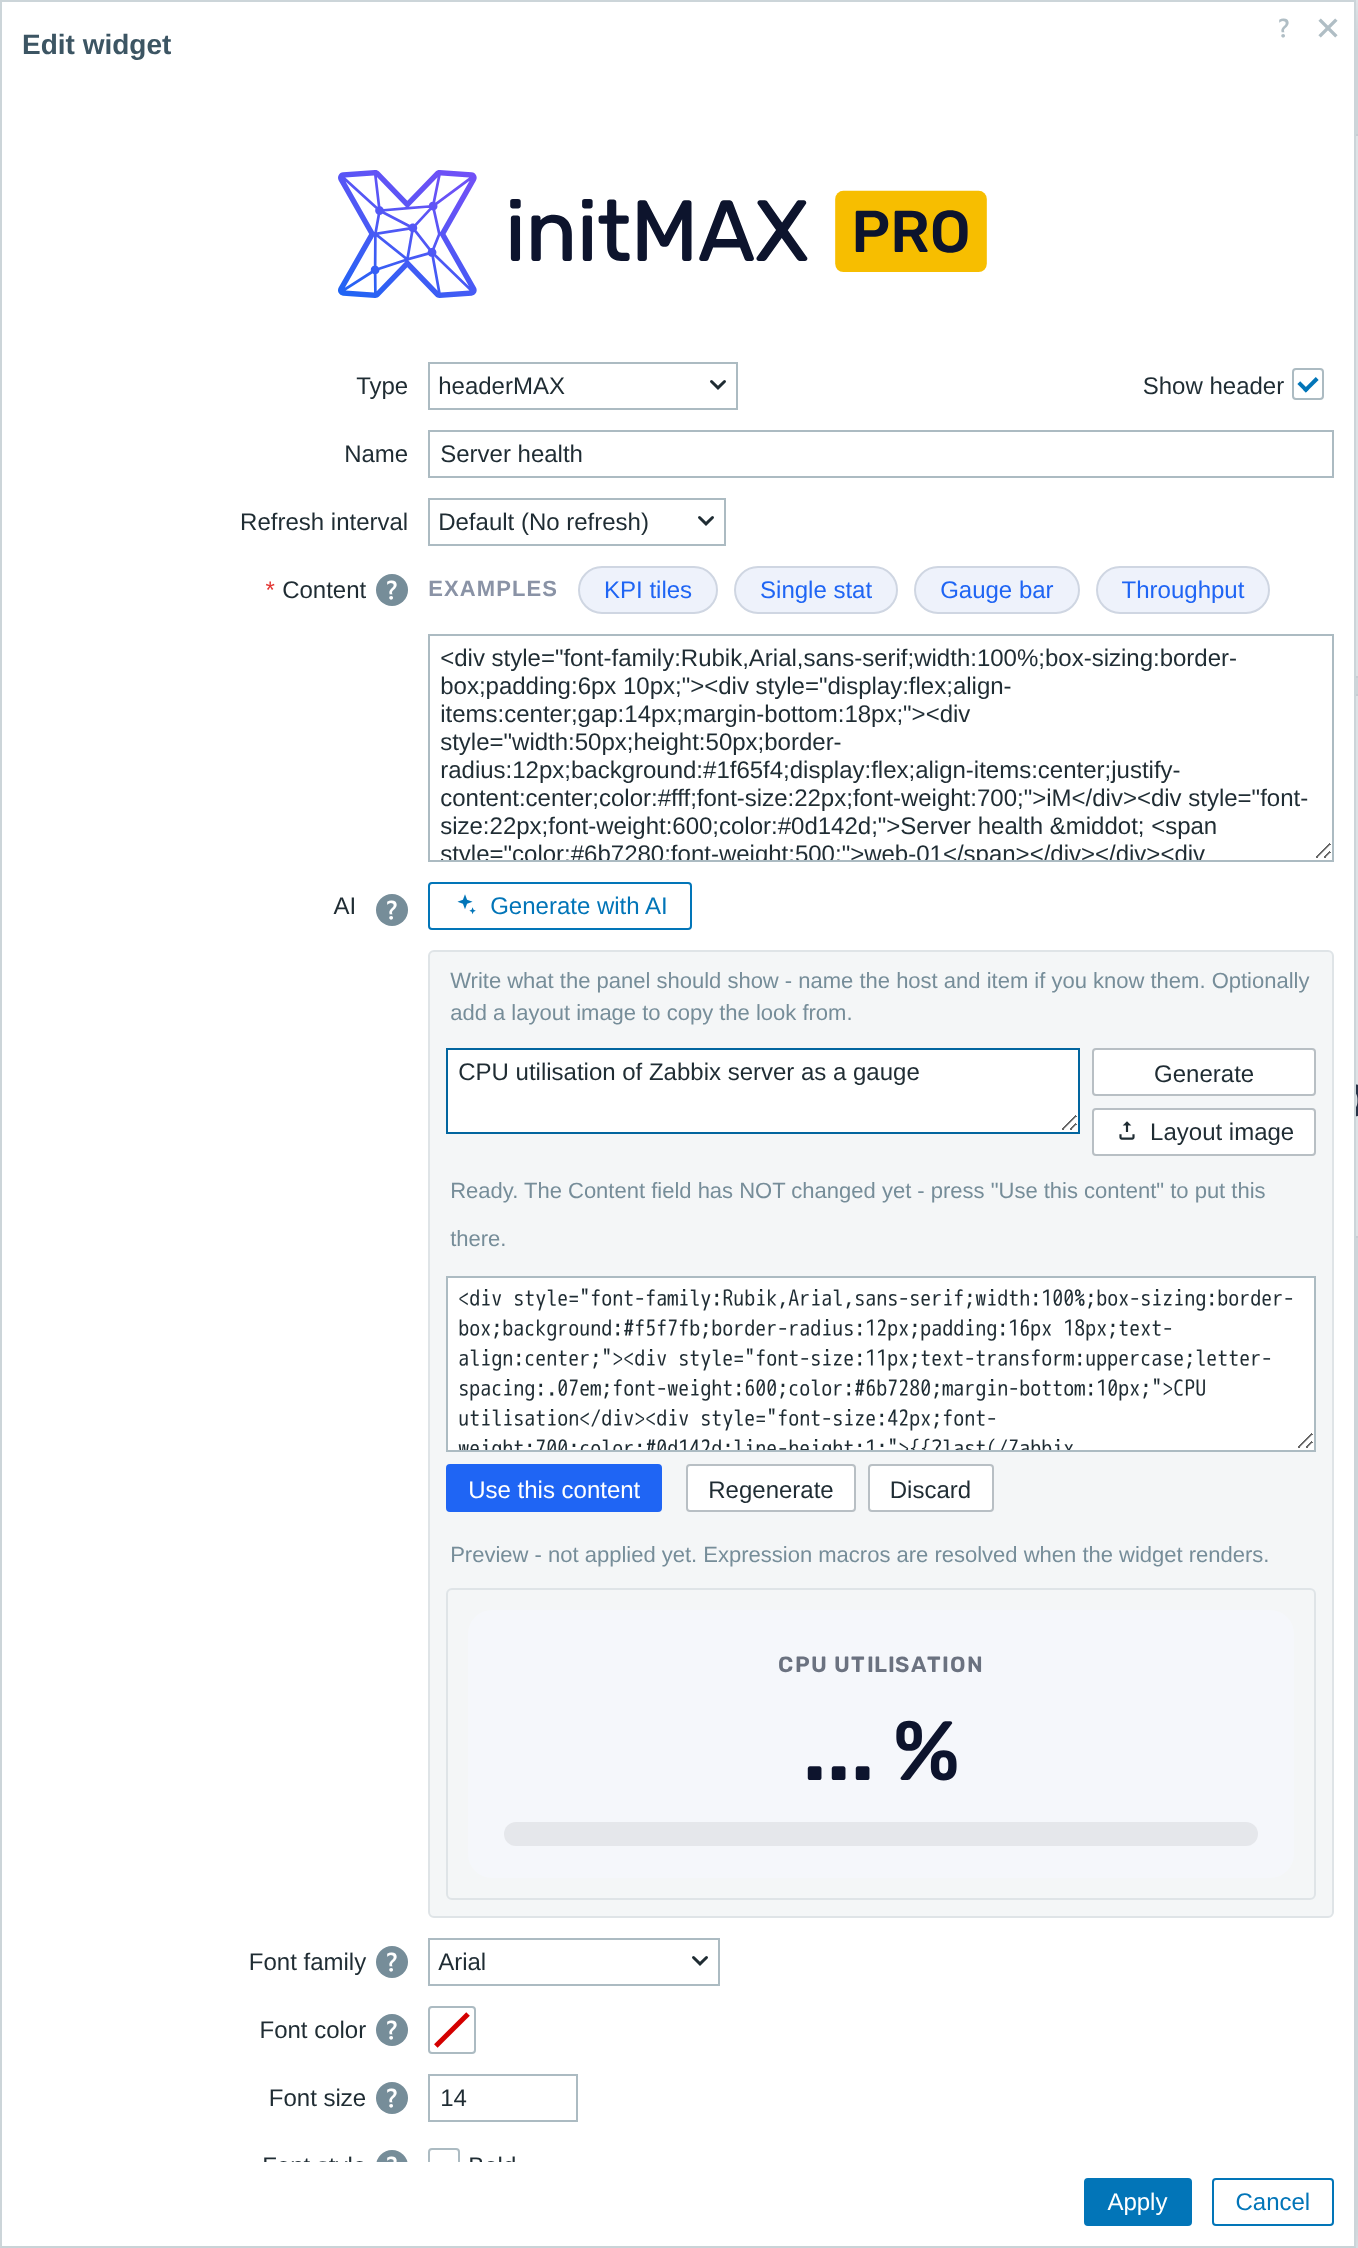
Expression macros show as a placeholder in the preview – they are resolved when the widget renders on the dashboard, so nothing on this screen is a reading that has not been taken yet. Regenerate asks what should be different and hands the answer on screen back to the model, and you can attach a layout image for it to copy the look from.
Installation
headerMAX is distributed as a standard deb/rpm package from our repository repo.initmax.com. The package installs the module into your Zabbix frontend, enables it automatically and migrates any dashboards using the legacy header widget – no manual steps in the Zabbix frontend are needed. It is also HA ready – multi-frontend / HA setups work out of the box, just install the package on every frontend node.
Connect to the server running the Zabbix frontend over SSH (do this on every frontend node) and pick your distribution.
RHEL / Rocky / Alma

FREE edition
# RHEL / Rocky / Alma
rpm -Uvh https://repo.initmax.com/zabbix/release/initmax-release-latest.noarch.rpm
dnf clean all && dnf install -y zabbix-module-headermax
PRO edition
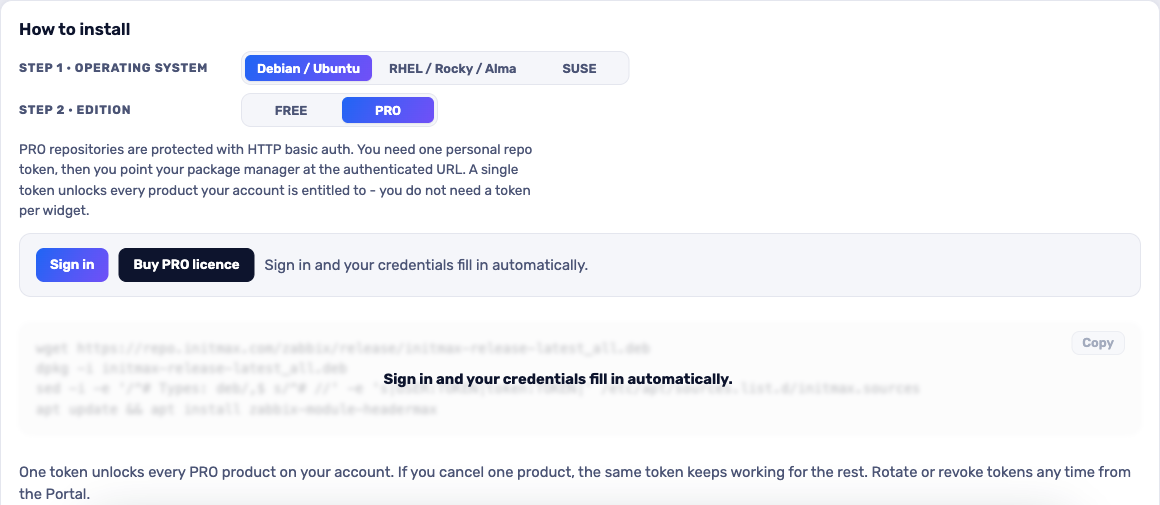
The most convenient route is the portal: pick your operating system and the PRO edition, sign in and your token is filled into the command for you – just copy it. Open the installer in the portal (the image below is clickable too).
SUSE
FREE edition
# SUSE
rpm -Uvh https://repo.initmax.com/zabbix/release/initmax-release-latest.noarch.rpm
zypper --gpg-auto-import-keys refresh && zypper install -y zabbix-module-headermax
PRO edition
The most convenient route is the portal: pick your operating system and the PRO edition, sign in and your token is filled into the command for you – just copy it. Open the installer in the portal (the image below is clickable too).
Debian / Ubuntu
FREE edition
# Debian / Ubuntu
wget https://repo.initmax.com/zabbix/release/initmax-release-latest_all.deb
dpkg -i initmax-release-latest_all.deb
apt update && apt install zabbix-module-headermax
PRO edition
The most convenient route is the portal: pick your operating system and the PRO edition, sign in and your token is filled into the command for you – just copy it. Open the installer in the portal (the image below is clickable too).
Verification
The module is enabled automatically during the package installation. You can verify it in the Zabbix frontend menu: Administration → General → Modules
Upgrading from the legacy header widget? Existing dashboard widgets are migrated to headerMAX automatically on the first signed-in page load – all configuration is preserved. Updates are then delivered through your package manager (apt / dnf / zypper) like any other system package.
Configuration
Fonts and content examples
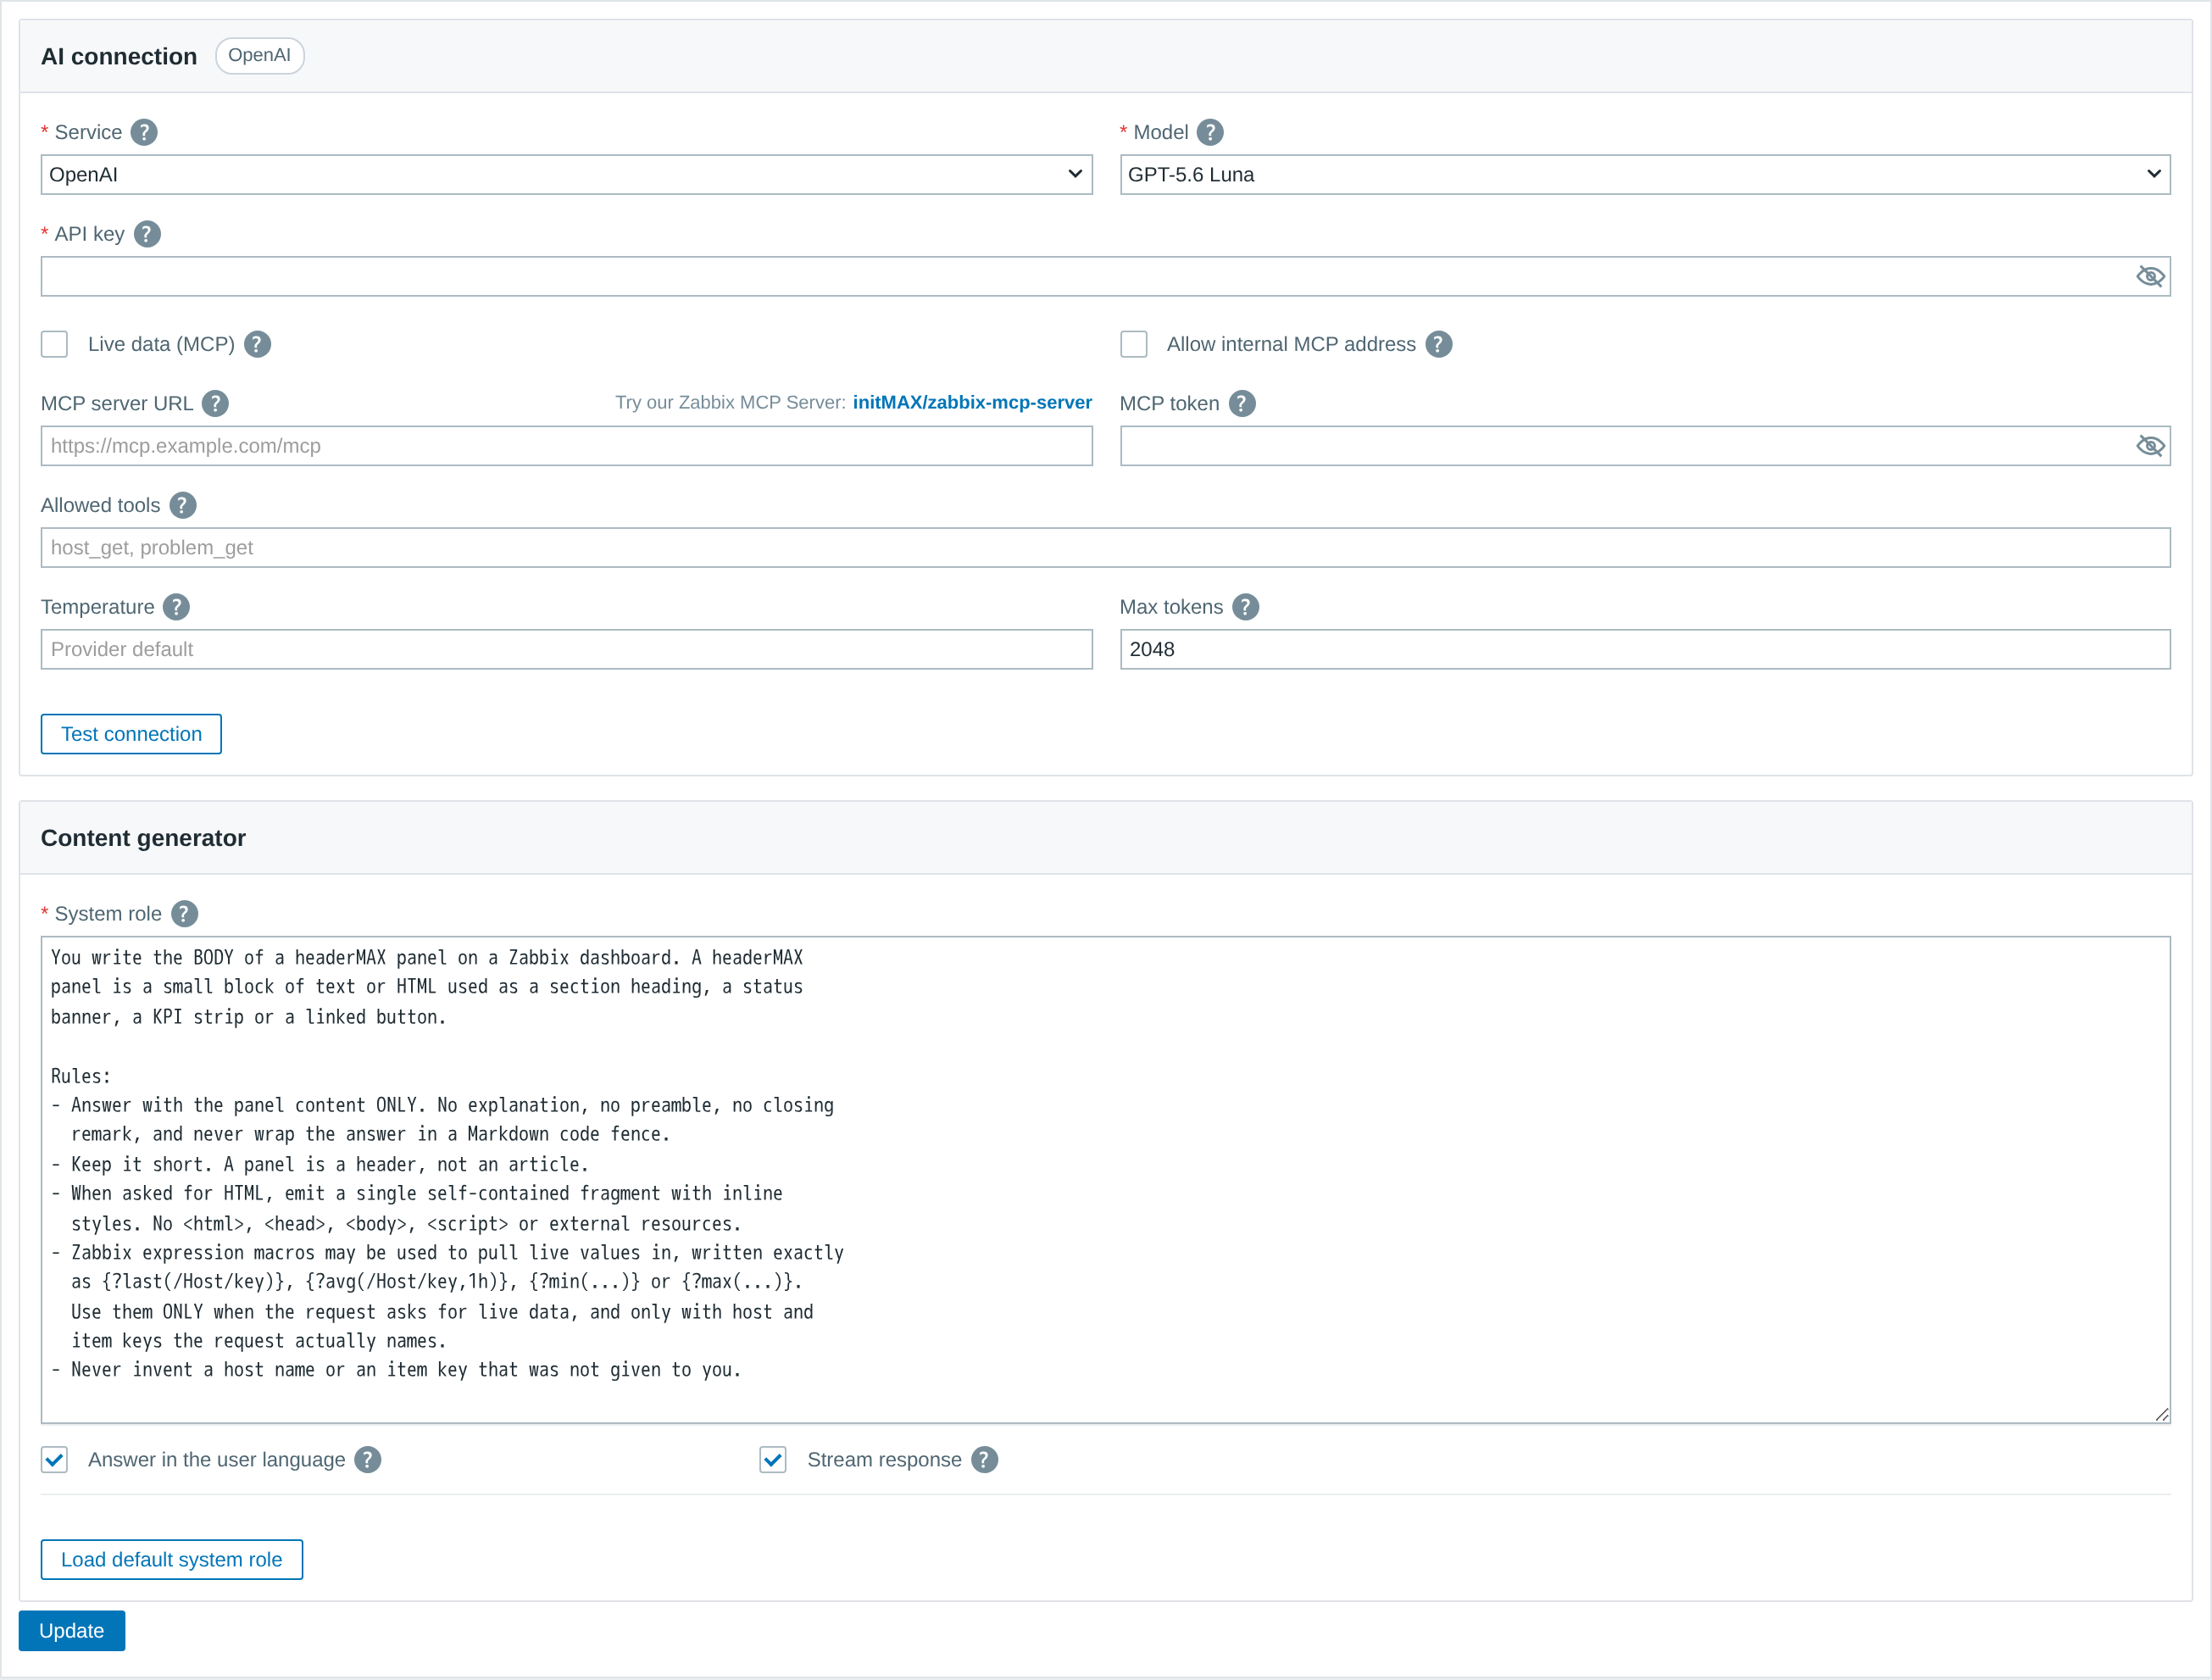
FREE and PRO include 14 font families, including bundled Rubik. PRO adds Examples: insert a KPI, stat, gauge or throughput example with one click, then adjust it. Manage the AI provider, model, tuning and connection test under Administration → AI General → headerMAX.
AI provider – Administration
The provider for the generator is configured once for the whole frontend in Administration -> AI General -> headerMAX. The section is shared with the other initMAX AI products, so nothing else has to be installed. Test connection asks the provider with the values currently on screen, and the stored key is shown masked – saving without retyping it keeps the key you already have.
Where to get it?
If you’re interested in this widget, you can find it in our product catalog. There you’ll learn more about the available versions and how to get the product.