In this guide, we will show you how to easily force a two-factor authentication on a user group in Zabbix, and how to reset the token for TOTP (Time-based One Time Password) generation.
Configuration options
To use two-factor authentication (2FA) you do not need to install anything, you just need to have your Zabbix version at least 7.0.
First step is to enable and setup multi-factor authentication in global settings.
You can configure multiple authentication methods here, the following are available:
- TOTP stands for “Time-based One-Time Password”, it is a one-time password based on time. It’s a two-factor authentication mechanism where the user generates a one-time code based on the current time in addition to the regular password. This method increases security because the password is only valid for a limited time and cannot be used repeatedly.
- TOTP is usually generated using smart phone applications such as Google Authenticator or Authy. The user displays the current code from the app and enters it along with their regular password when logging in. Each code is only valid for a limited time, usually from 30 seconds to a few minutes, thus making authentication more secure.
- DUO Universal Prompt is a feature from Duo Security to improve and simplify the multi-factor authentication (MFA) process. MFA is a security method that requires users to prove their identity using more than one authentication mechanism when accessing protected systems and services. It typically includes something the user knows (such as a password), something they have (such as a smart phone) or something they are (such as a fingerprint).
- Universal Prompt is designed to be compatible with a wide range of devices and platforms, providing advanced capabilities for managing and setting authentication policies according to the needs of the organization. Its use can significantly increase the overall security when accessing sensitive data and services, while reducing the complications and frustration associated with traditional MFA methods.
2FA Configuration
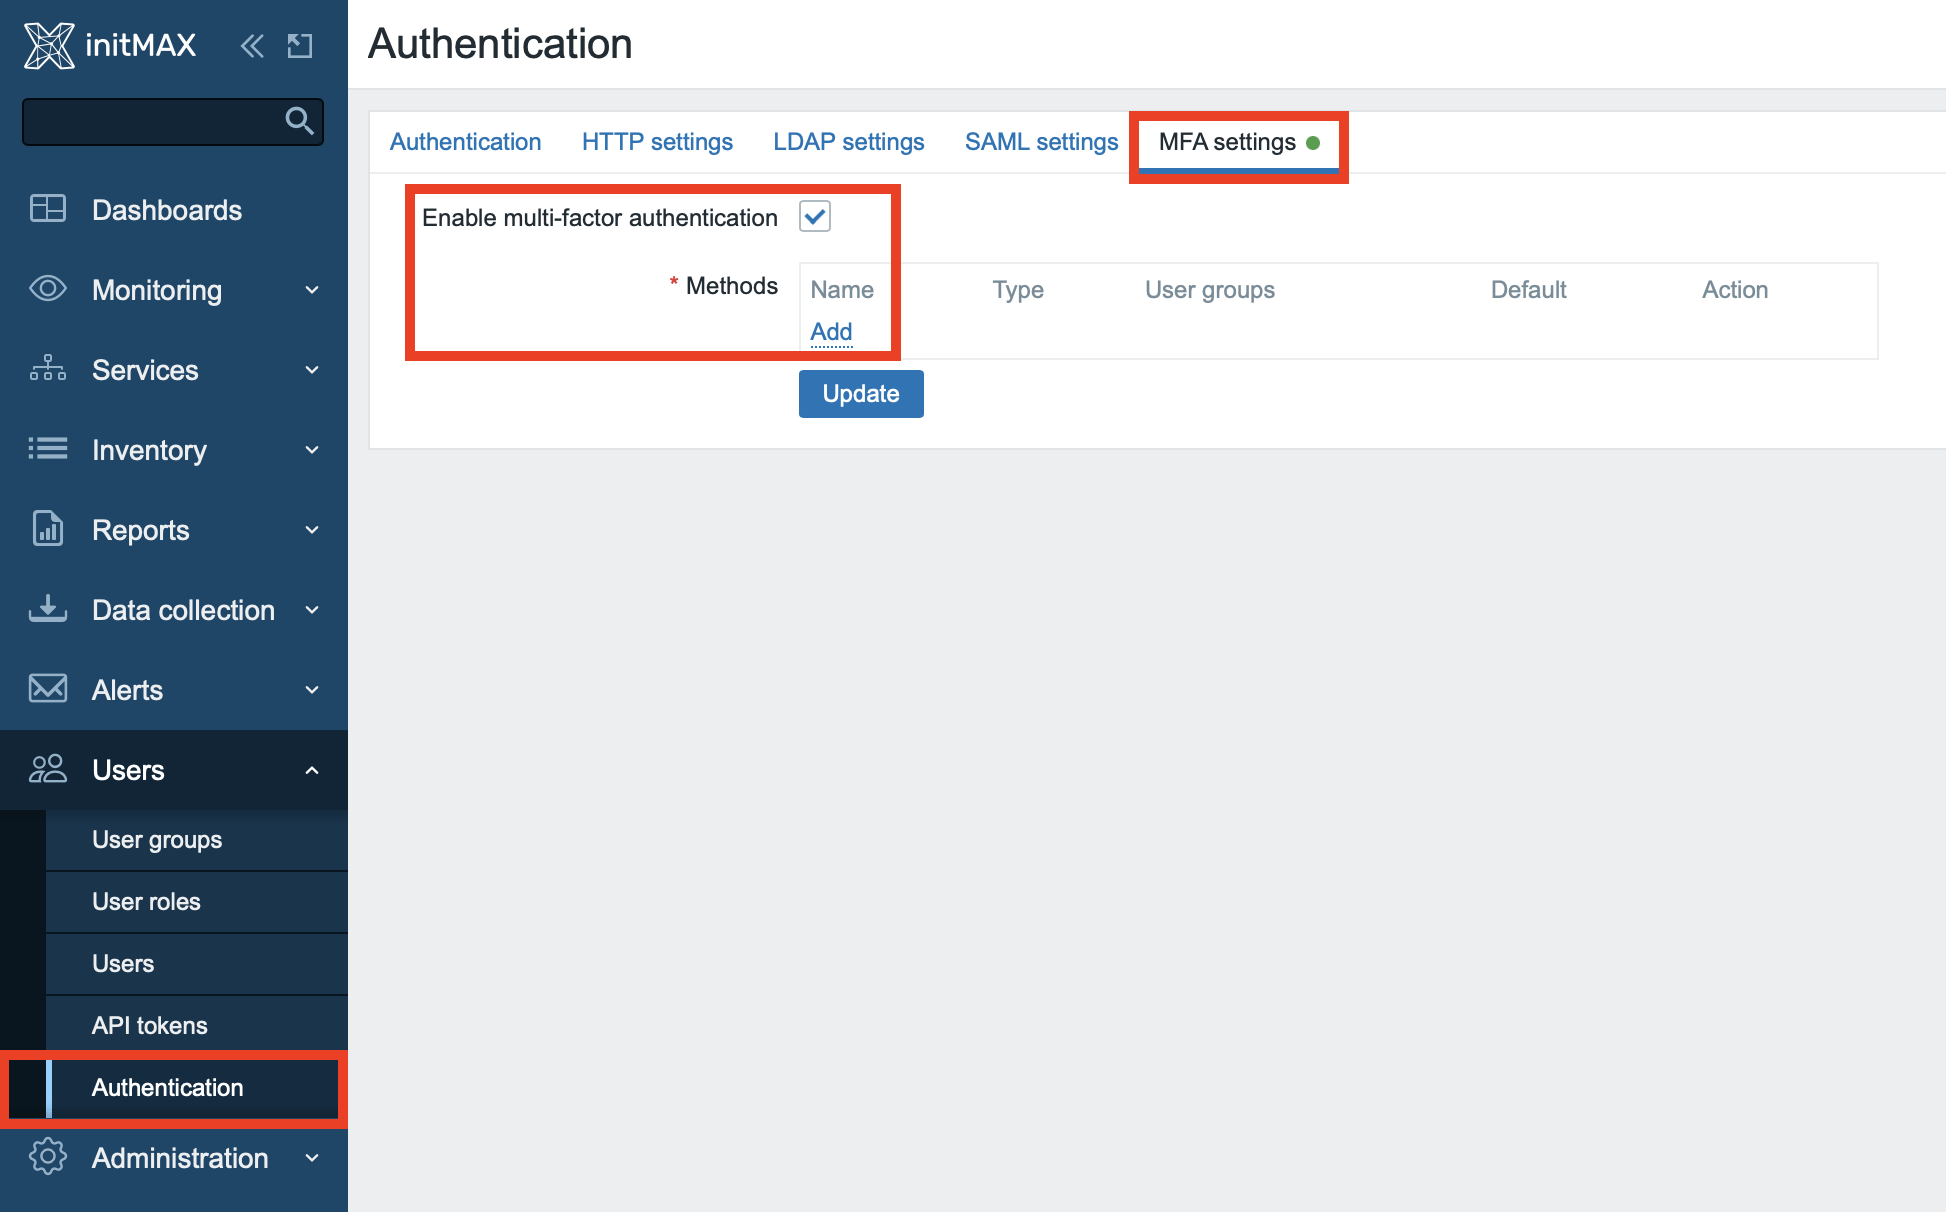
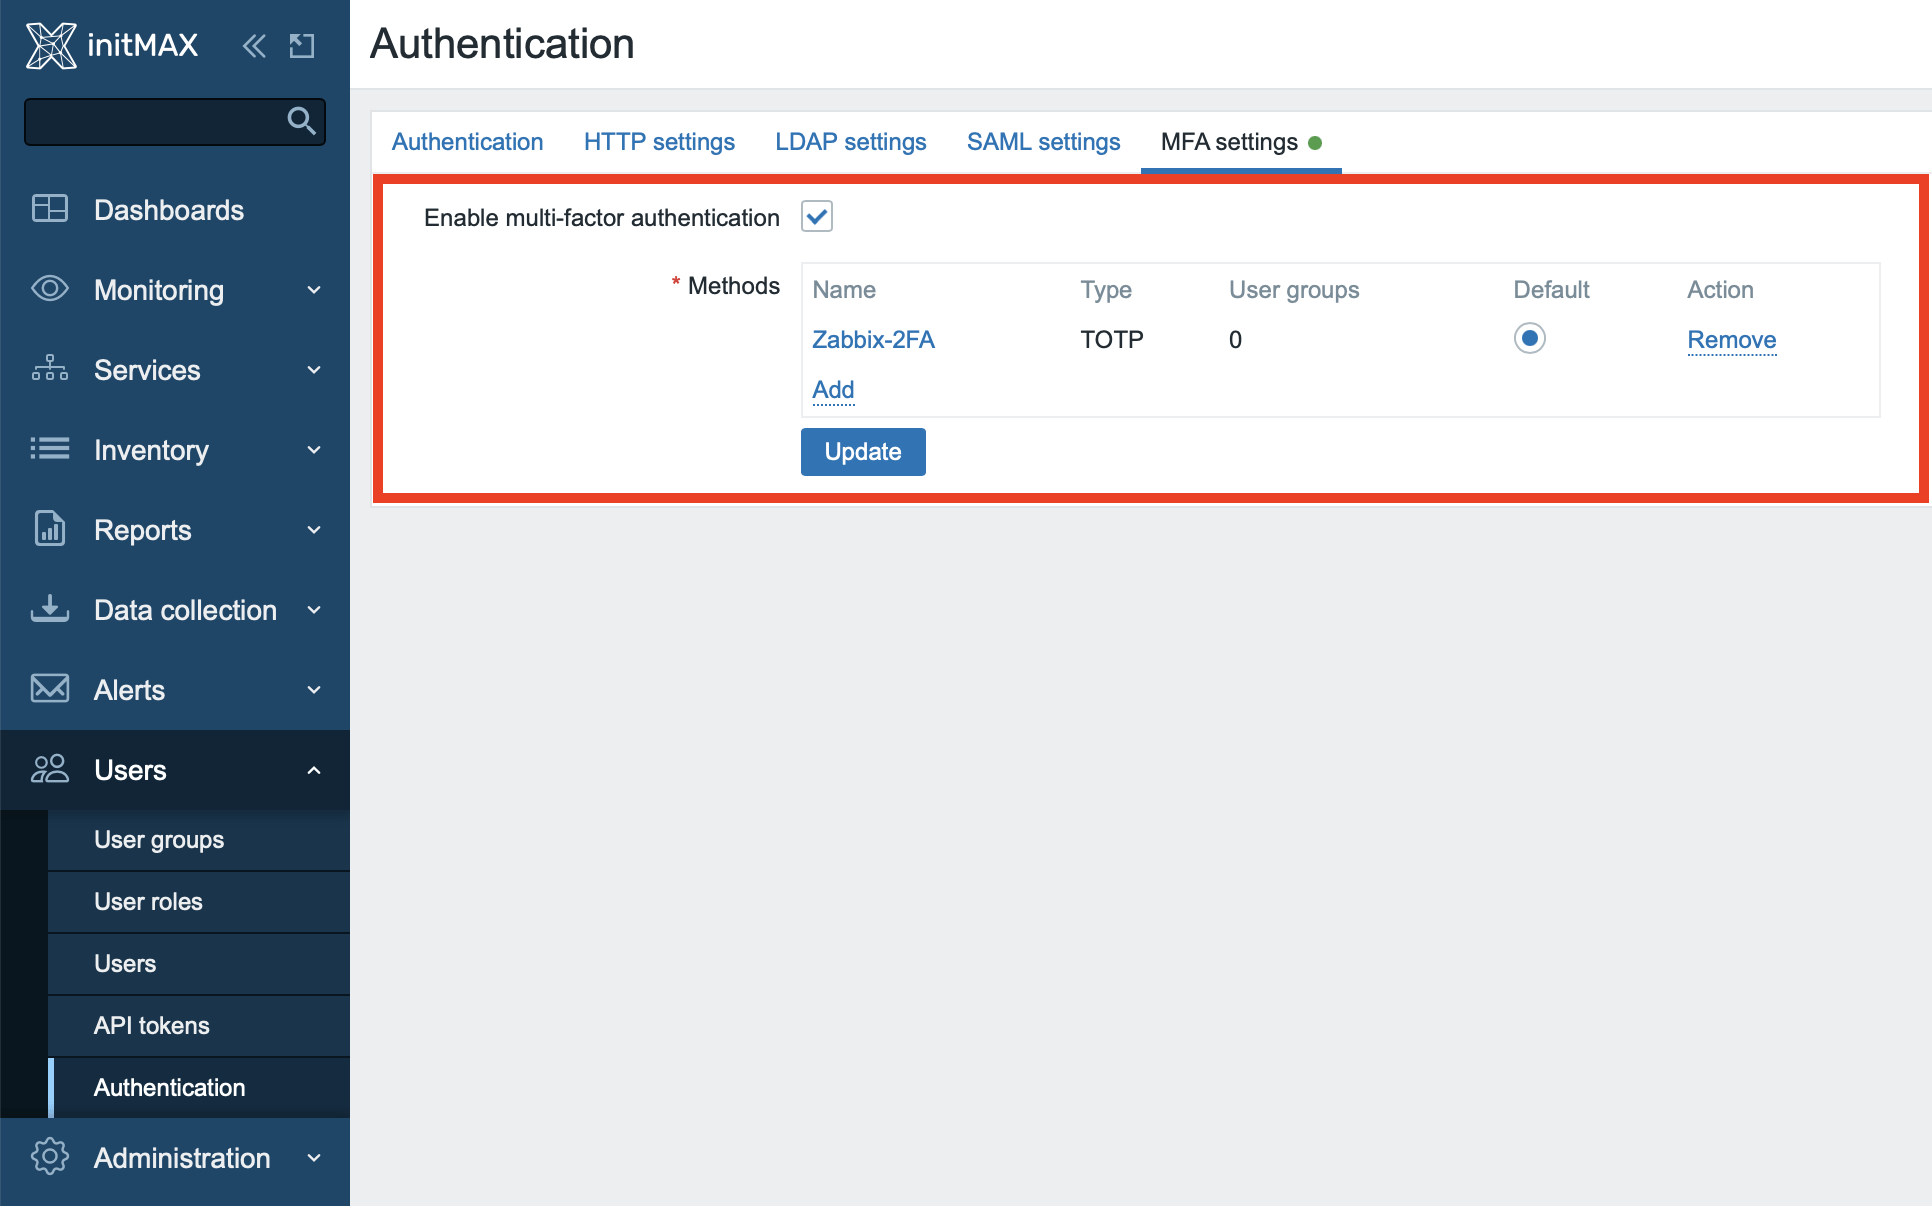
The next step is to set up the general multi-factor authentication. This configuration option can be found in the Zabbix web interface in the Users -> Authentication -> MFA settings section.
Here you need to enable multi-factor authentication and click the Add button to add our first authentication method. As you can see, you can use different settings in Zabbix for different user groups.
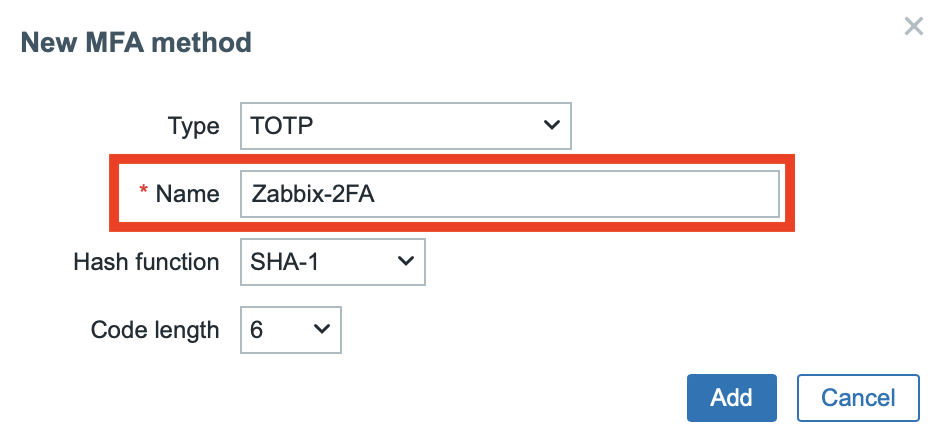
The choice of name when creating your new MFA method will later act as an identifier in the mobile application which will generate one-time passwords.
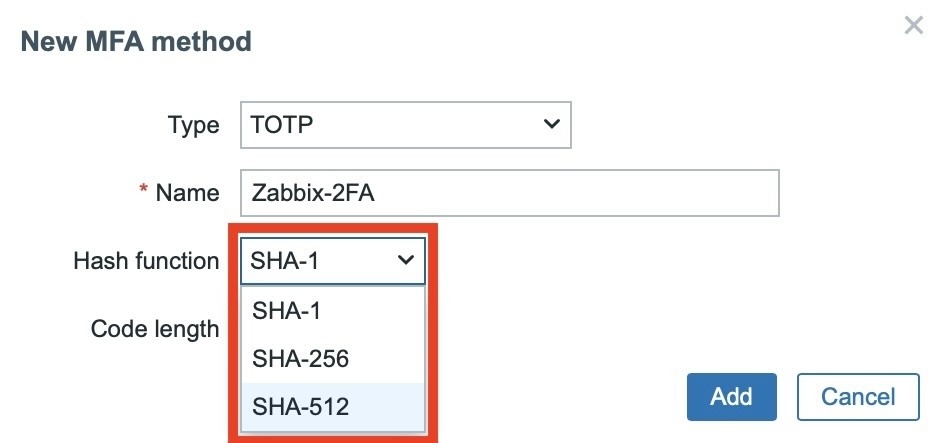
Choose the hash function that will be used to generate one-time passwords. If you don’t need to use (now deprecated) SHA-1 for compatibility reasons, then avoid this option. For the purposes of this example, we’ve chosen the strongest available hash function SHA-512.
In the Code Length drop-down menu, choose how long the generated one-time code will be. You can choose either a 6-digit or 8-digit code. Choose the latter. Save the selected settings using the Add button.
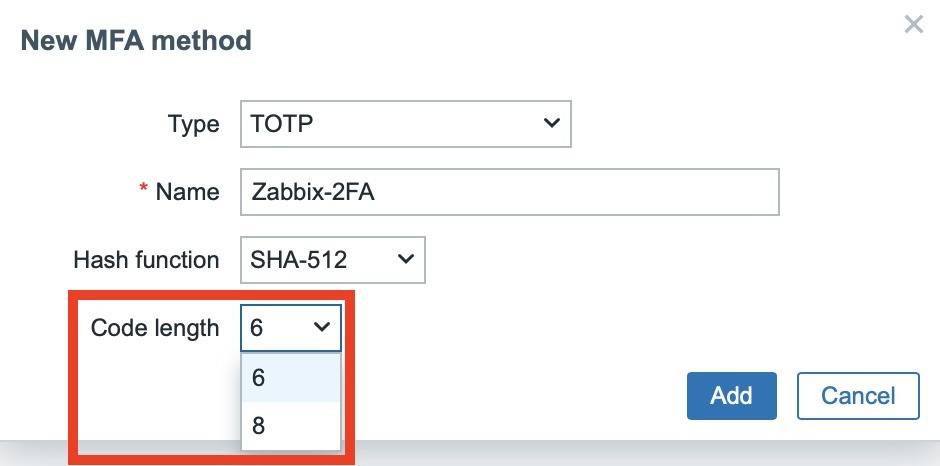
After saving the settings, verify that the configuration has been saved and is active, and don’t forget to update the MFA settings using the Update button.
Applying settings to a user group
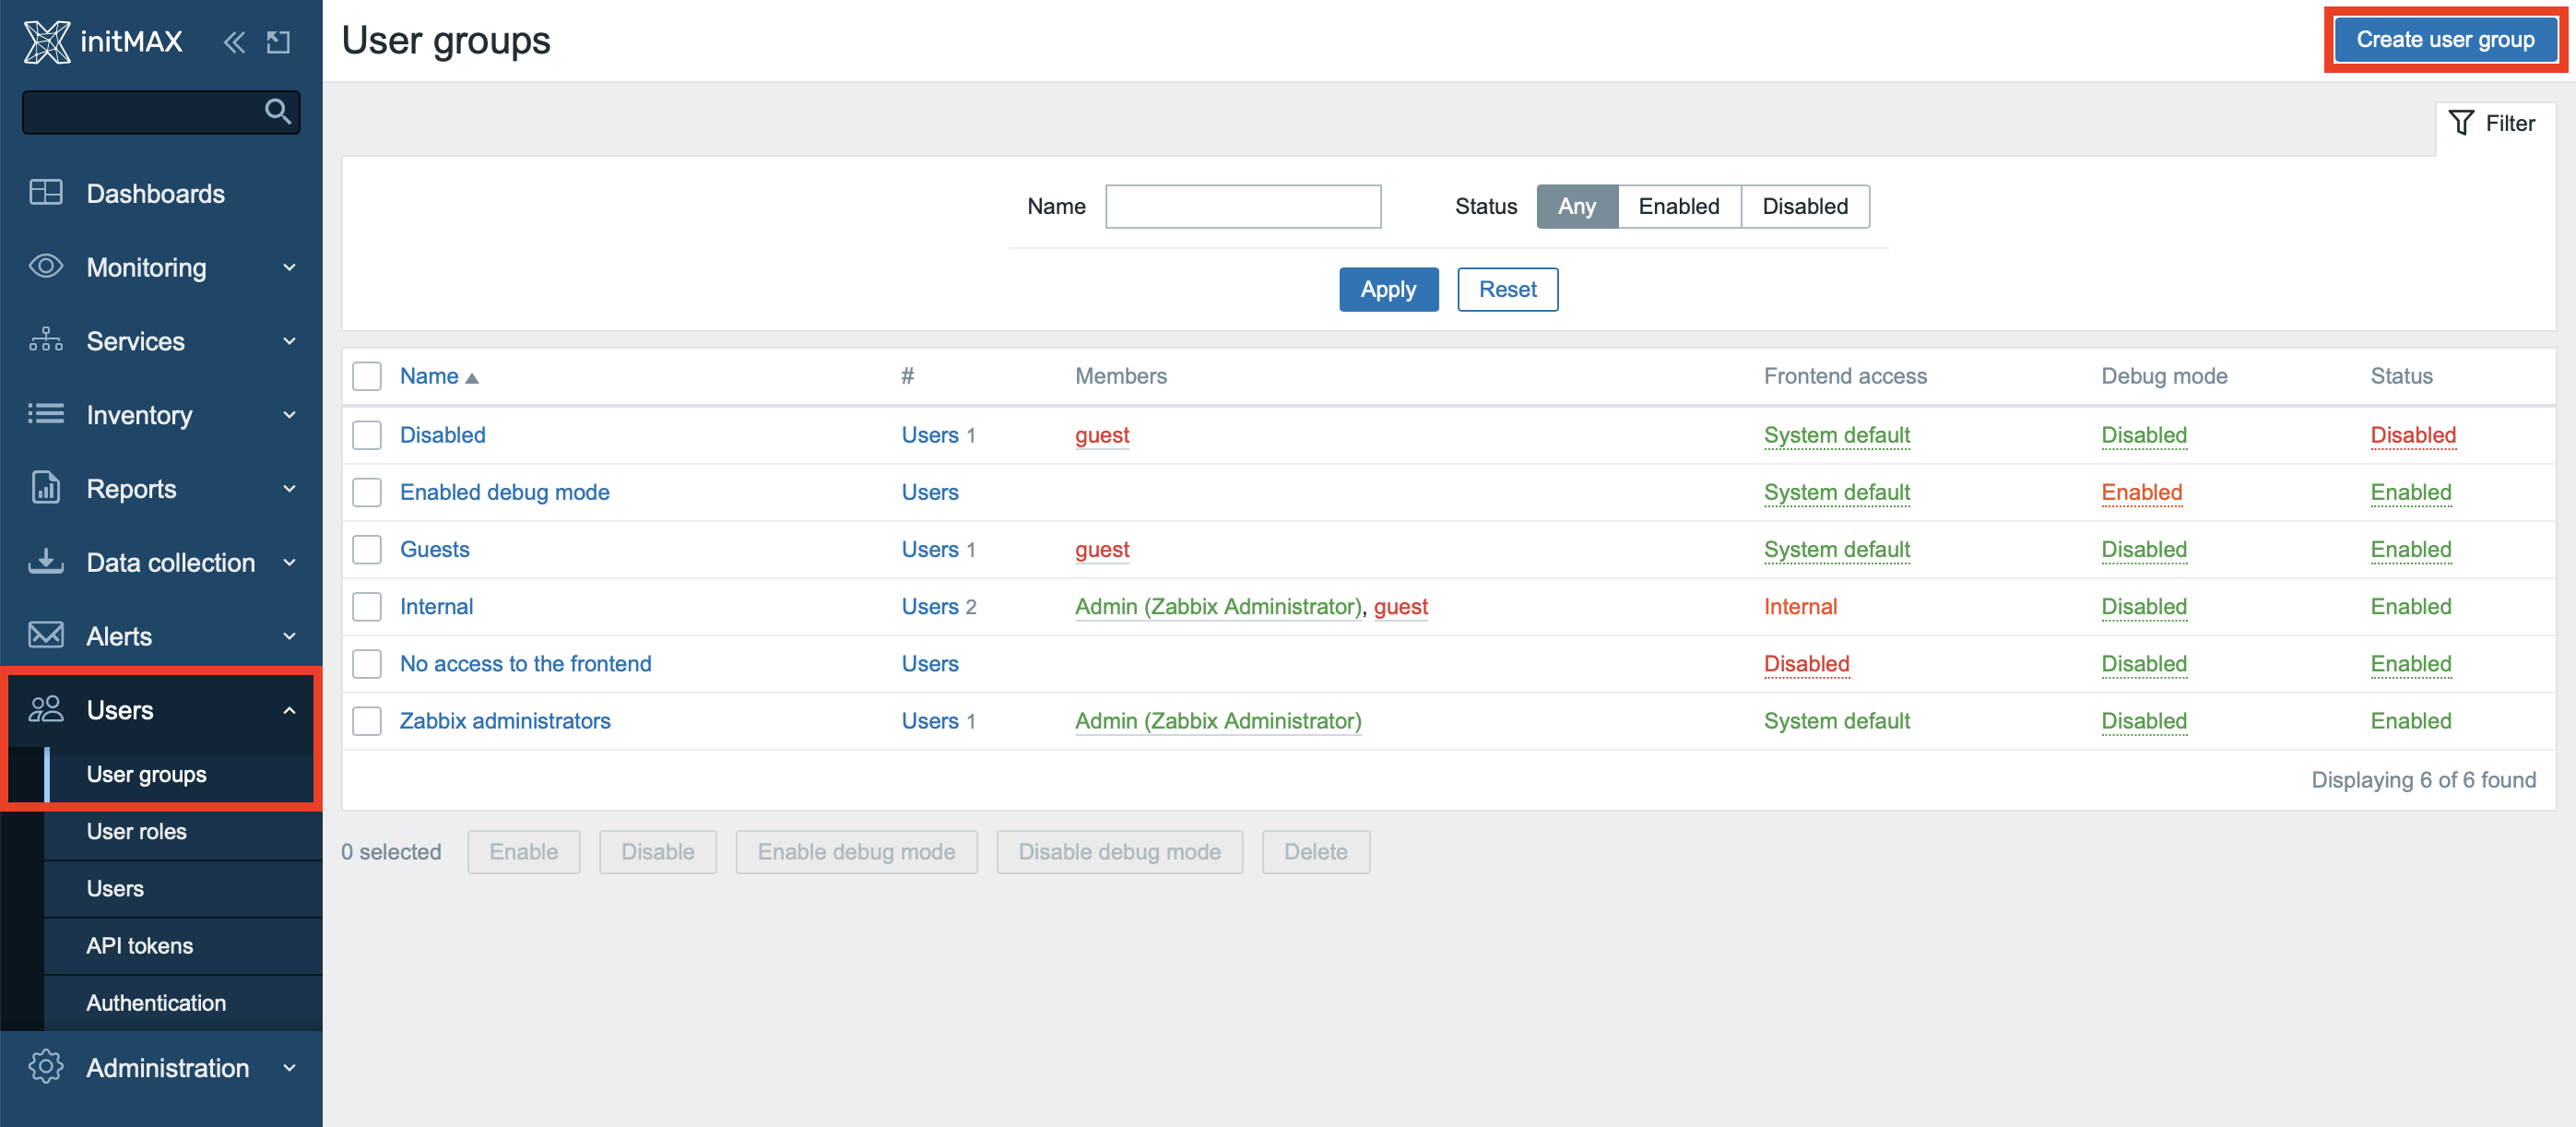
To set up two-factor authentication for a user group, you of course have the option of using an already existing group, but in this scenario we will create a new one. Create a new group in the section Users -> User groups -> Create user group.
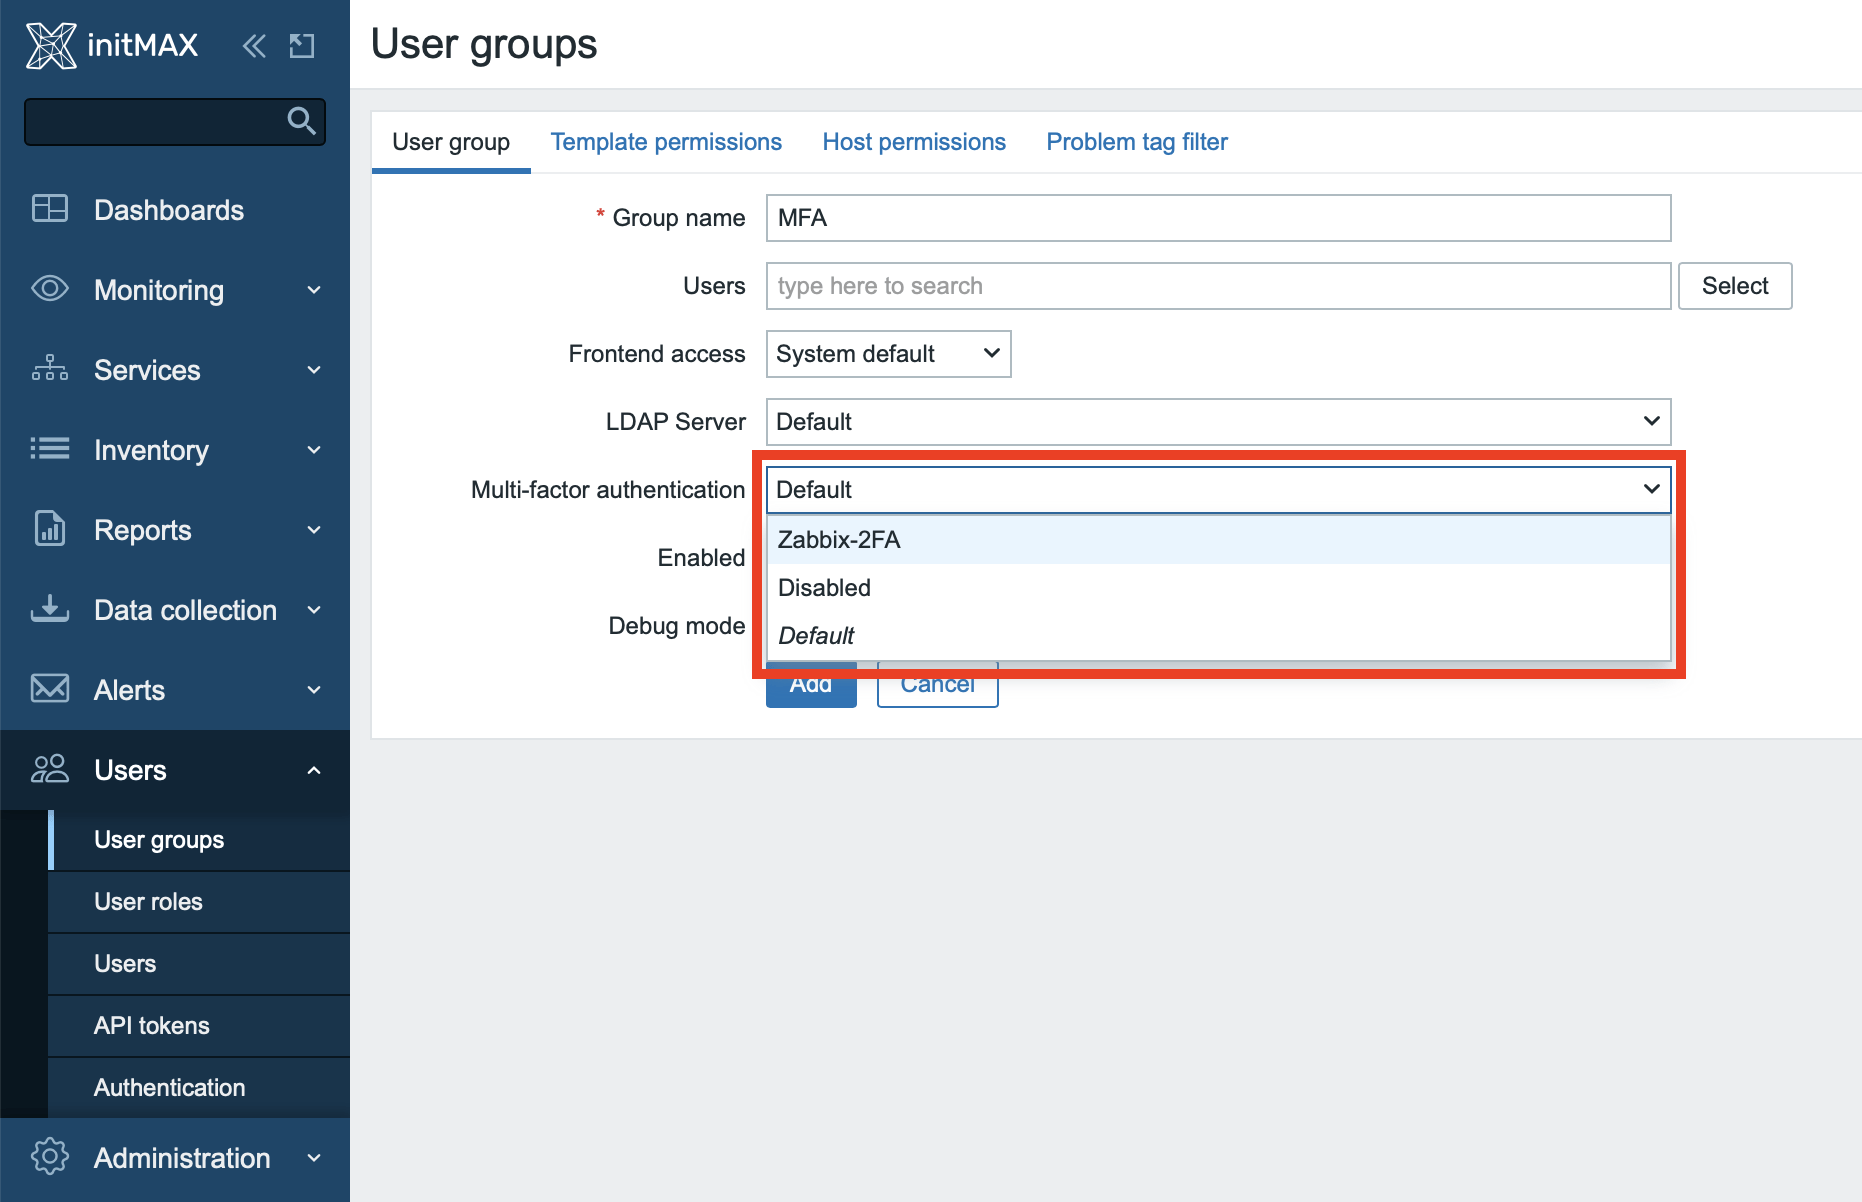
Name the group appropriately and in the Multi-factor authentication section choose your previously created MFA setting, in this case called “Zabbix-2FA”.
Assign users to a group
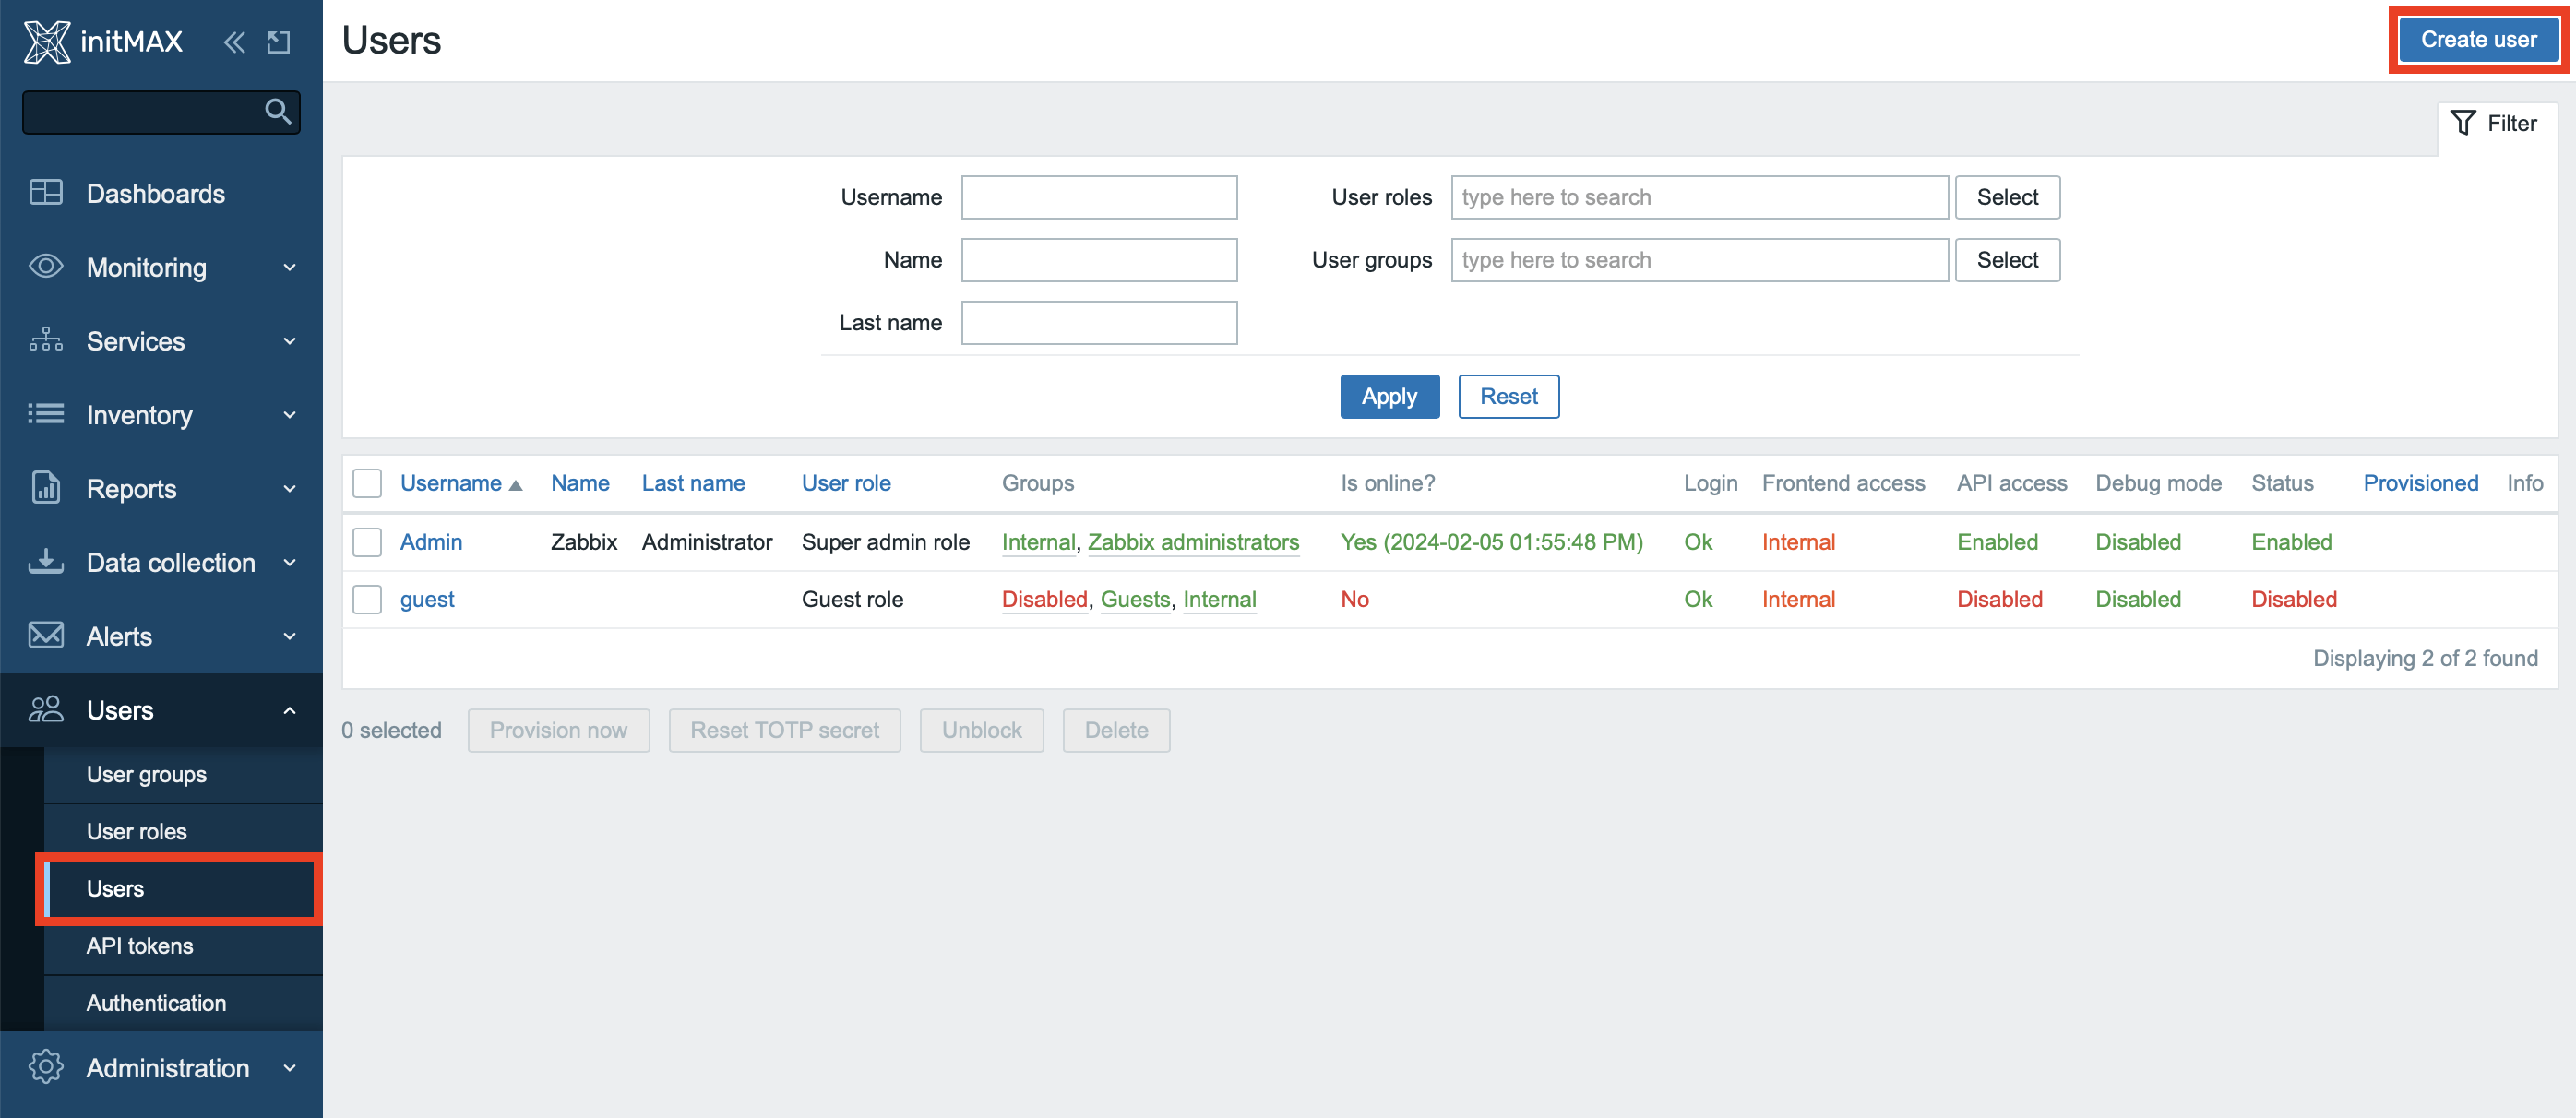
In this scenario, we will create a brand new user for multi-factor authentication. In practice, however, you will most likely apply this setting to existing users in the same way. Create new user by clicking on a button Create user in section Users -> Users.
Assign the previously created group to this user.
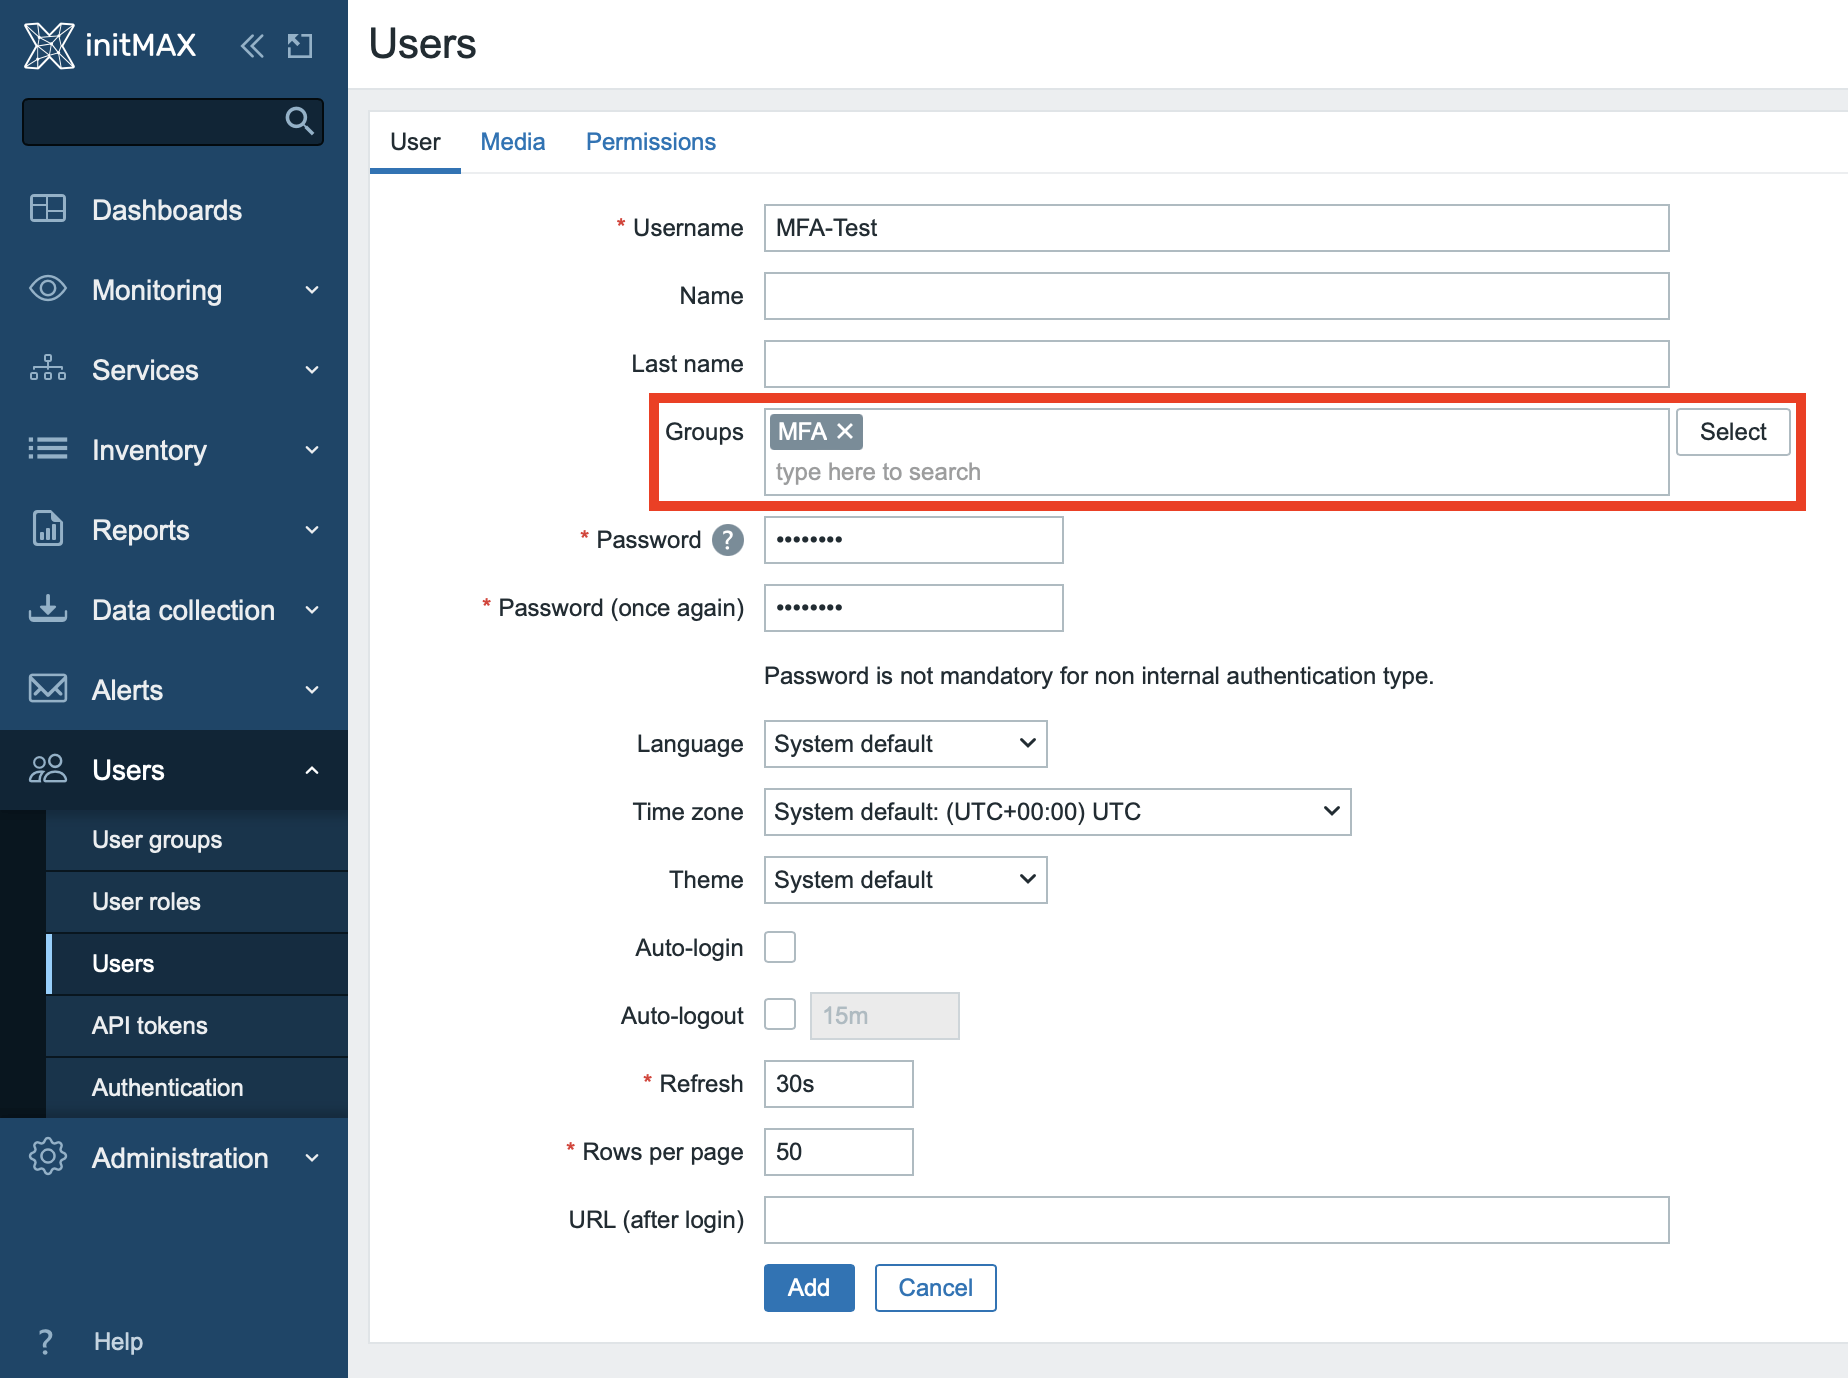
For testing purposes, set permissions of this user to the “Super admin role”, and finish the setup by clicking on the the Add button.

Check that the user has been created correctly and is indeed enabled.

At this point, the configuration is already complete and you can proceed to test the entire solution.
Testing the setup
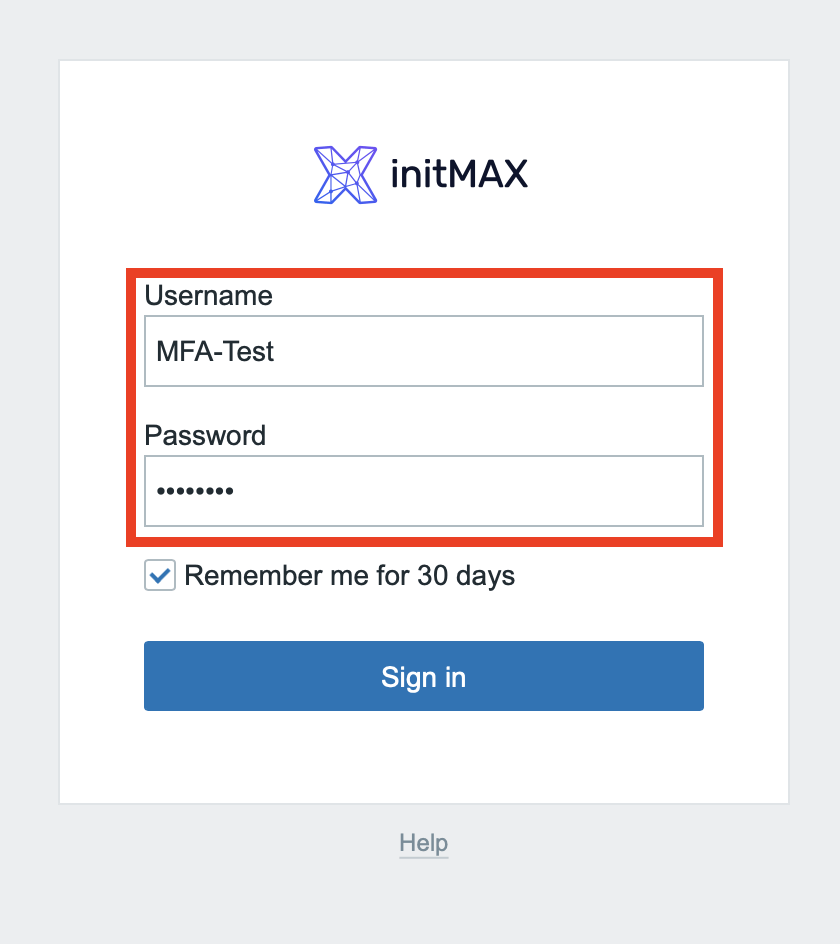
Try to log in to the Zabbix using the newly created user’s logon credentials.
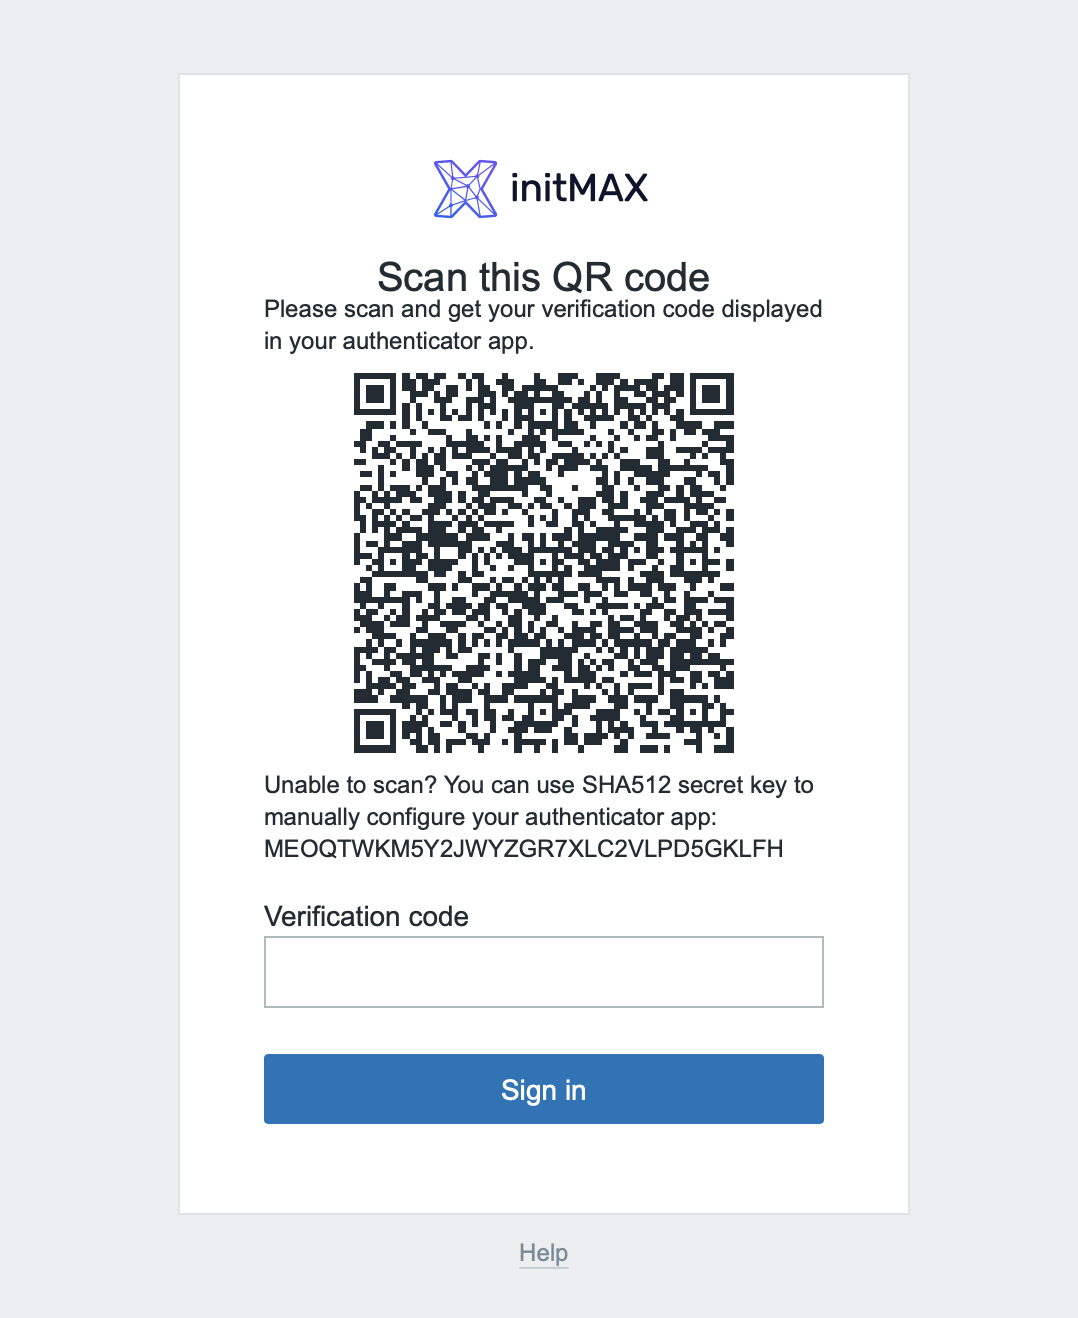
After entering your username and password, a new step in logon process is shown. A request to scan a QR code using a smartphone authentication application.
Installation and configuration of the smart phone application
To enable MFA, you need a smart phone authentication application. This can be, for example, Microsoft Authenticator, Google Authenticator, or some other one.
Google Authenticator download links for both Android and IOS can be found here:
Android – Google Authenticator
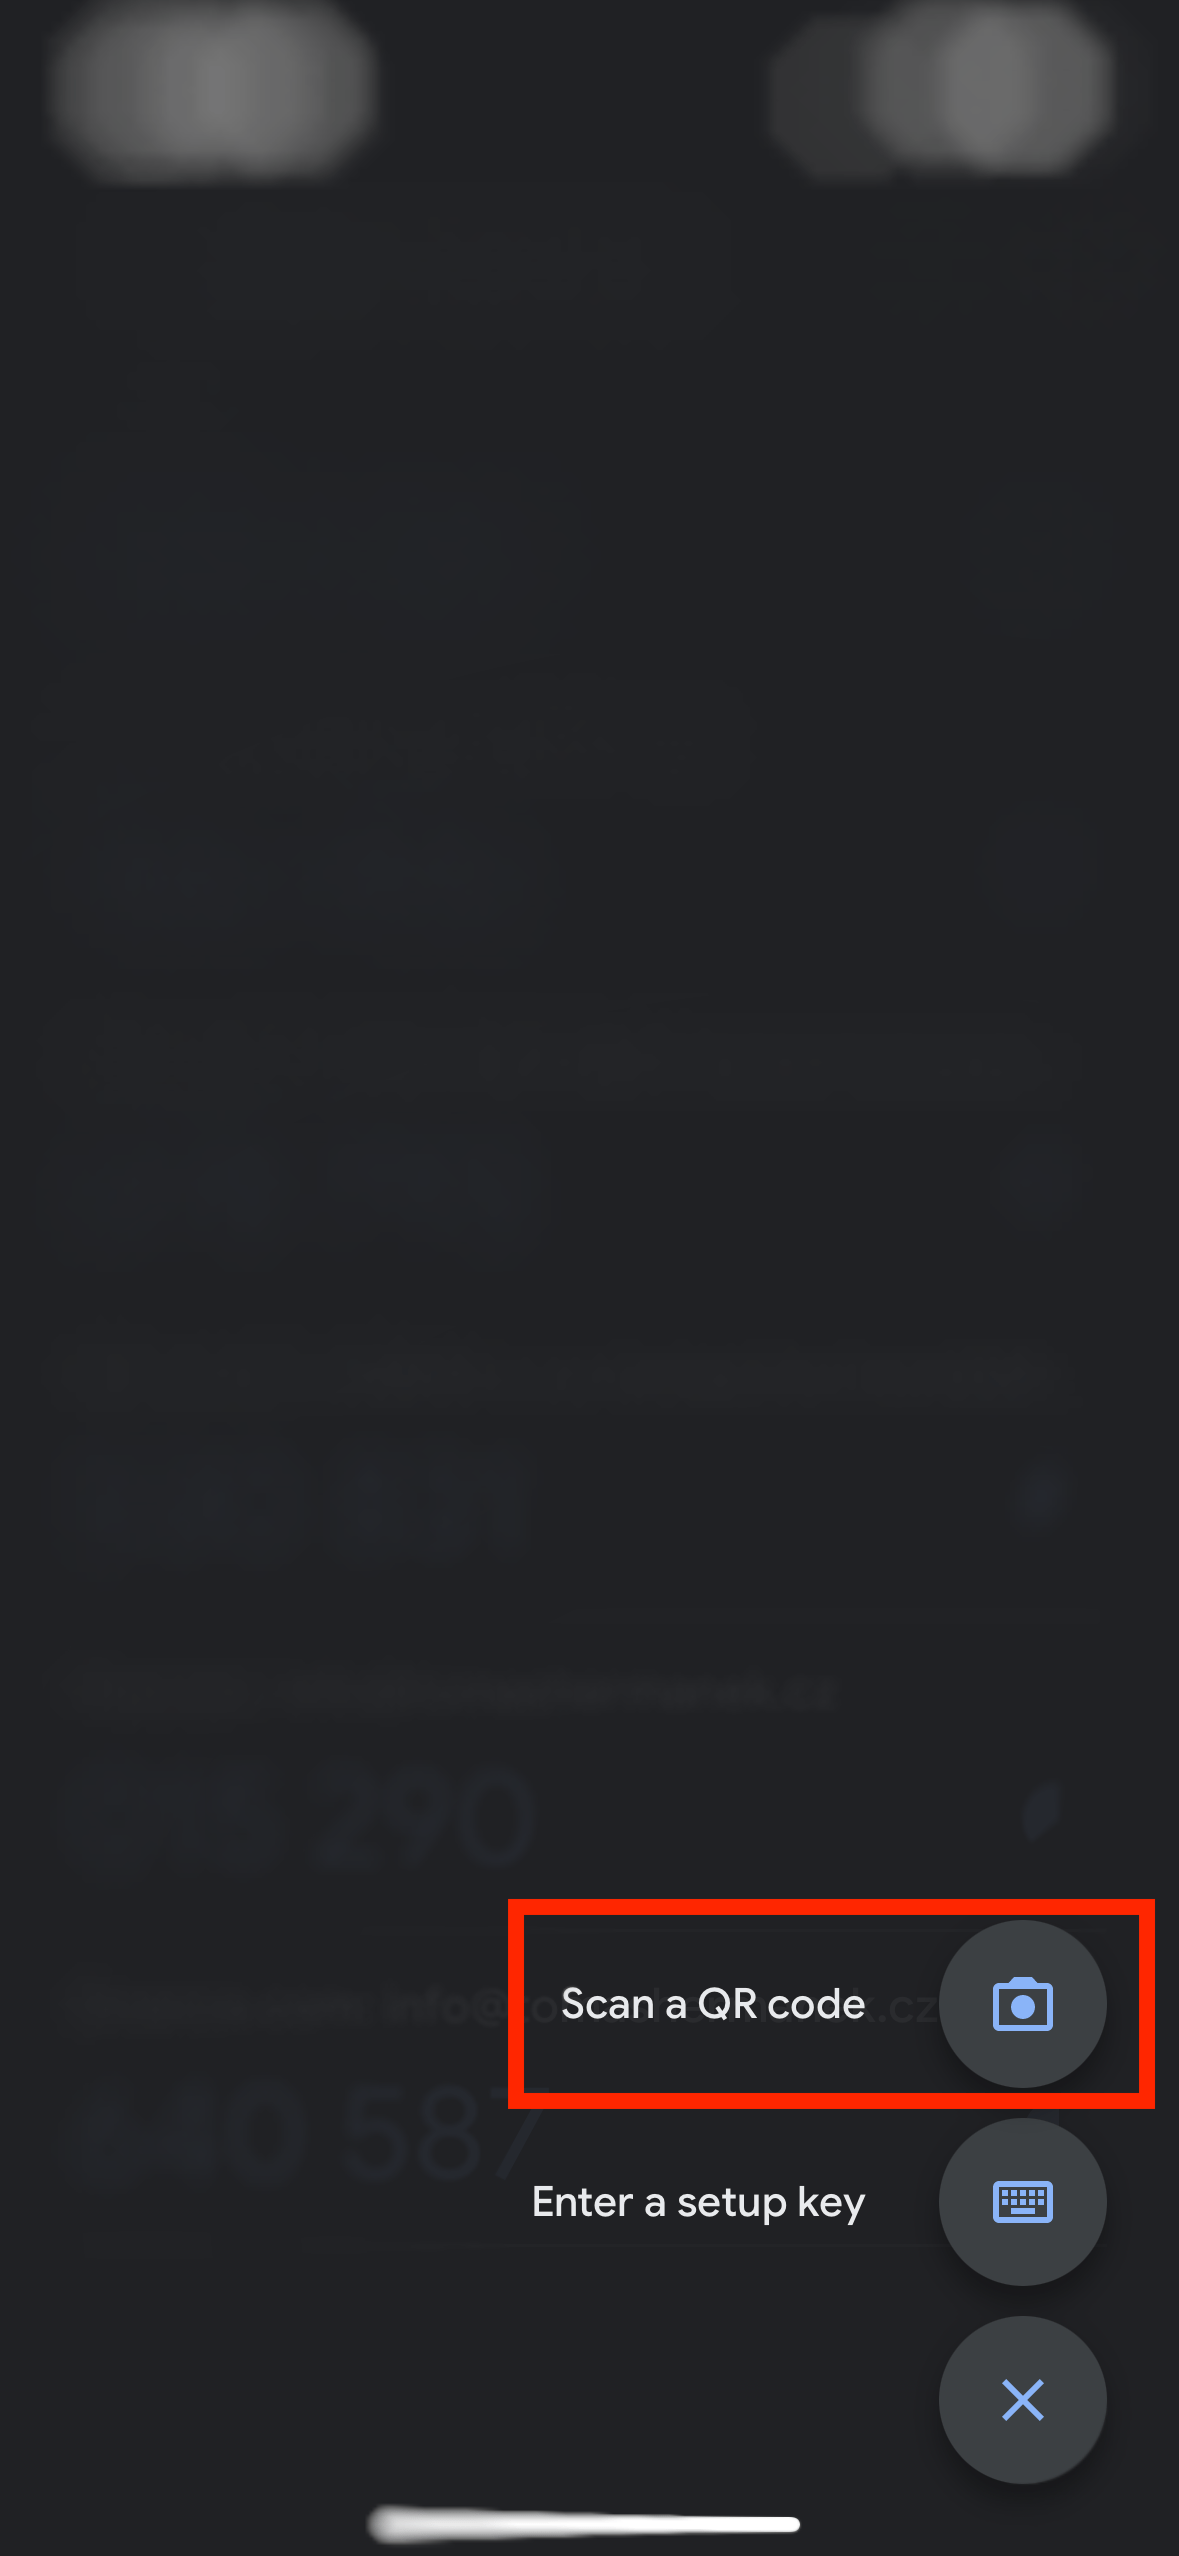
After installing the application on your smartphone, open it up. In here choose to add a new source using the plus button in the lower right corner.
Select “Scan a QR code” in the pop-up menu, this will open up the camera app. Take a picture of the QR code displayed when you try to log in to Zabbix.
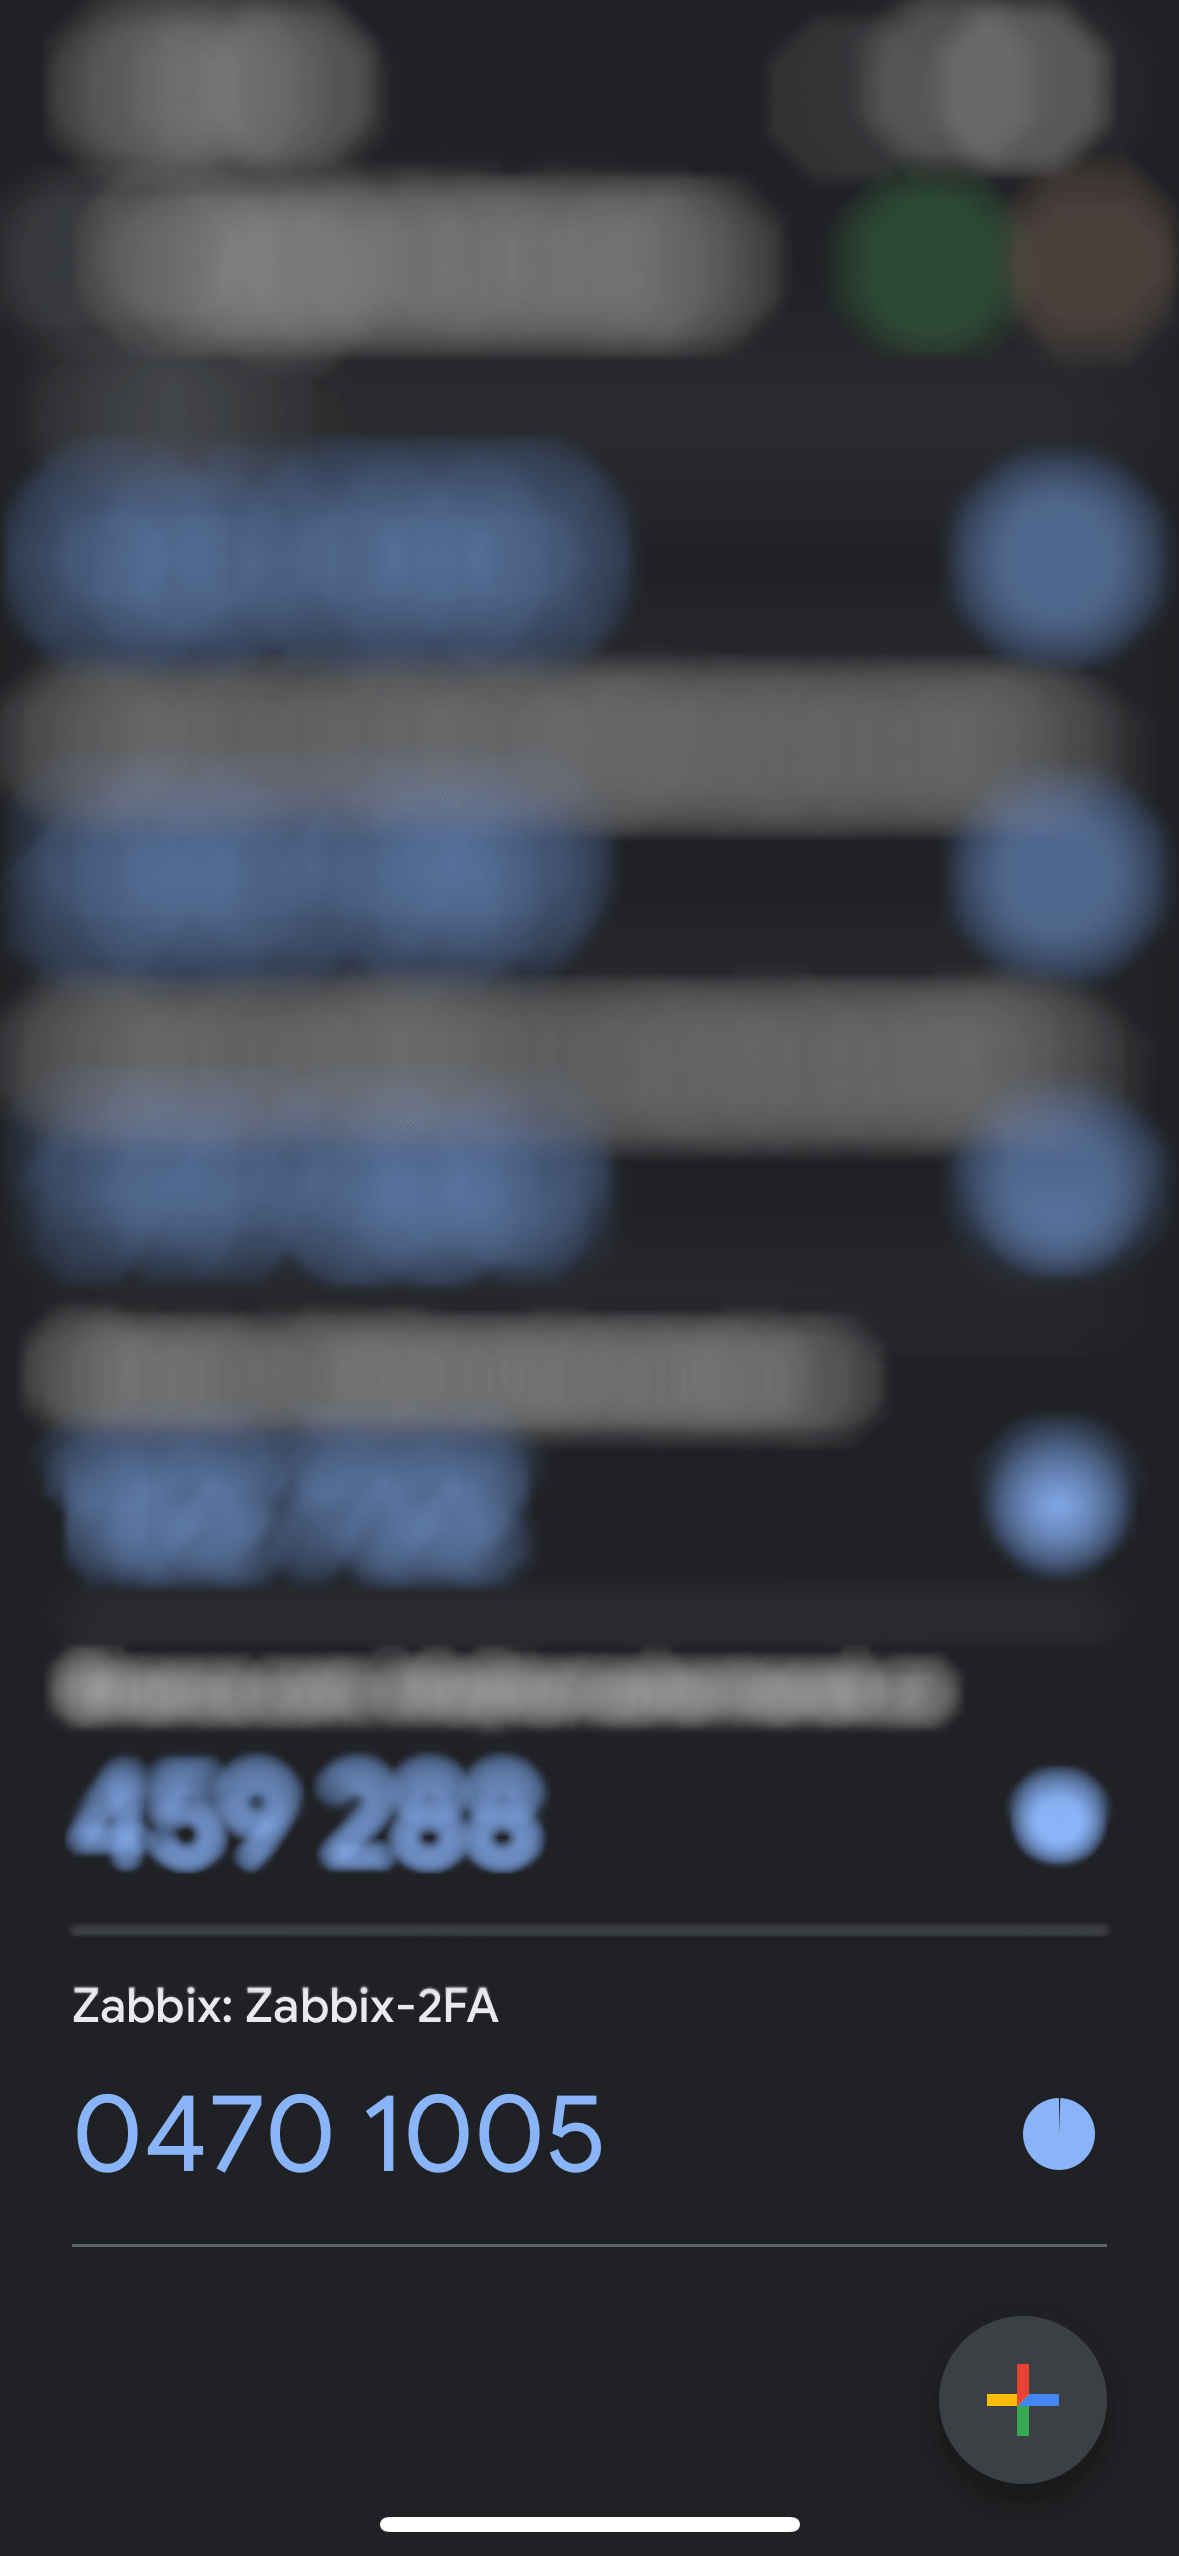
After scanning the QR code, you can see the application and the name of the MFA service. These are the previously configured values, including the length of the generated code to 8 digits.
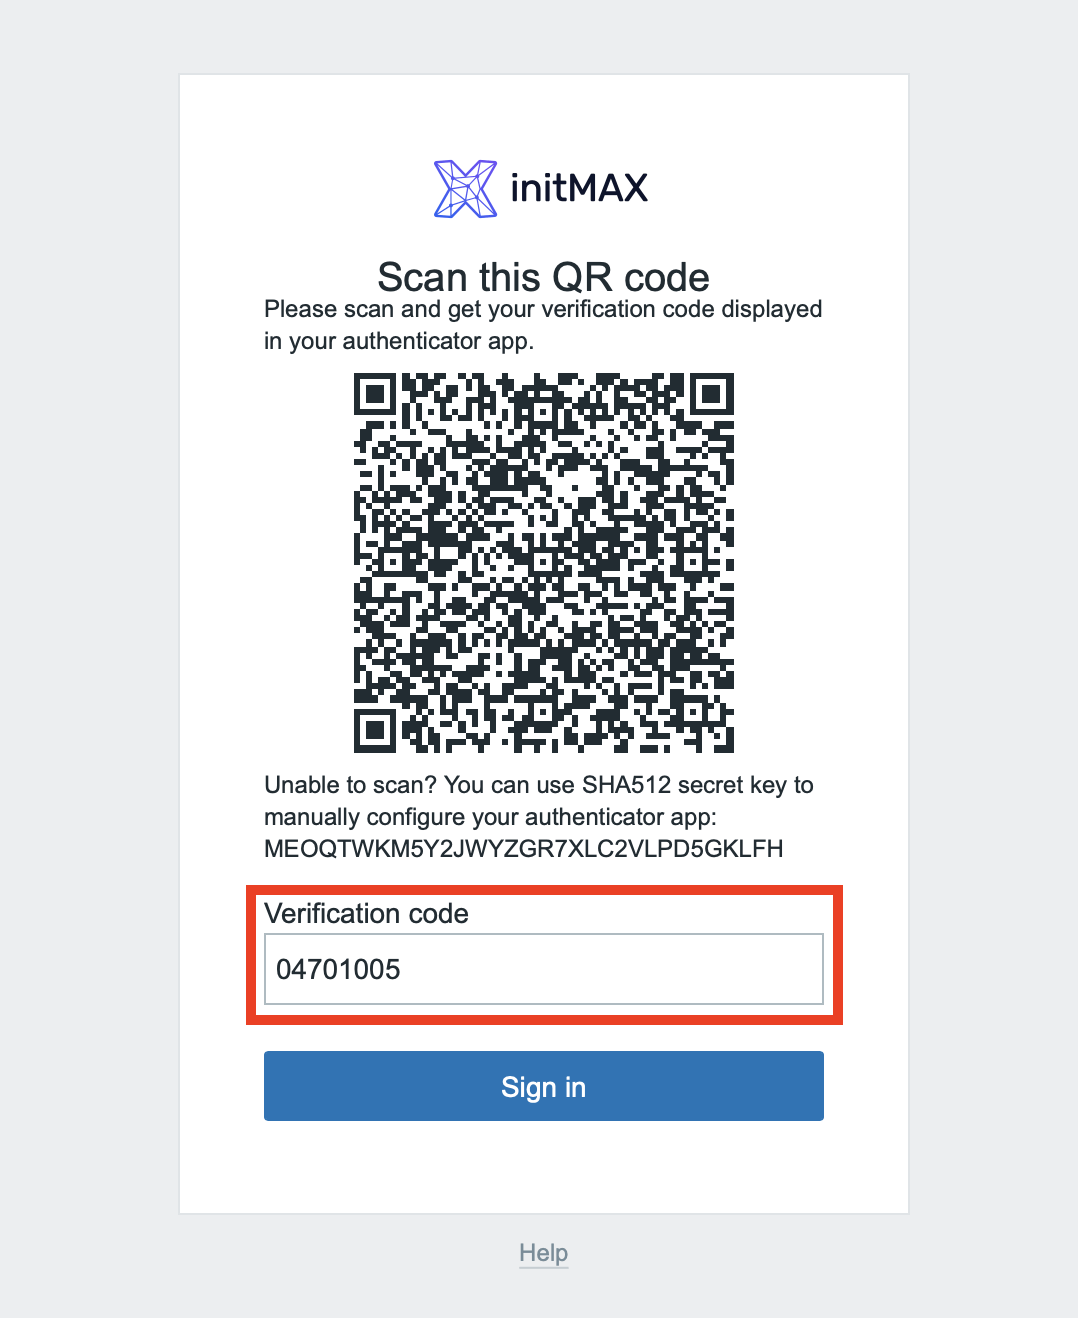
The last step is to type in the generated one-time password into the verification form in Zabbix and sign in.
You have now set up your smart phone app for a multi-factor authentication for Zabbix.
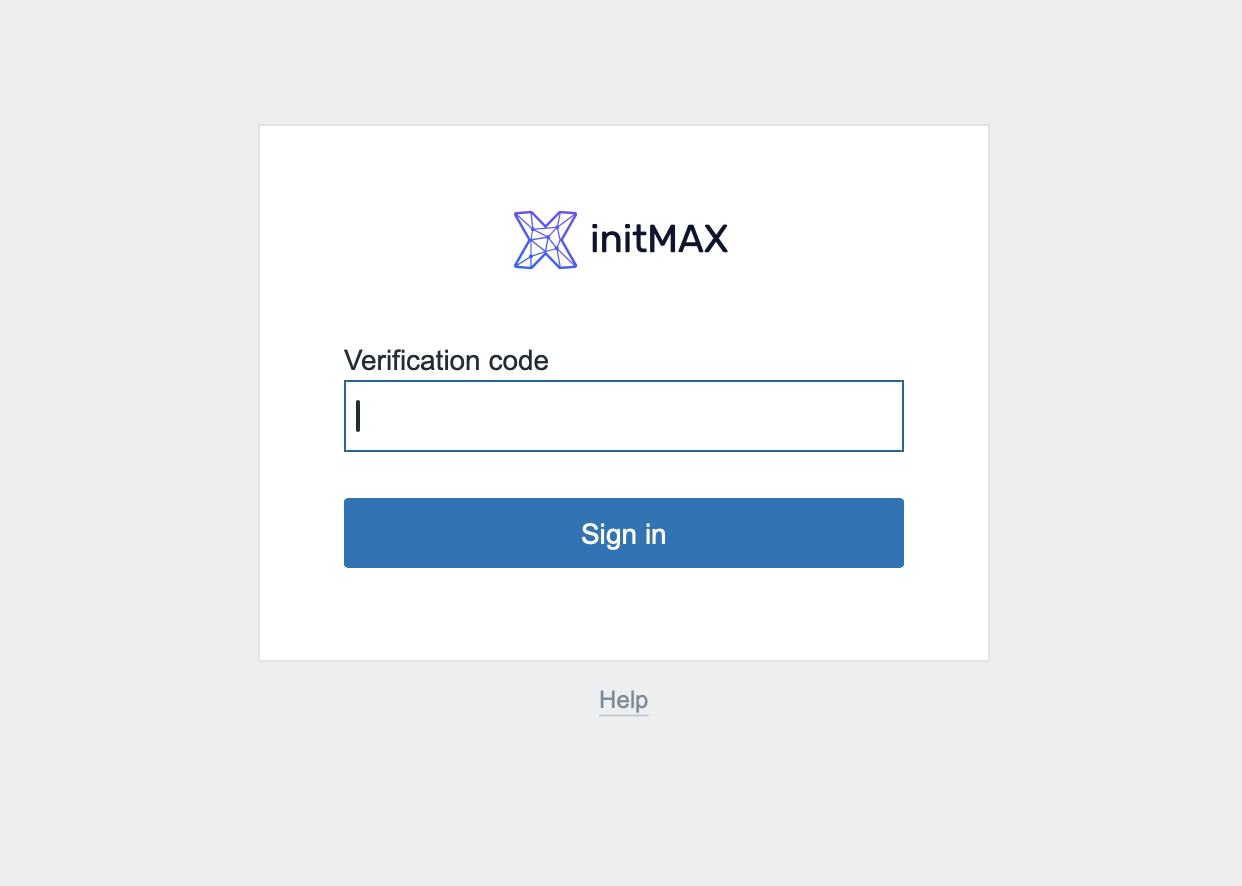
Each time this particular user logs in, it will no longer be necessary to scan the QR code again. Zabbix will only prompt you to enter a one-time password generated by the user’s smartphone authentication application.
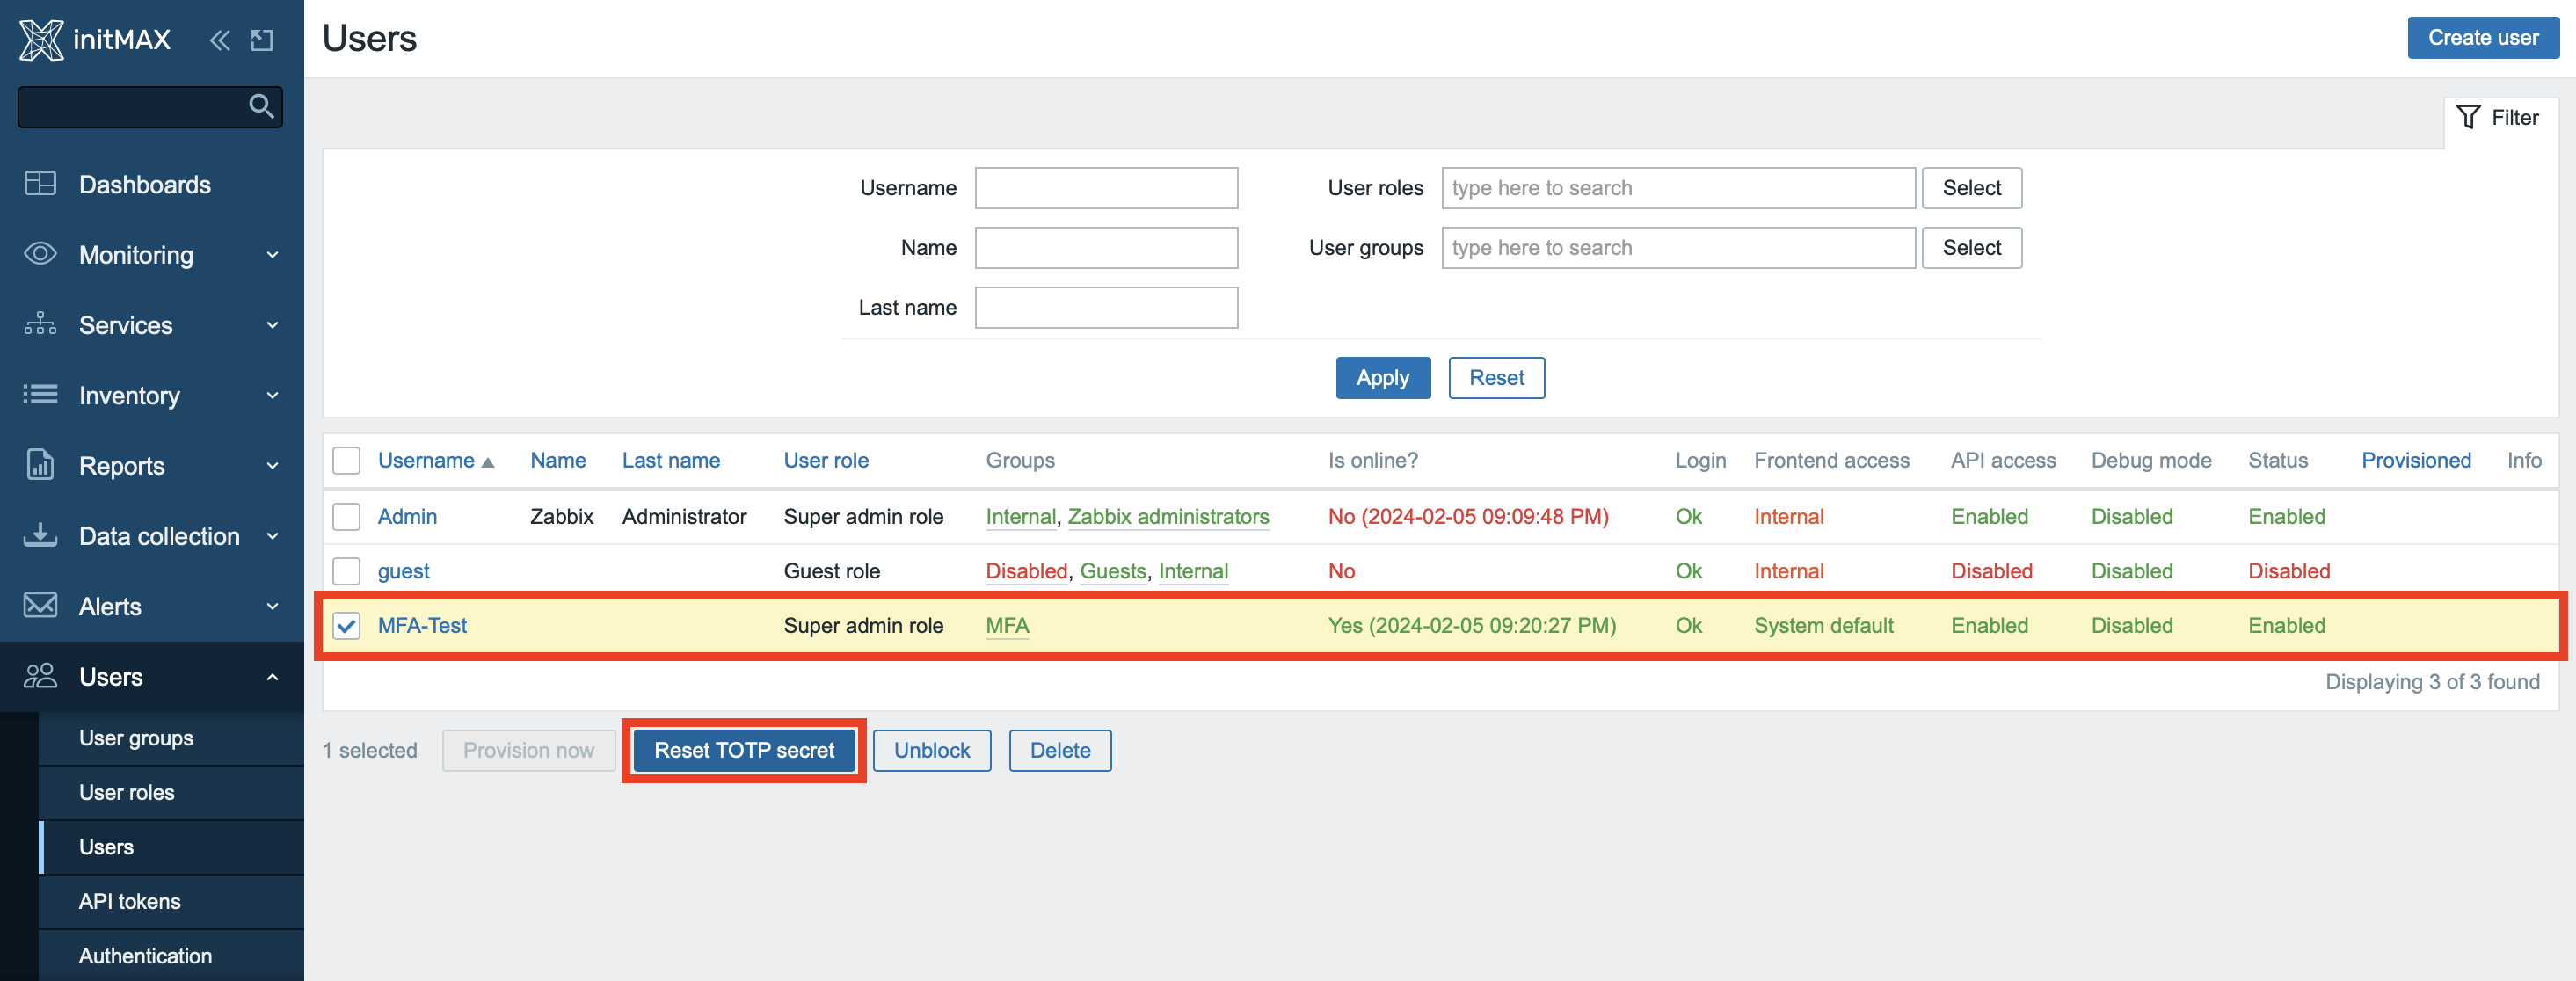
TOTP token reset
Every user with activated two-factor authentication has the option to ask the Zabbix Super administrator to reset their TOTP token.
It can be done for the selected user account in the Users -> Users section using the Reset TOTP secret button.
This option is extremely useful, for example, in a case the smartphone that is tied to a user account is lost. This is because this token is stored on it.
And that’s it! You have now learned how to secure your Zabbix with two-factor authentication. You now also know how to reset the authorization token for the TOTP if necessary.
Give us a Like, share us, or follow us 😍
So you don’t miss anything: