Let’s see how to install and configure the OpenSource security platform Wazuh, which integrates SIEM and XDR into a unique solution.

Wazuh indexer
Preparation tasks
Let’s start by enabling all the ports needed to run Wazuh on the target server. Both those related to the syslog server or agent registration and communication, as well as the web interface port.
Use the commands below to add all these ports to firewall exceptions:
firewall-cmd --permanent --add-port={514,443,1514,1515,1516,55000}/tcp
firewall-cmd --permanent --add-port={514,1514}/udp
firewall-cmd --reload
At this moment, the basic requirements for running the Wazuh indexer are met.
Next download the tool supplied directly by Wazuh. This tool will generate all necessary certificates on the server, which are then used for encrypted communication.
curl -sO https://packages.wazuh.com/4.4/wazuh-certs-tool.shAlso download the configuration file config.yml, which will serve as a template for creating individual certificates.
curl -sO https://packages.wazuh.com/4.4/config.ymlCertificates and configuration
Open this configuration file and fill in the necessary values according to the requirements of your infrastructure.
nano ./config.ymlFor purposes of this demonstration, we use the so-called all-in-one installation. Therefore all Wazuh components are installed on one server.
The content of this example configuration file is in our case following:
nodes:
  indexer:
    - name: wazuh-demo
      ip: 192.168.91.15

  server:
    - name: wazuh-demo
      ip: 192.168.91.15

  dashboard:
    - name: wazuh-demo
      ip: 192.168.91.15
Save the file and run the downloaded script that will generate certificates according to this configuration.
bash ./wazuh-certs-tool.sh -AGenerated certificates will be automatically saved in ./wazuh-certificates folder.
You will of course need these certificates to continue the installation process. So for portability between (possible) individual nodes, let’s compress them into an archive:
tar -cvf ./wazuh-certificates.tar -C ./wazuh-certificates/ .In the next step, verify that you have the coreutils package installed and install it, if necessary.
yum install coreutilsNow import the RPM key for the official Wazuh repository:
rpm --import https://packages.wazuh.com/key/GPG-KEY-WAZUHNext, manually create a repository file in the path /etc/yum.repos.d/wazuh.repo and save it with the following content:
[wazuh]
name=EL-$releasever - Wazuh
baseurl=https://packages.wazuh.com/4.x/yum/
gpgkey=https://packages.wazuh.com/key/GPG-KEY-WAZUH
gpgcheck=1
enabled=1
protect=1
Installation
So now you can proceed to install the Wazuh indexer package itself.
yum install wazuh-indexerAfter the installation of the wazuh-indexer, open the configuration file /etc/wazuh-indexer/opensearch.yml and fill in the information about the layout of our nodes in the Wazuh cluster.
We are using the all-in-one installation here. So we will take this into account when setting up the following configuration directives.
You can leave the other settings untouched, so save the file and close it.
network.host: "192.168.91.15"
node.name: "wazuh-demo"
cluster.initial_master_nodes:
  "wazuh-demo"
cluster.name: "wazuh-custer"
Now you need to deploy your generated certificates on every single node in the cluster. Yet, in this case we only have one.
Create a folder in the standard path where the certificates will be located.
mkdir /etc/wazuh-indexer/certsAnd to this location, extract the necessary certificates under the correct names, from the archive in which they are located.
tar -xf ./wazuh-certificates.tar -C /etc/wazuh-indexer/certs/ ./indexer.pem ./indexer-key.pem ./admin.pem ./admin-key.pem ./root-ca.pemSet the correct ownership and permissions to the certificates, and also to the folder in which certificates are stored.
chown -R wazuh-indexer:wazuh-indexer /etc/wazuh-indexer/certs
chmod 500 /etc/wazuh-indexer/certs
chmod 400 /etc/wazuh-indexer/certs/*
To initialize the Wazuh cluster with new certificates, the system service must already be running.
Start the service then and set it to start automatically after system startup.
systemctl daemon-reload
systemctl enable wazuh-indexer --now
In the next step, run the supplied script. This script initializes the cluster using the new certificates, i.e. adds the basic configuration files and starts the cluster.
/usr/share/wazuh-indexer/bin/indexer-security-init.shIn the last step, test the functionality of the Indexer.
First check, that the indexer API responds correctly:
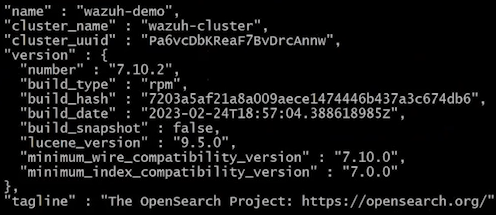
curl -k -u admin:admin https://wazuh-demo.lab.initmax.cz:9200The correct result with an API response, which returns basic information about the cluster looks similar to this:
With the following command you can display a list of individual nodes in the cluster (in this case there’s only one):
curl -k -u admin:admin https://wazuh-demo.lab.initmax.cz:9200/_cat/nodes?vIf Wazuh indexer API responds correctly, then you have this part done for now. You can proceed to the installation of Wazuh manager.
Wazuh manager (server)
Since you have already added the repositories in previous steps, just download and install the appropriate package:
yum -y install wazuh-managerYou can now start the service and set it to start automatically on system startup.
systemctl daemon-reload
systemctl enable wazuh-manager --now
Verify that the service started successfully.
systemctl status wazuh-managerFilebeat
Wazuh manager processes parsed logs based on individual rules and then saves them to a file.
The data is retried from these files by filebeat, so you need to install it as well.
yum -y install filebeatDownload the basic configuration file for filebeat from the official Wazuh repository:
curl -so /etc/filebeat/filebeat.yml https://packages.wazuh.com/4.4/tpl/wazuh/filebeat/filebeat.ymlIn this configuration file, in the path /etc/filebeat/filebeat.yml, in the output.elasticsearch: section, edit the hosts: subsection to reflect the IP address of the source Indexer.
So in our case like this:
output.elasticsearch:
  hosts: ["192.168.91.15:9200"]
Then create a filebeat keystore:
filebeat keystore createTo the created filebeat keystore add the credentials for the admin user.
Attention: This is definitely not a recommended practice from a security point of view and it is used here for demonstration purposes only, as the password you enter is visible in the commands history!
echo admin | filebeat keystore add username --stdin --force
echo admin | filebeat keystore add password --stdin --force
In the next step, download the filebeat basic template from the official Wazuh repository and set the correct permissions to it.
This template serves as a recipe that filebeat sends to the Indexer, and on which the data is subsequently stored and marked so that filebeat can work with it efficiently and Wazuh can further process it.
curl -so /etc/filebeat/wazuh-template.json https://raw.githubusercontent.com/wazuh/wazuh/4.4/extensions/elasticsearch/7.x/wazuh-template.json
chmod go+r /etc/filebeat/wazuh-template.json
Now, download and install Wazuh module for filebeat:
curl -s https://packages.wazuh.com/4.x/filebeat/wazuh-filebeat-0.2.tar.gz | tar -xvz -C /usr/share/filebeat/moduleAs the last step of the filebeat configuration, install the generated certificates again in the correct paths and with the correct permissions:
mkdir /etc/filebeat/certs
tar -xf ./wazuh-certificates.tar -C /etc/filebeat/certs/ ./filebeat.pem ./filebeat-key.pem ./root-ca.pem
chmod 500 /etc/filebeat/certs
chmod 400 /etc/filebeat/certs/*
chown -R root:root /etc/filebeat/certs
At this moment, you can start the service and set it to start automatically after system startup.
systemctl daemon-reload
systemctl enable filebeat --now
After successfully starting the filebeat service, we can test the basic functionality with the following command:
filebeat test outputIf everything is fine, then the correct output of this command looks like this (for this scenario):
elasticsearch: https://192.168.91.15:9200...
  parse url... OK
  connection...
    parse host... OK
    dns lookup... OK
    adresses: 192.168.91.15
    dial up... OK
  TLS...
    security: server's certificate chain verification is enabled
    handshake... OK
    TLS version: TLSv1.3
    dial up... OK
  talk to server... OK
  version: 7.10.2
These are all the steps needed for successful installation and basic configuration of Wazuh manager.
You can now focus on installing Wazuh dashboard.
Wazuh dashboard
First, install the necessary libraries.
yum install libcapDue to our sample “all-in-one” installation, you already have the repositories added from previous steps.
So just download and install the correct package:
yum -y install wazuh-dashboardAfter the installation is complete, edit the configuration file /etc/wazuh-dashboard/opensearch_dashboards.yml so that it reflects our cluster layout.
For our sample implementation, only values of these two configuration options will need to be changed:
server.host: 192.168.91.15
opensearch.hosts: https://192.168.91.15:9200
After saving the configuration file, proceed again to deployment of your generated certificates. Do not forget to set the correct permissions and ownership.
mkdir /etc/wazuh-dashboard/certs
tar -xf ./wazuh-certificates.tar -C /etc/wazuh-dashboard/certs/ ./dashboard.pem ./dashboard-key.pem ./root-ca.pem
chmod 500 /etc/wazuh-dashboard/certs
chmod 400 /etc/wazuh-dashboard/certs/*
chown -R wazuh-dashboard:wazuh-dashboard /etc/wazuh-dashboard/certs
And all that remains is to start the wazuh-dashboard service and enable the automatic startup.
systemctl daemon-reload
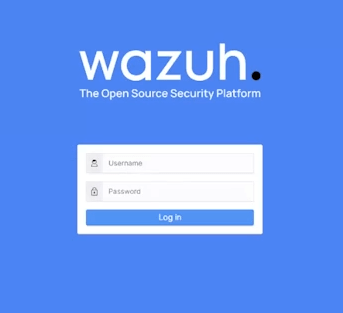
systemctl enable wazuh-dashboard --nowAt this moment, you have all components of Wazuh installed and you can then log into its web interface, in our case at the url https://192.168.91.15/.
Wazuh agents
Password authentication
By default, the Wazuh manager is set to register any agent that attempts to do so.
Which is not entirely advisable for either security or operational reasons. You shall then set Wazuh to require a password for authentication of individual agents.
You can do so even in web interface, in section Management -> Configuration.
Tip: You can also edit this configuration file directly on the Wazuh manager file system, in the path /var/ossec/etc/ossec.conf using your favorite text editor.
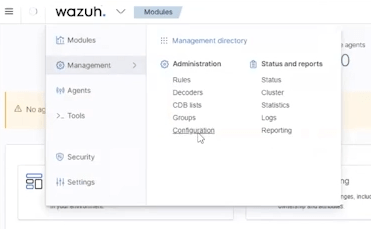
In here click the Edit configuration link.

This link will allow us to manually edit the configuration XML file ossec.conf, which is the Wazuh manager configuration, directly in the web interface.
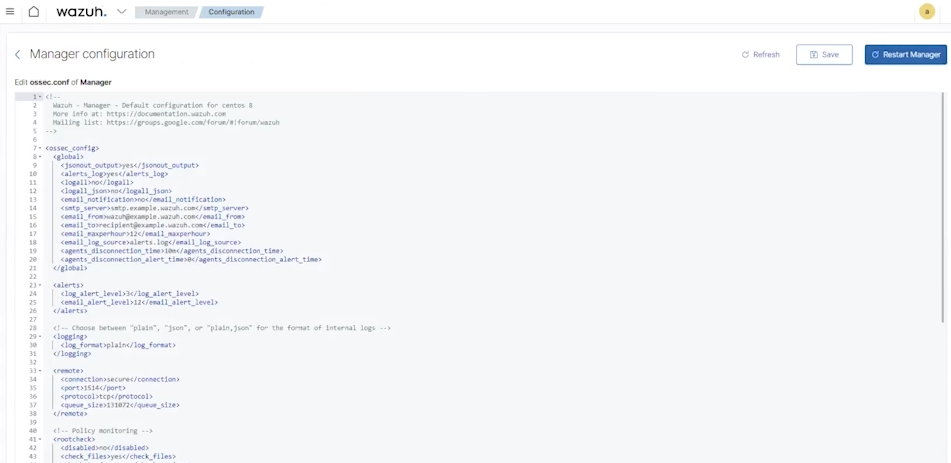
In this configuration file, the <use_password> directive in the <auth> section must be set to yes.

Next, you need to create a file on the server’s filesystem. This file will contain a password that the Manager will verify when registering agents.
So create this file in the path /var/ossec/etc/authd.pass, type in the password to it (on a single line and without any other characters) and save it.
nano /var/ossec/etc/authd.passAttention: Wazuh is currently working on a more efficient and safer way for storing the authentication password (e.g. keystore). Therefore this may be different in newer versions!
You can now proceed to the server configuration.
Manager configuration
First enable vulnerability detector. To do so edit the same file and in section <vulnerability_detector> change the value of directive <enabled> to yes (see below).
...
<vulnerability_detector>
  <enabled>yes</enabled>
...
And again, in the same section called <vulnerability_detector> enable providers for a specific operating systems, in our case it’s CentOS.
So let’s enable RedHat provider:
...
<vulnerability_detector>
...
  <provider name="redhat">
    <enabled>yes</enabled>
...
Use the Save button to check the validity of the modified file and to save it.

After successfully saving the file, you need to restart the Wazuh manager using the Restart Manager button.

A dialog box will appear asking you to confirm this action, do so by clicking on Confirm button.
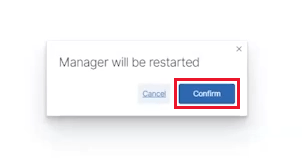
Tip: You can also restart the Manager by restarting its system service.
systemctl restart wazuh-managerAs a final step, it is recommended to generate new passwords for Wazuh instead of the default ones. You can do that using the command below.
The output of this command are newly generated and strong passwords.
/usr/share/wazuh-indexer/plugins/opensearch-security/tools/wazuh-passwords-tool.sh --change-all --admin-user wazuh --admin-password wazuhAdding an agent
We recommend sorting individual agents into groups. For example by server type, or by operating system, as it is in case below.
You can create groups in section Management -> Groups using the Add new group button.
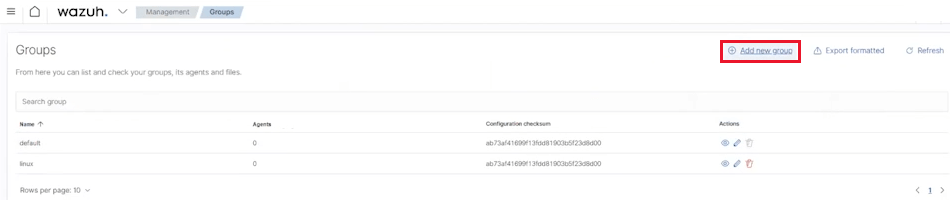
You can then add new agents using the wizard, which can be found in the Agents menu section.
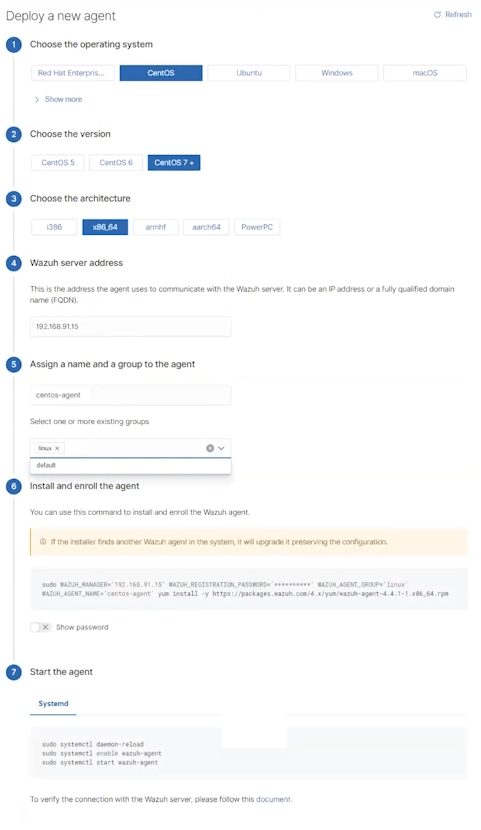
Agent installation
You install the agent itself by copying the command generated by this wizard and running it on the target server.
Attention: Wazuh agent must not be installed on the server where the Manager is running. The installation won’t even be allowed due to package conflicts!
You really don’t want you registration password to be part of the shell’s command history. So leave it defined by asterisks for now.
sudo WAZUH_MANAGER='192.168.91.15' WAZUH_REGISTRATION_PASSWORD='******' WAZUH_AGENT_GROUP='linux' WAZUH_AGENT_NAME='centos-agent' yum install -y https://packages.wazuh.com/4.x/yum/wazuh-agent=4.4.1-1.x86_64.rpmAfter successfully installing the agent, open the file containing the registration password.
Change the asterisks manually to the correct password and save the file.
nano /var/ossec/etc/authd.passAnd as the last step, start the service and enable it to start automatically after system startup.
systemctl daemon-reload
systemctl enable wazuh-agent --now
As a part of the launching process of this service the agent will perform a basic security audit and vulnerability scan.
All the necessary information about the operating system is sent from the agent to Wazuh manager.
The agent registers itself on the Wazuh server and is subsequently added for further analysis.
You can then add other agents in the very same way.
At this point, you have all Wazuh core components successfully installed and fully functional. That includes basic configuration and the process of adding one sample agent.
Give us a Like, share us, or follow us 😍
So you don’t miss anything: