Description
This module introduces the ability to define custom inventory fields in Zabbix through a graphical interface. inventoryMAX utilizes dedicated macros in the format {INVENTORYMAX.*}, whose values can be either numeric or string-based. The visibility and order of inventory columns can be configured and customized, and these custom fields can also be combined with native {INVENTORY.*} macros for extended flexibility.
The module configuration is available under Administration → inventoryMAX fields config.
An overview of all inventoryMAX inventory fields can be found under Inventory → inventoryMAX.
Usage examples
Configuration step:
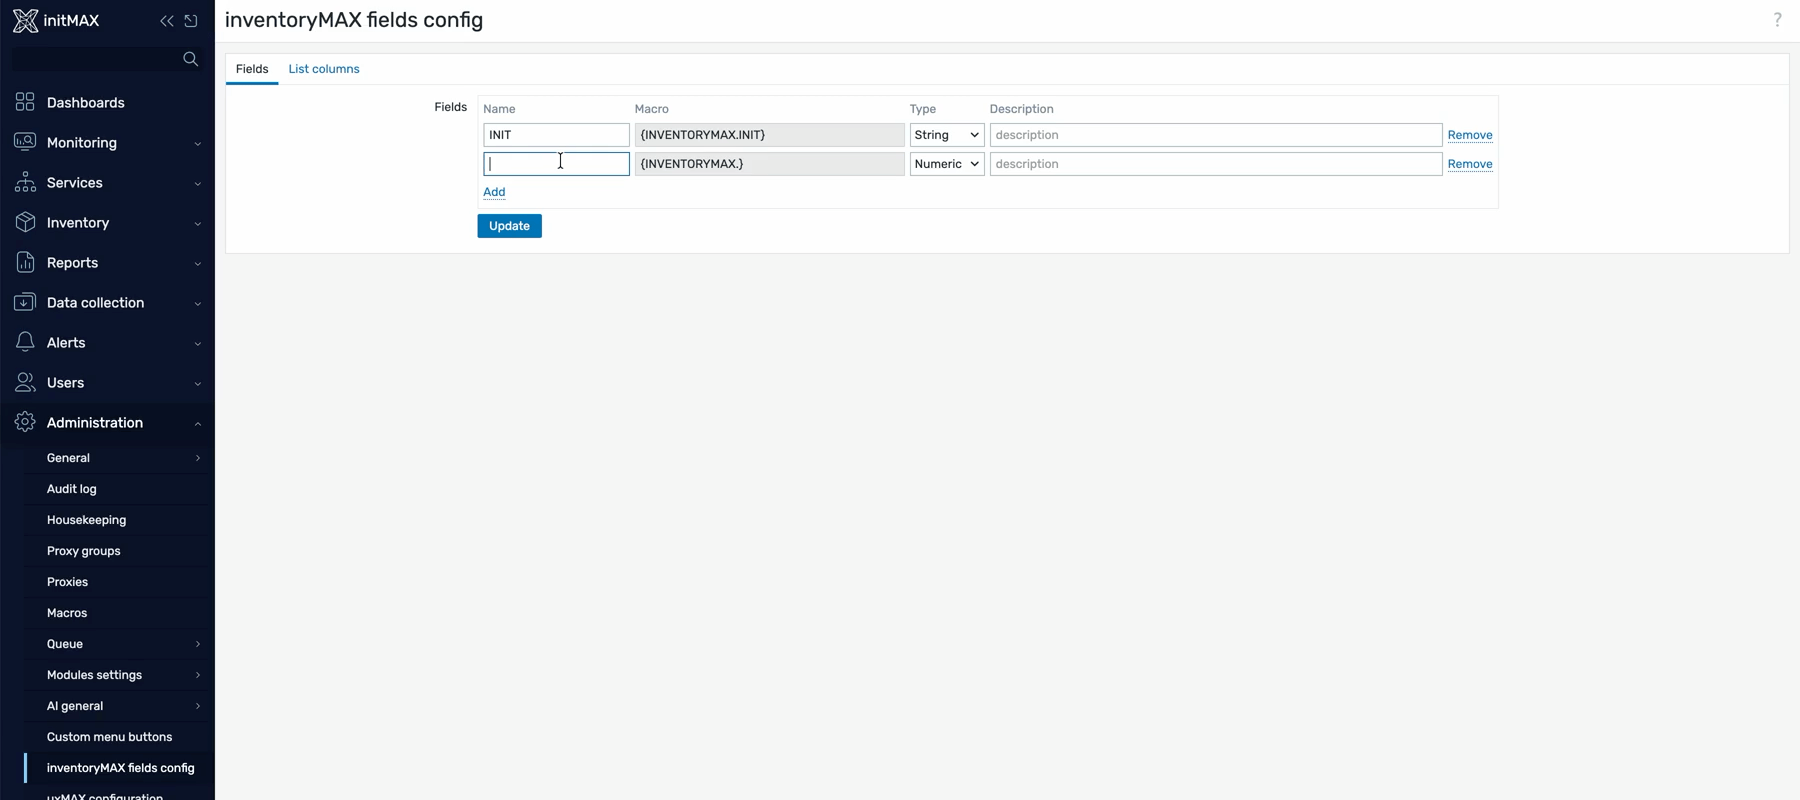
The user creates two new custom fields, INIT and MAX, in the inventoryMAX fields config section in Administration menu. The corresponding macros {INVENTORYMAX.INIT} and {INVENTORYMAX.MAX} are automatically generated for these fields. In the List Columns tab, the user adjusts the column order, placing INIT and MAX before the built-in Zabbix field {INVENTORY.CONTACT}.
The custom inventory fields are defined as follows: INIT is a string field, MAX is a numerical field, and the description is optional (left blank in this case).
Entering and accessing the data:
In inventoryMAX (see the Inventory section of Zabbix frontend ), the user enters values for the previously created custom fields for the host DEMO-SERVER ( for INT field string demo and for MAX field integer 2 ). If needed, these entries can be accesed and filtered using the standard Zabbix filtering options available in this section.
Configuration
inventoryMAX fields config
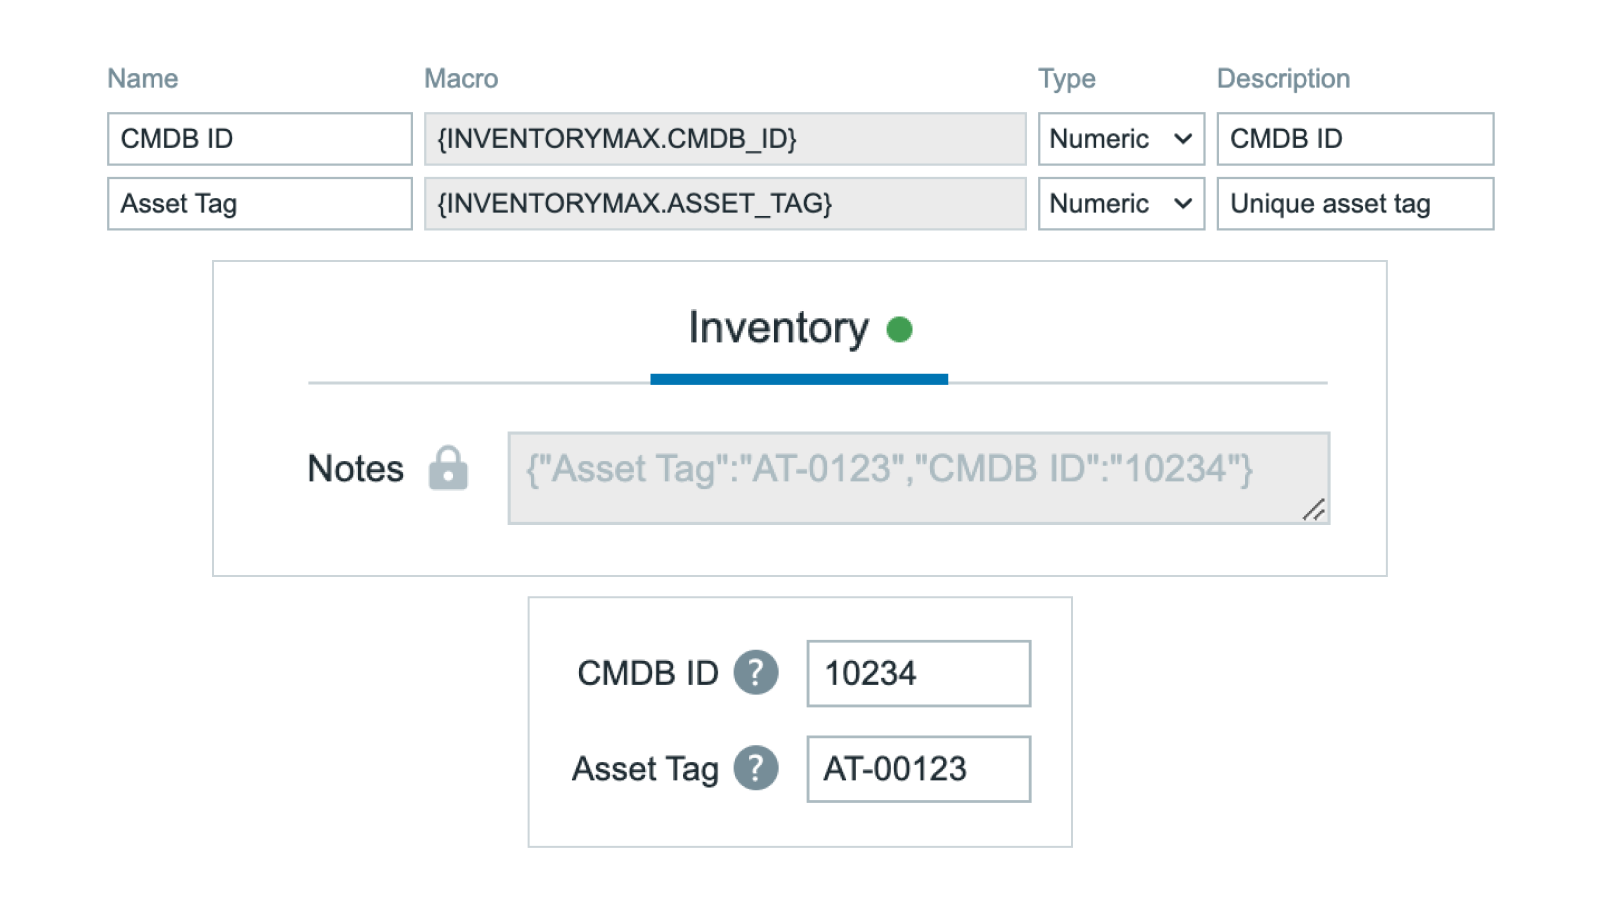
In this section ( Administration section of Zabbix frontend → inventoryMAX fields config ) it’s possible to configure Name, macro, type and description of the custom inventory fields.

| Name | The name of custom field. |
| Macro | Is being created on the fly to prevent mistakes. Starts with {INVENTORYMAX.*) after the name of the field is entered the macro is finalized following naming convention standards for Zabbix macros. |
| Type | Numeric/String |
| Description | Message to identify the purpose of the macro. Later is visible in the inventoryMAX view ( located in Inventory section of the Zabbix frontend ) as a help popup represented by “?” symbol. |
In the list columns tab it is possible to configure the visibility of the created custom fields in the inventoryMAX view ( located in Inventory section of the Zabbix frontend ).

| Label | The name of custom field. |
| Column | Manually put in the desired {INVENTORYMAX.*} macro. Example: {INVENTORYMAX.NAME} |
| Strip unresolved macros | When enabled it hides unresolved macros. |
inventoryMAX
In this section ( Inventory section of Zabbix frontend → inventoryMAX ) it’s possible to enter values for predefined custom inventory fields ( example for INT and MAX fields ). To set the values click on the desired host in this section. Mass update function can be utilized.

Installation
Repository setup on the server
This module is available only with subscription.
Connect to your Zabbix frontend server (perform on all frontend nodes) via SSH
Navigate to the /modules folder (typically located at /usr/share/zabbix/ or /usr/share/zabbix/ui/)
cd /usr/share/zabbix/modules/Clone the repository on your server
#PRO
git clone https://git:<<YOUR-TOKEN>>@git.initmax.cz/initMAX-Public/Zabbix-UI-Modules-inventoryMAX-PRO.git
Change the ownership of the directory to the user under which your Zabbix frontend is running using the chown command (cat /etc/passwd to find which user was created during installation), some examples:
chown -R nginx:nginx ./Zabbix-UI-Modules-inventoryMAX*chown -R apache:apache ./Zabbix-UI-Modules-inventoryMAX*chown -R www-data:www-data ./Zabbix-UI-Modules-inventoryMAX*Frontend module initialization
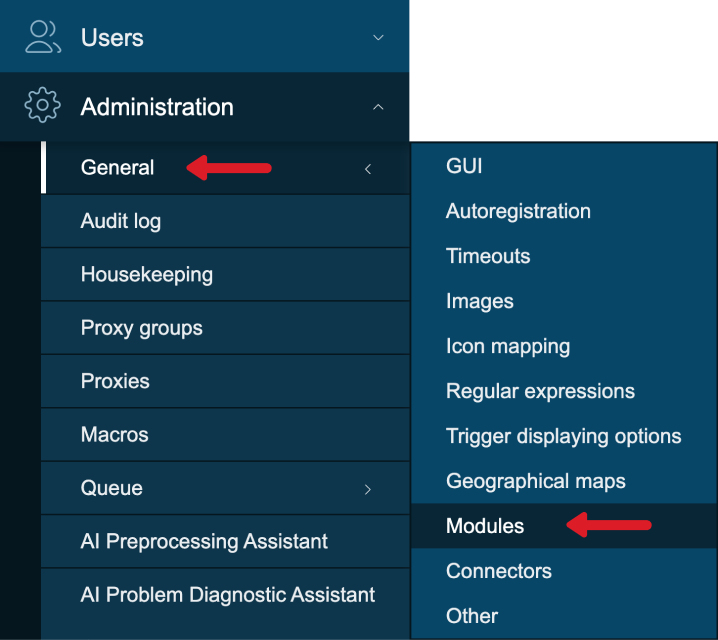
Navigate to the Zabbix frontend menu and select: Administration → General → Modules
Use the ‘Scan directory’ button at the top
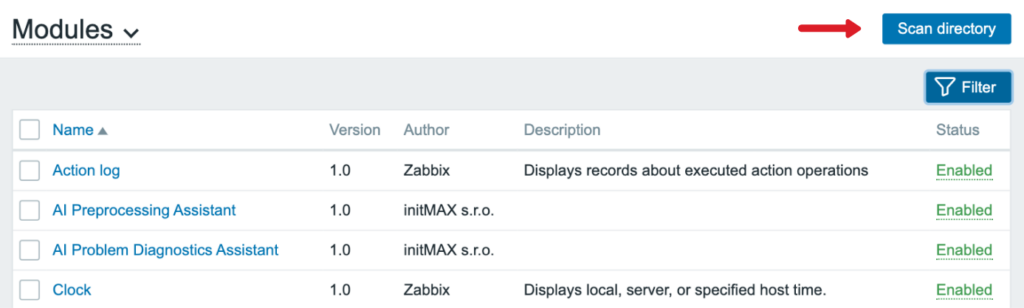
Enable the newly discovered module/widget

The module is available in the menu

Where to get it?
If you’re interested in this widget, you can find it in our e-shop. There you’ll learn more about the available versions and how to get the product.