Description
A simple yet powerful widget for displaying issues in a clear matrix for selected host groups. matrixMAX becomes especially useful when combined with matrixMAX-detail or inventoryMAX widgets. The visualization relies on trigger tags using the key:value format; by default the tag is matrix:value, but it can be customized as needed.
Usage example
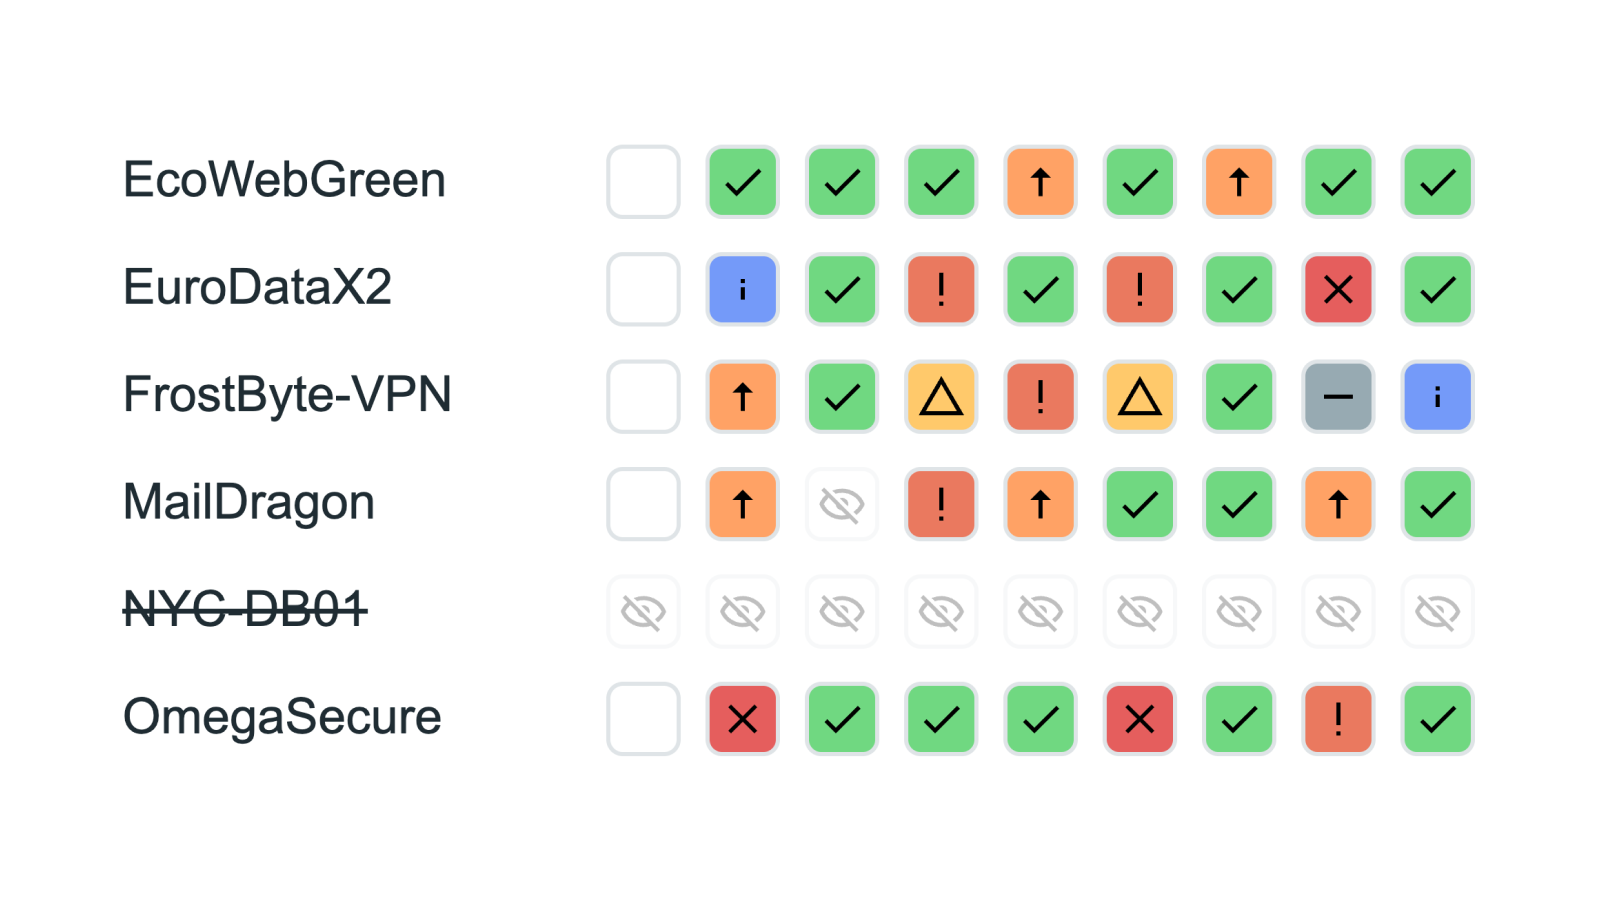
Several triggers for services on hosts in the host group DEMO/matrixmax-1 have been tagged with the matrix tag and corresponding values. The user clicks “Load tags” to automatically populate all triggers into a matrix table. Rows represent hosts (if default matrix tags are used, they load automatically), and columns represent tagged services. In this example, the host DataTitan.cloudcompany.com is crossed out because it’s disabled in Zabbix. The cells are colored based on the trigger severity.
Features matrixMAX
Left click
- Clicking on a host directs you to Monitoring → Problems with a filter by host name.
- Clicking on a trigger directs you to Monitoring → Problems filtered by the trigger tag to show recent problems.

Right clik
- Clicking on the host will show the classic Zabbix host menu
- Clicking on the trigger cell will show the classic Zabbix item menu
Feature matrixMAX-detail
Clicking on the trigger cell in matrixMAX will show additional information for the trigger in the matrixMAX-detail widget if configured. Information contains problems, event details, action log and a quick access menu. Furthermore you have possibility to use function like execute now, see history and graphs for related items or update the event itself. If the data collected by the item is in HTML format, it can also be turned into a table for a quick overview for further analysis.
For uptime feature to work in matrixMAX-detail the corresponding item needs to have tag: matrix:uptime.
Configuration matrixMAX
The matrixMAX widget works based on tags that are present on triggers. Each trigger that you will want to include in matrixMAX visual matrix must have a tag key “matrix” with some value eg.: memory etc. for automatic flow to work ( use Load tags button ) or the tags ( key:value format ) can be specified manually.
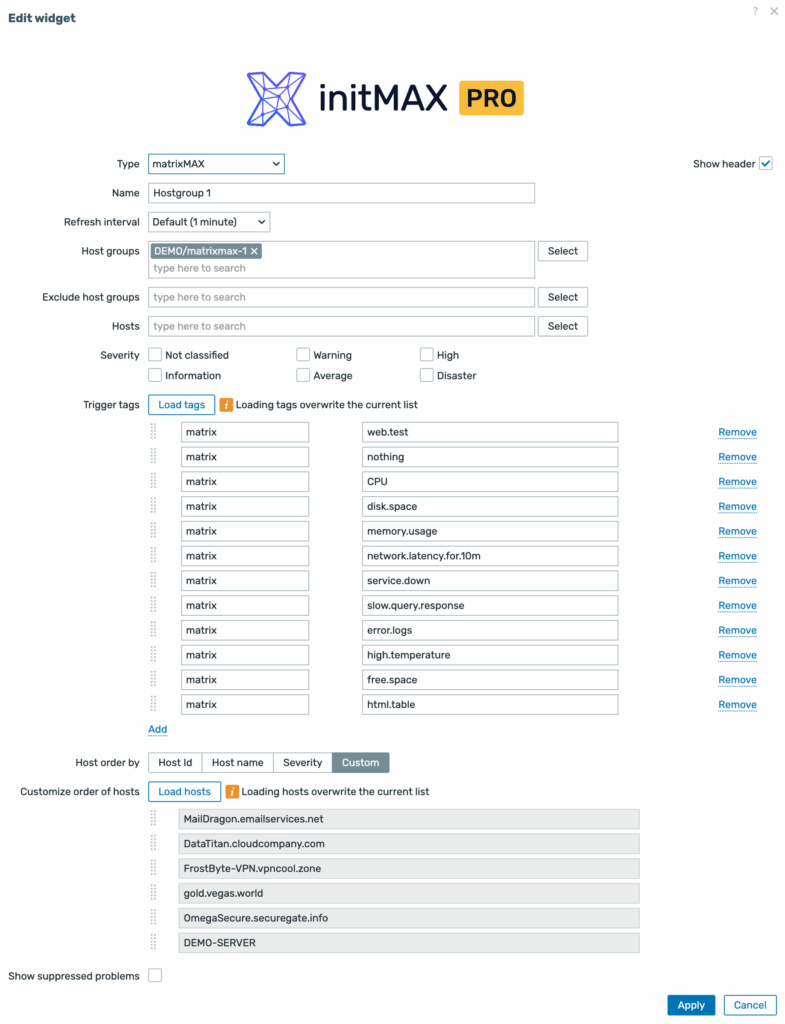
| Field | Description |
| Type | Choose widget type – matrixMAX |
| Name | Distinctive name of the widget |
| Refresh interval | How often is data loaded into the widget |
| Host groups | Choose at least one host group or multiple |
| Exclude host groups | Specify which host groups will be excluded |
| Hosts | Select specific hosts. Note: Disabled hosts are striked through. |
| Severity | Choose which severity the widget will display |
| Problem tags | You can load tags with a tag key matrix automatically or fill them in manually |
| Host order by | Select host order logic, or choose custom and manually rearrange them |
| Show suppressed problems | Option to include suppressed problems |
Configuration matrixMAX-detail
The matrixMAX-detail will allow you to only choose the matrixMAX widget and up to three inventory fields based on their macros.
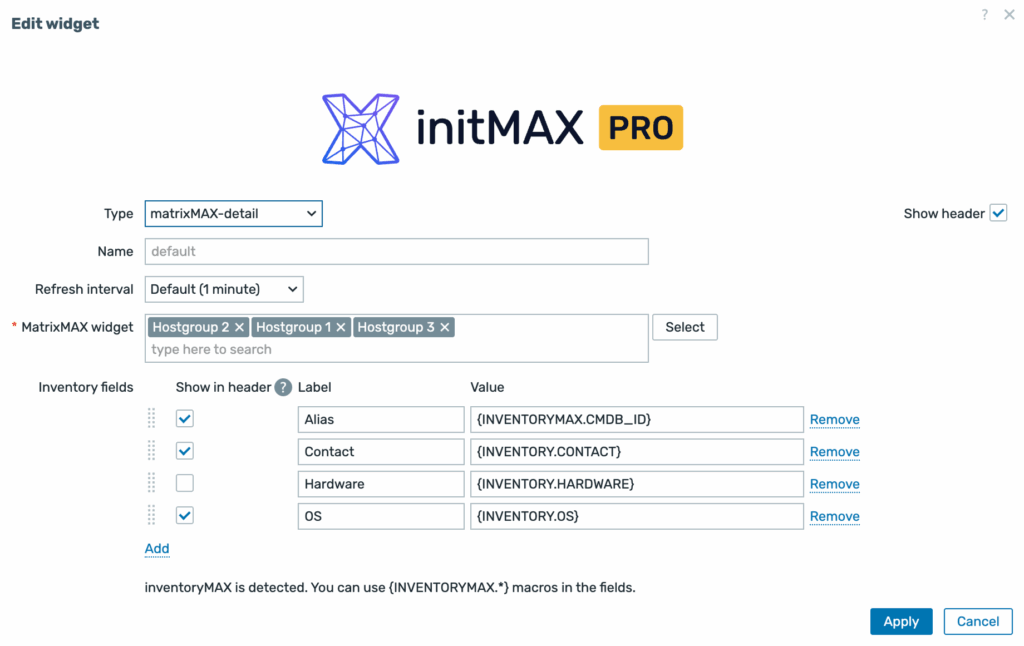
| Field | Description |
| Type | choose matrixMAX-detail |
| Name | Distinctive name for widget |
| Refresh interval | How often is data loaded into the widget |
| MatrixMAX widget | Choose which matrixMAX widget will be able to display details here |
| Inventory fields | Label and Value using the Inventory macro that will be displayed behind the host name |
Installation
Repository setup on the server
Connect to your Zabbix frontend server (perform on all frontend nodes) via SSH
Navigate to the /modules folder (typically located at /usr/share/zabbix/ or /usr/share/zabbix/ui/ from Zabbix 7.2)
cd /usr/share/zabbix/modules/Clone the repository on your server
#PRO
git clone https://git:<<YOUR-TOKEN>>@git.initmax.cz/initMAX-Public/Zabbix-UI-Widgets-matrixMAX-PRO.git
The repository contains two widgets, so they must be moved directly to the modules directory.
#move subdirectory directly into modules directory
mv Zabbix-UI-Widgets-matrixMAX-PRO/* .
You should have in the directory:
ls ./Zabbix-UI-Widgets-matrixMAX*
#Zabbix-UI-Widgets-matrixMAX-detail
#Zabbix-UI-Widgets-matrixMAX-PRO
#Zabbix-UI-Widgets-matrixMAX
Change the ownership of the directory to the user under which your Zabbix frontend is running using the chown command (cat /etc/passwd to find which user was created during installation), some examples:
chown nginx:nginx ./Zabbix-UI-Widgets-matrixMAX*chown apache:apache ./Zabbix-UI-Widgets-matrixMAX*chown www-data:www-data ./Zabbix-UI-Widgets-matrixMAX*Frontend module initialization
Navigate to the Zabbix frontend menu and select: Administration → General → Modules
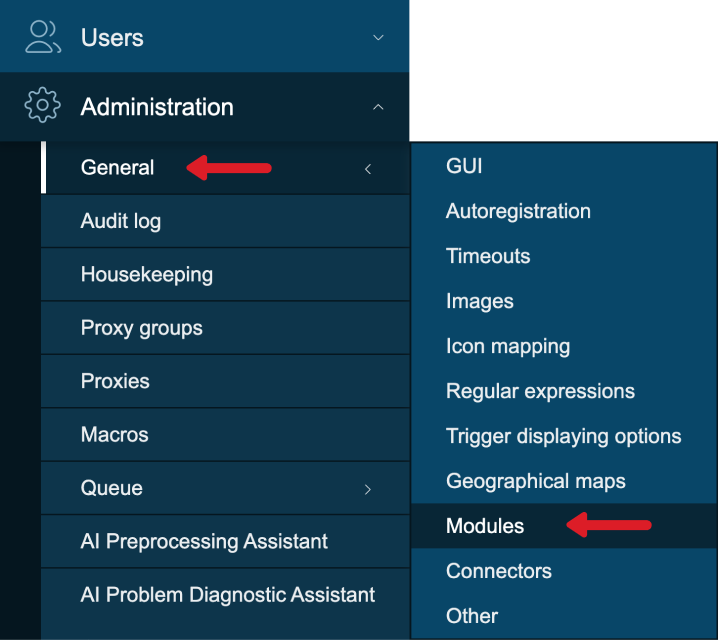
Use the ‘Scan directory’ button at the top
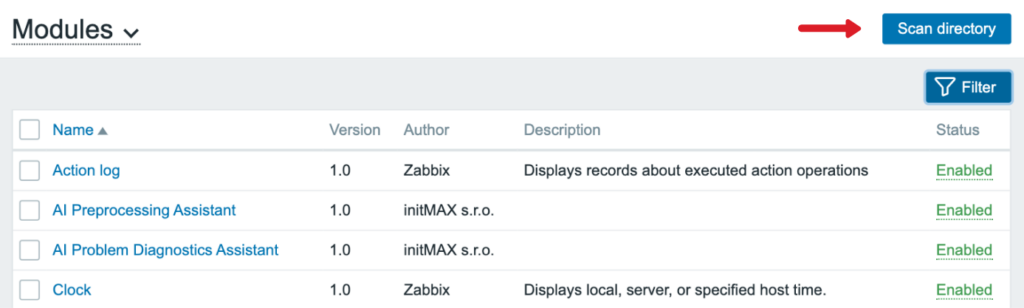
Enable the newly discovered module/widget

The module is available in the menu

Where to get it?
If you’re interested in this widget, you can find it in our e-shop. There you’ll learn more about the available versions and how to get the product.