Desription
Module Problem Diagnostic Assistant helps Zabbix users streamline the process of identifying and resolving issues in monitored systems. It analyzes data from hosts, items, and events, offering potential solutions based on the information gathered. By leveraging this AI assistant, users can more efficiently troubleshoot and manage their infrastructure.
Usage examples
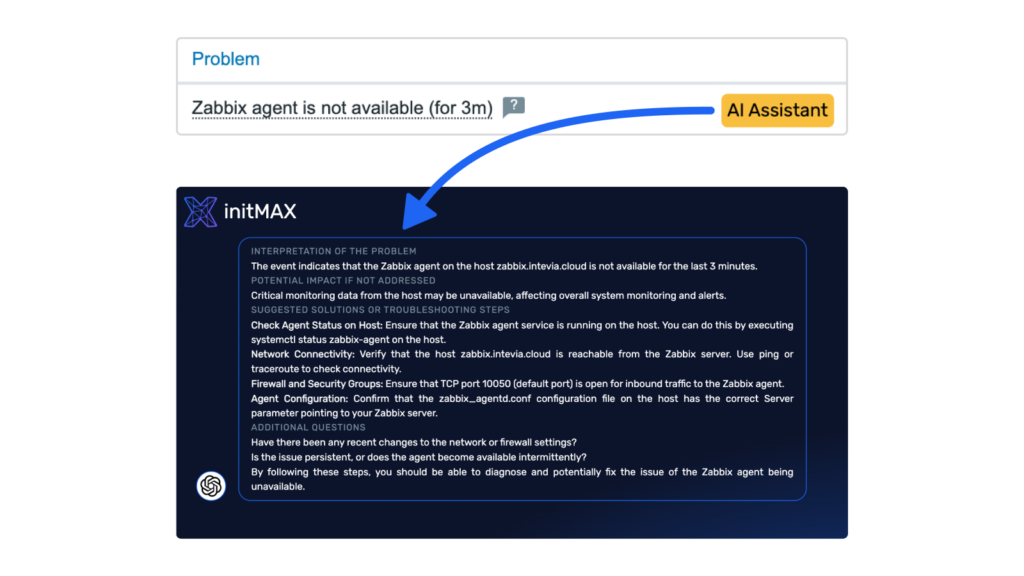
To utilize this module use the yellow button ‘AI Assistant’ next to problem’s name. New window opens with several sections:
- Brief interpretation of the problem
- Potential impact if not addressed
- Suggested solutions or troubleshooting steps
- Hints for further troubleshooting in form of additional questions that can lead to solution
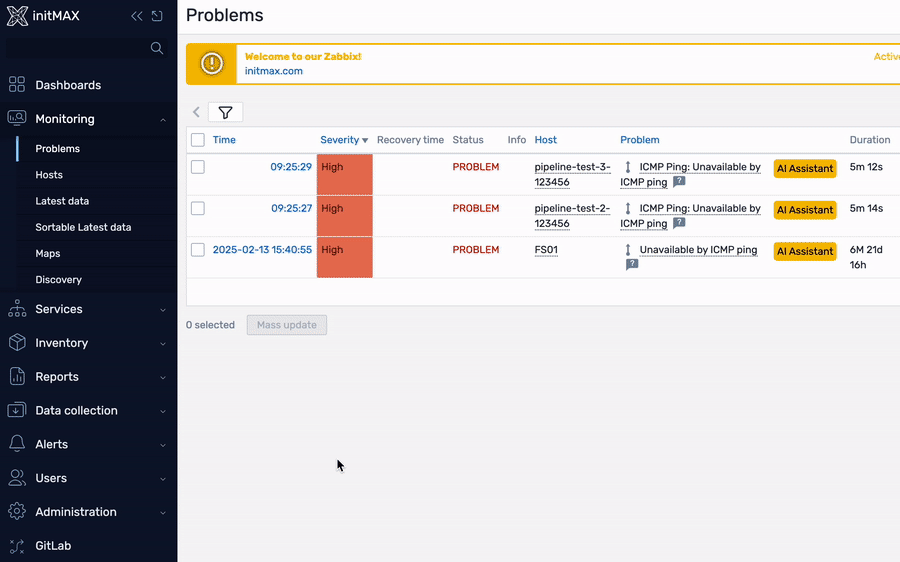
Example of unavailable host (Unavailable by ICMP ping)
After user uses ‘AI Assistant’ button he gets recommendation how to approach the problem. See additional questions section for added value. If the host is not really down this problem might have been triggered by a configuration change on network level.
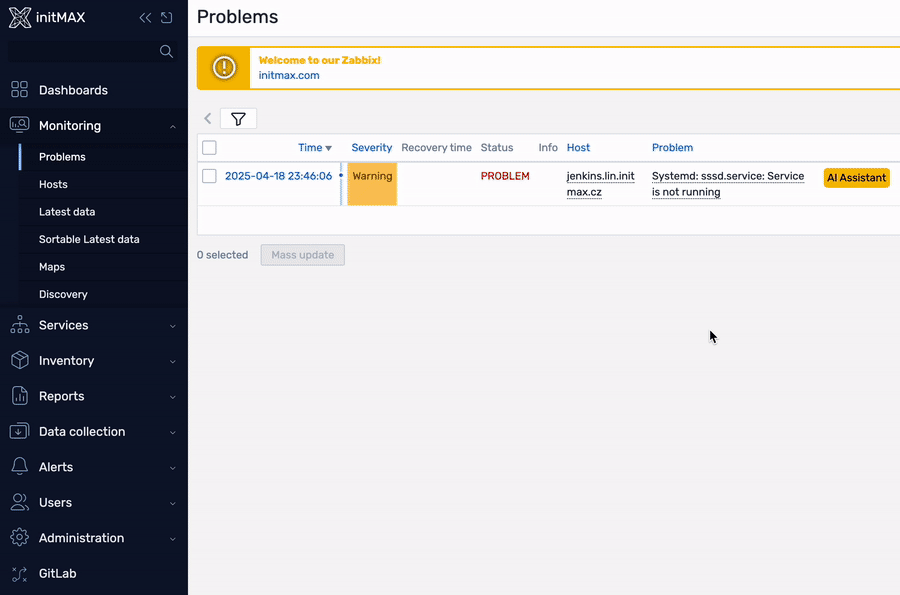
Example of systemd service not running (Systemd: sssd.service: Service is not running)
After user uses ‘AI Assistant’ button he gets hint to start the service and check its logs. You can ask additional questions for added value, like what to do if it becomess this a recurring problem.
Installation
Repository setup on server
Connect to your Zabbix frontend server (perform on all frontend nodes) via SSH
Navigate to the /modules folder (typically located at /usr/share/zabbix/ or /usr/share/zabbix/ui/)
cd /usr/share/zabbix/modules/Clone repository on your server
#PRO
git clone https://git:<<YOUR-TOKEN>>@git.initmax.cz/initMAX-Public/Zabbix-UI-Modules-AI-Problem-Diagnostics-Assistant-PRO.git
Change the ownership of the directory to the user under which your Zabbix frontend is running using the chown command (cat /etc/passwd to find which user was created during installation), some examples:
chown nginx:nginx ./Zabbix-UI-Modules-AI-Problem-Diagnostics-Assistant*chown apache:apache ./Zabbix-UI-Modules-AI-Problem-Diagnostics-Assistant*chown www-data:www-data ./Zabbix-UI-Modules-AI-Problem-Diagnostics-Assistant*Frontend module initialization
Navigate to the Zabbix frontend menu and select: Administration → General → Modules
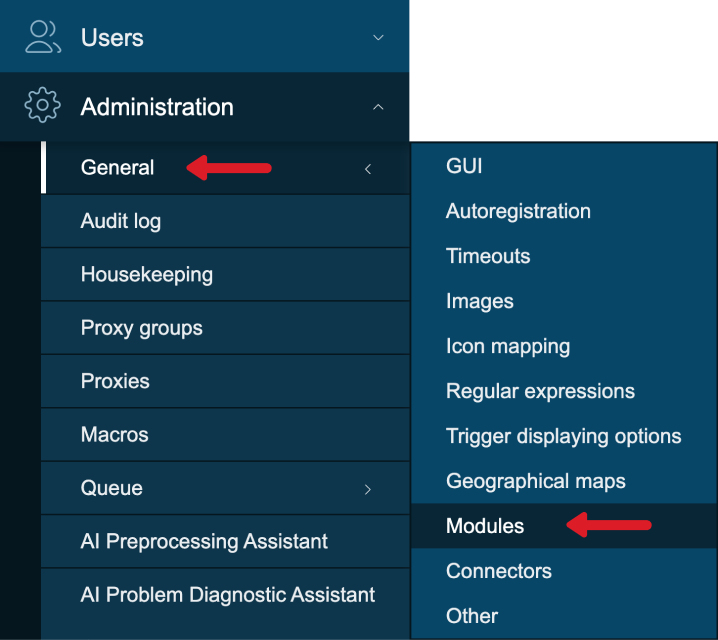
Use the ‘Scan directory’ button on the top
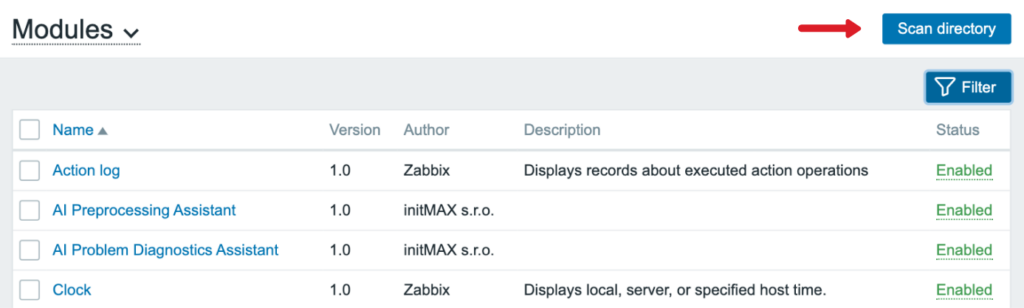
Enable the newly discovered module/widget

The module is available in the menu

Module configuration
Follow these steps to set up the AI Problem Diagnostic Assistant in your Zabbix frontend:
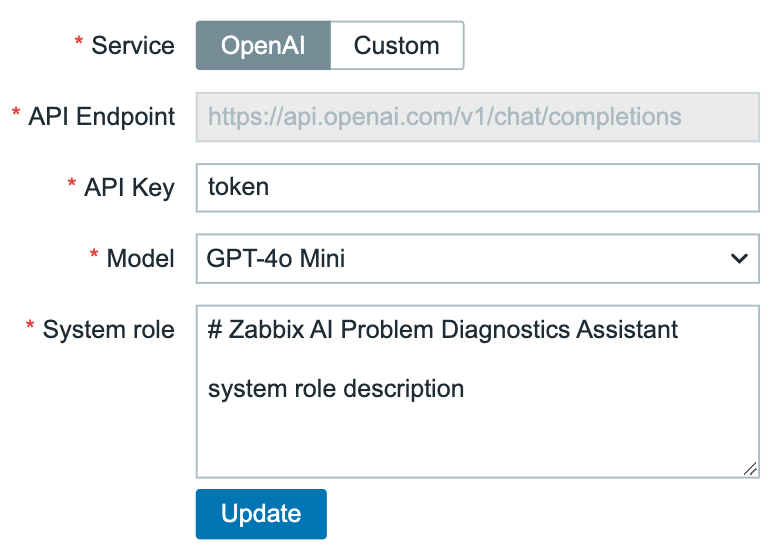
- Navigate to: Administration → AI general → AI Problem Diagnostic Assistant
- Choose AI Service:
- Option A: OpenAI
- Enter your OpenAI API token
- Select the desired OpenAI model (e.g., GPT-4, GPT-3.5-turbo)
- Option B: Custom AI API
- Provide the custom API endpoint URL
- Enter the authentication token for the custom API
- Option A: OpenAI
- Configure System Role:
- Locate the ‘PROMPT_SYSTEM_ROLE.md’ file in the root directory of the repository
- Copy the default System role content from this file
- Paste the copied content into the System role field in the Zabbix interface
- Save your configuration
- Use it and enjoy!
Where to get it?
If you’re interested in this module, you can find it in our e-shop. There you’ll learn more about the available versions and how to get the product.