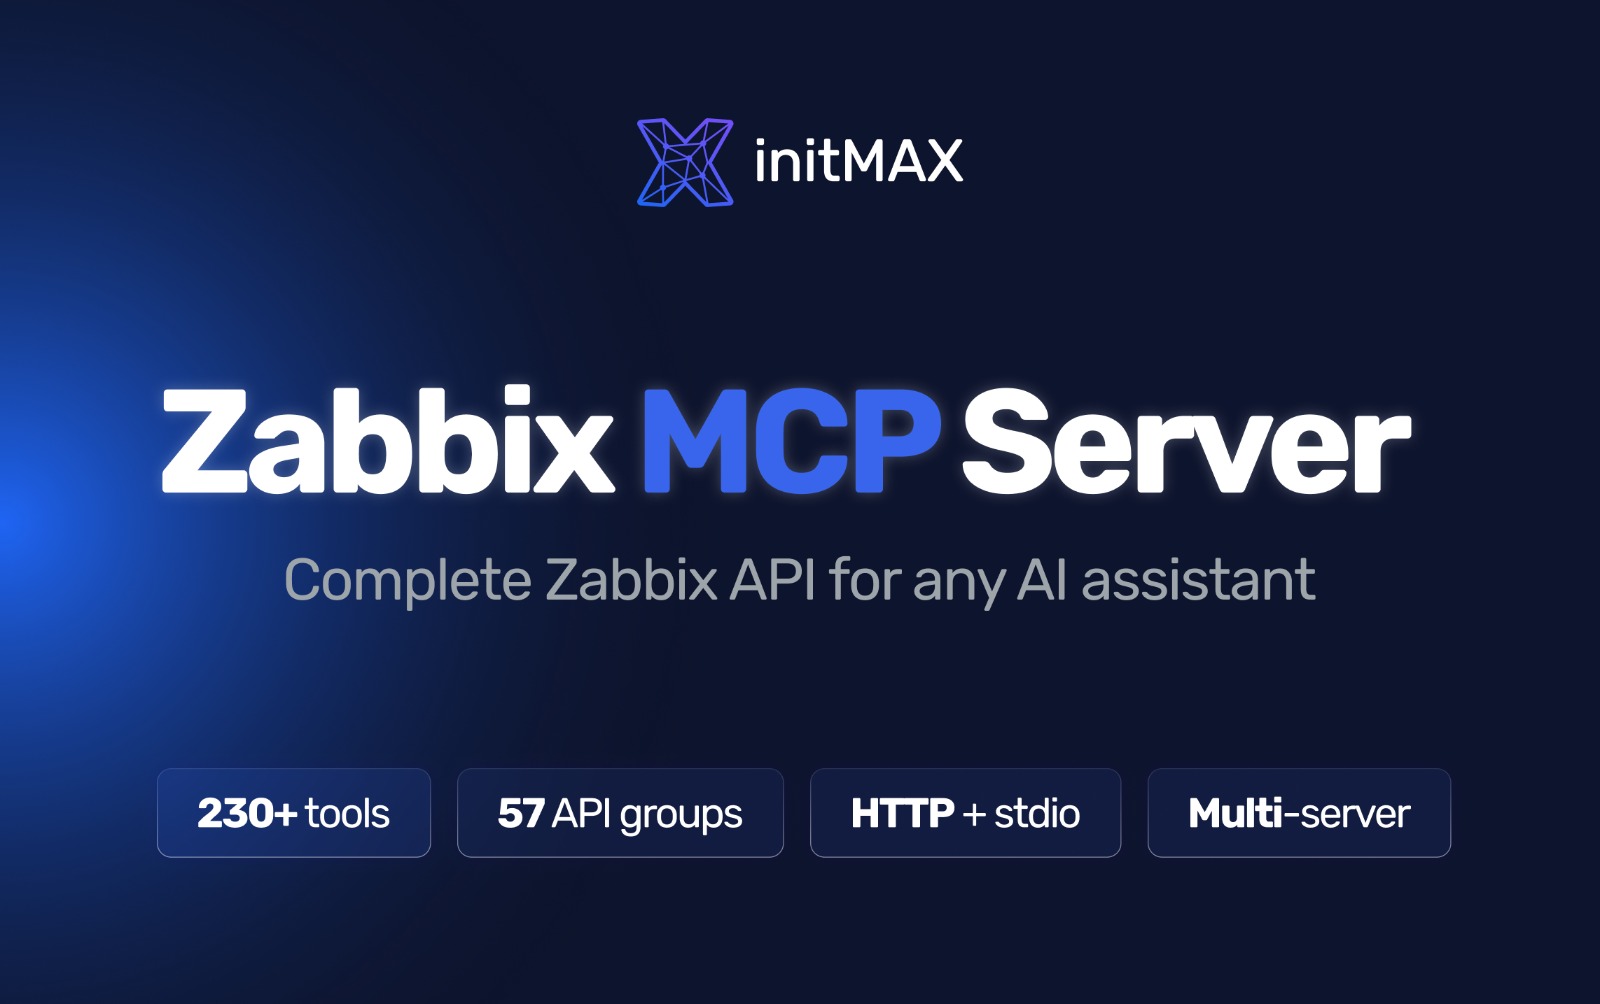
Zabbix is a powerful monitoring tool – but what if your AI assistant could work with it directly? That’s exactly what our Zabbix MCP Server enables. Thanks to the open MCP (Model Context Protocol) standard, you can connect Zabbix with any AI assistant – whether it’s Claude, ChatGPT, GitHub Copilot, Cursor, or any other MCP-compatible client.
What is MCP and why does it matter
Model Context Protocol (MCP) is an open standard that allows AI assistants to use external tools. Instead of manually copying data from Zabbix and pasting it into an AI chat, the MCP server exposes the entire Zabbix API directly to the AI assistant. It can then query hosts, check problems, browse triggers, create graphs, or generate reports on its own.
Simply put: your AI assistant becomes a full-fledged operator of your Zabbix.
What Zabbix MCP Server can do
The server covers the complete Zabbix API – 231 tools across all 58 API groups. This means the AI assistant can do everything you would do manually in the Zabbix web interface:
- Monitoring – querying hosts, problems, triggers, events, history, and trends
- Configuration – managing templates, hosts, host groups, items, discovery rules
- Visualization – exporting graphs as PNG, generating PDF reports
- Analytics – anomaly detection (z-score analysis), capacity forecasting (linear regression)
- Administration – users, roles, scripts, maintenance, SLA, dashboards
Usage examples – what you can ask your AI
Once the Zabbix MCP Server is connected to your AI assistant, you can simply ask in natural language:
Show me all current problems with severity High or aboveGenerate a CPU utilization graph for server db-prod-01 over the last 24 hoursCreate a PDF availability report for the Web Servers group for MarchWhich triggers fired most frequently in the last 7 days?Create host switch1 with IP 10.10.1.10, SNMP community public - generate an SNMP template for itWhat is the disk space forecast for server storage-01?The AI assistant will call the appropriate Zabbix API endpoints on its own, process the data, and return a clear response – including graphs or reports if you request them.
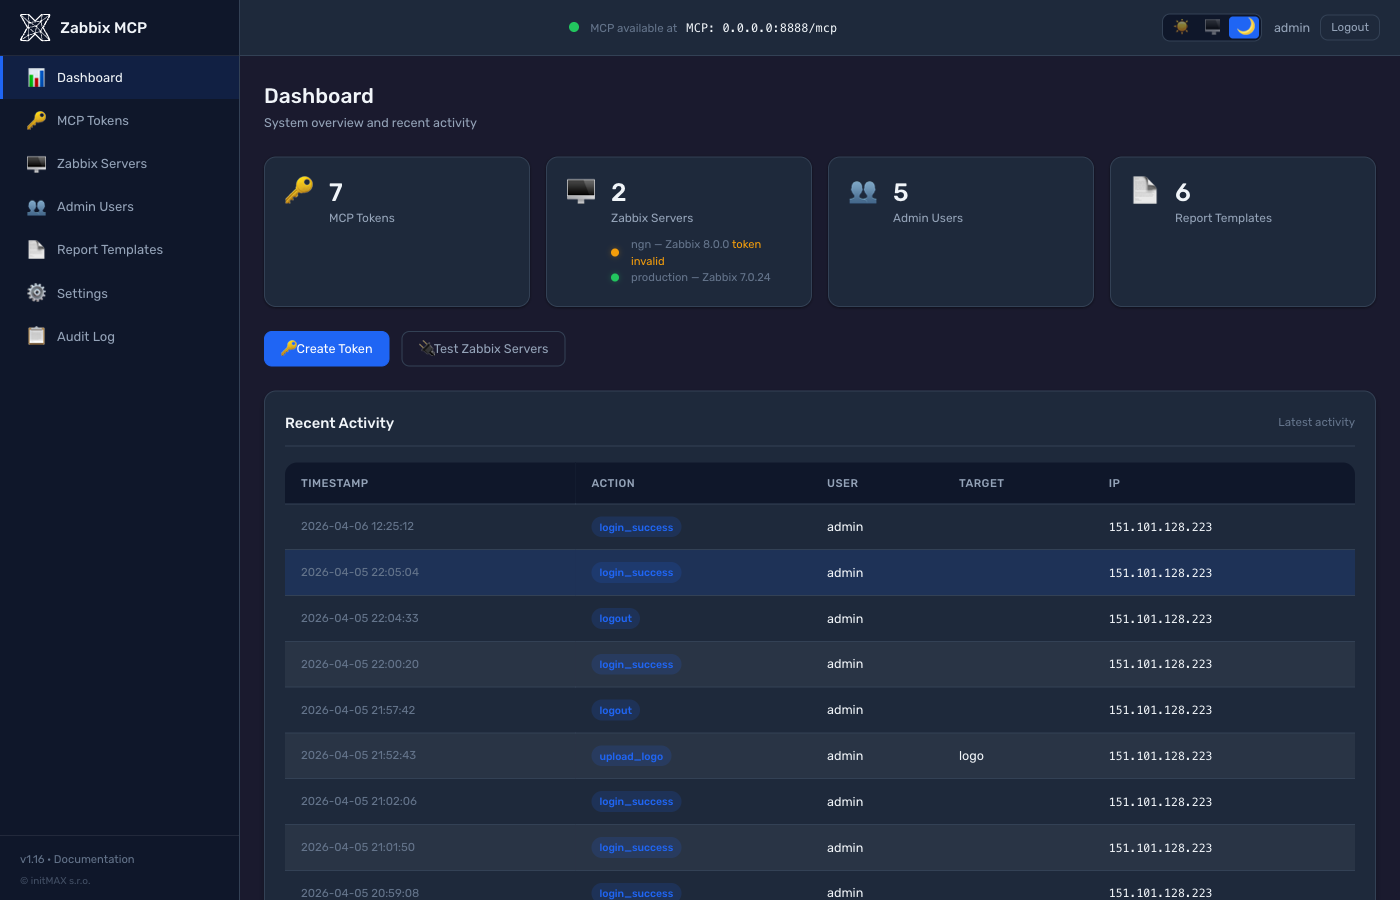
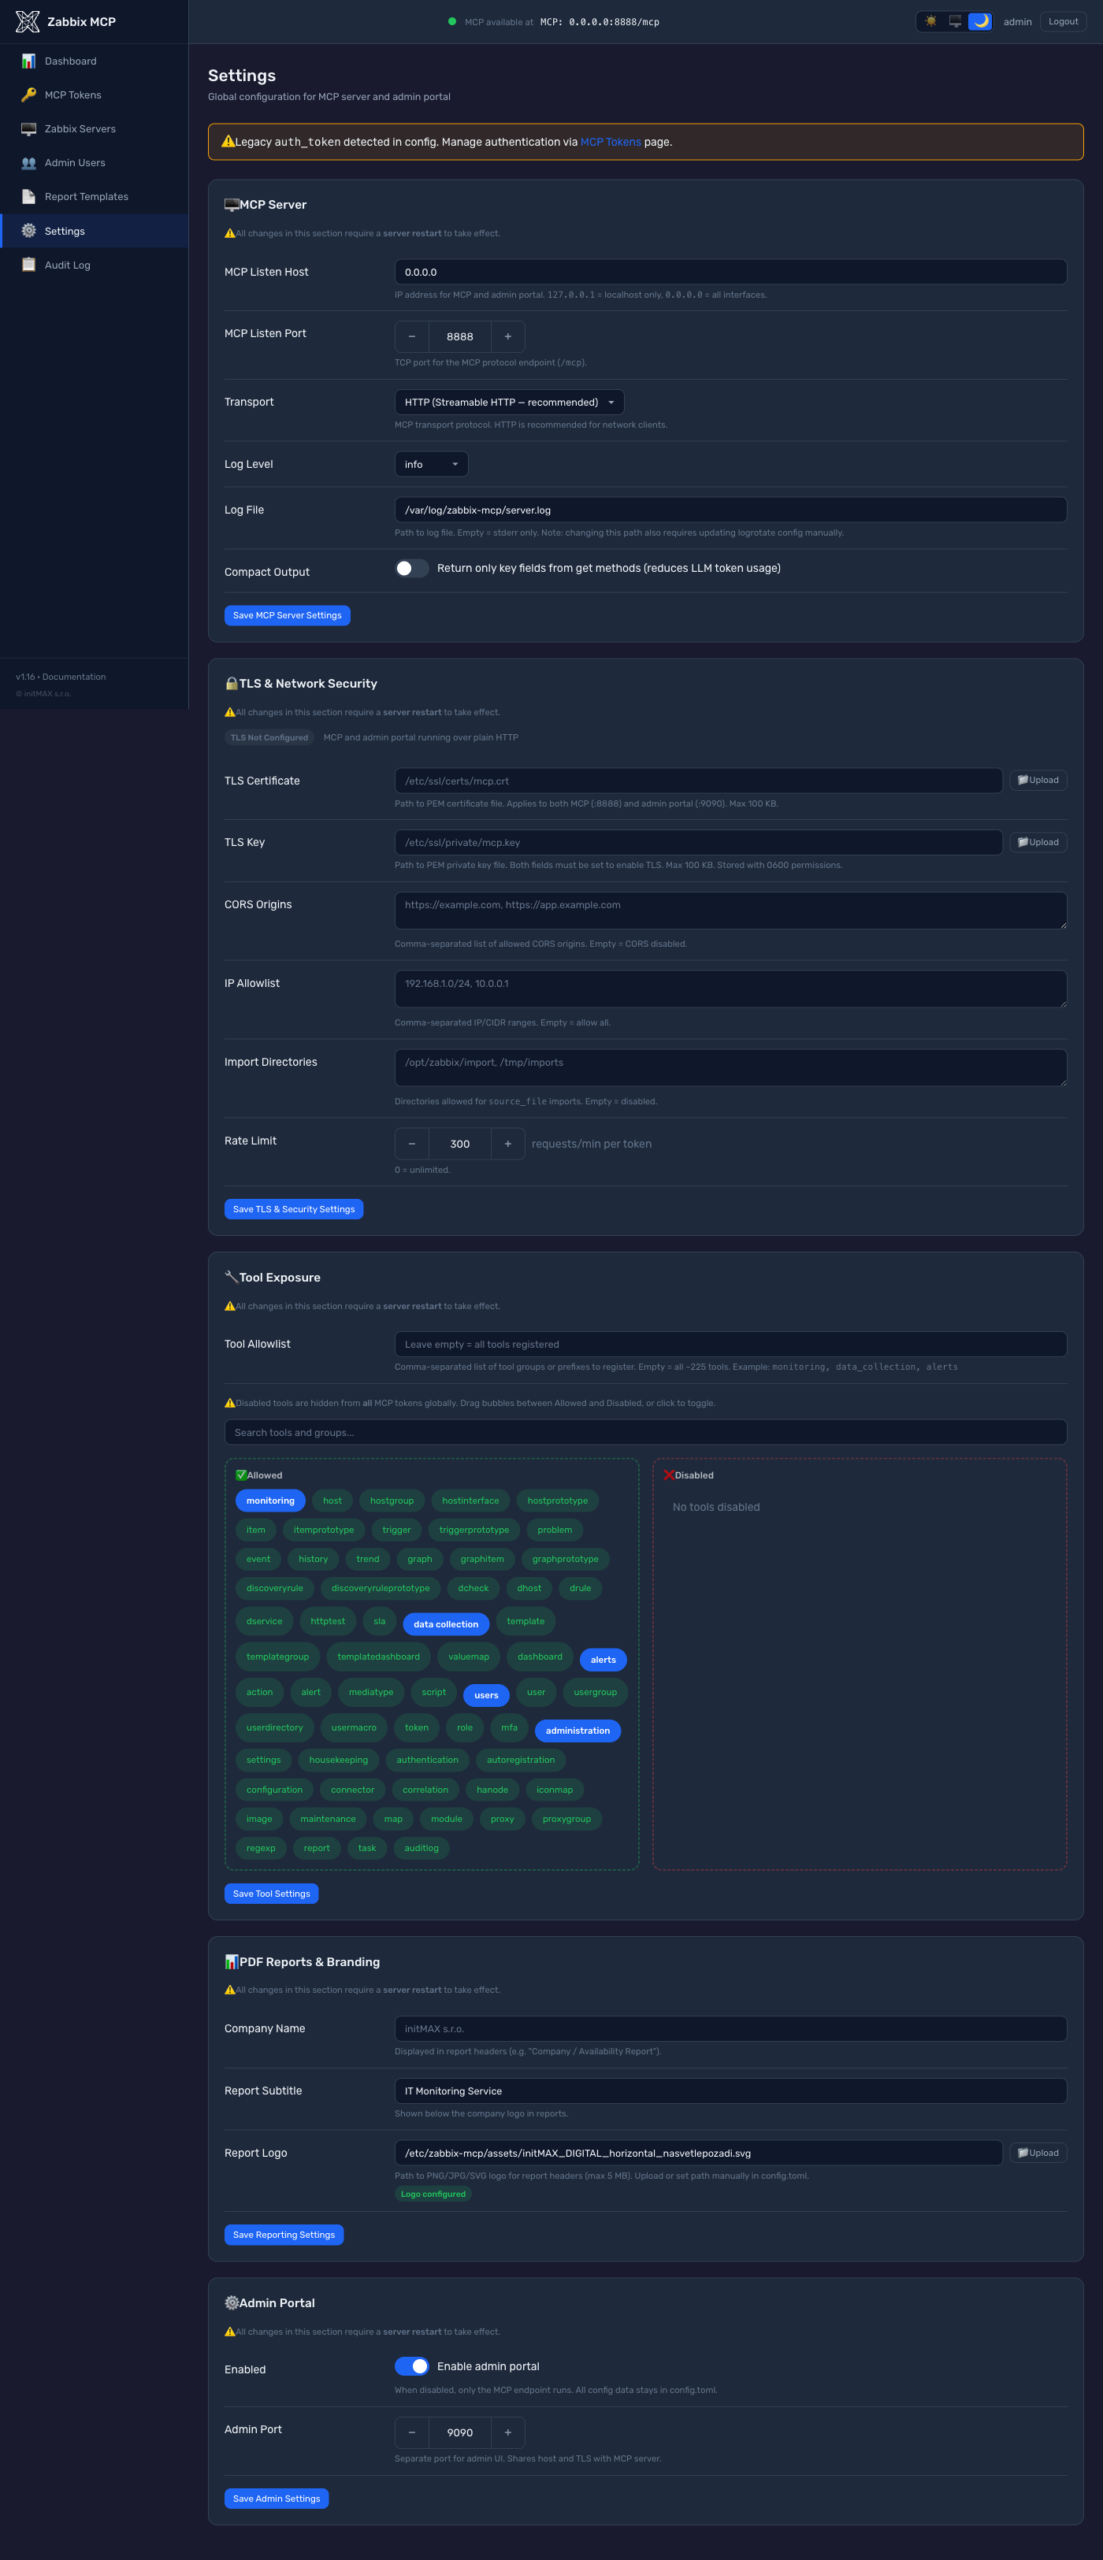
Admin portal – web management interface
Zabbix MCP Server includes a full-featured admin portal running on a separate port (default 9090). Through it, you can manage everything without editing configuration files. The admin portal can also be completely disabled, allowing you to control everything via the config.toml configuration file only.
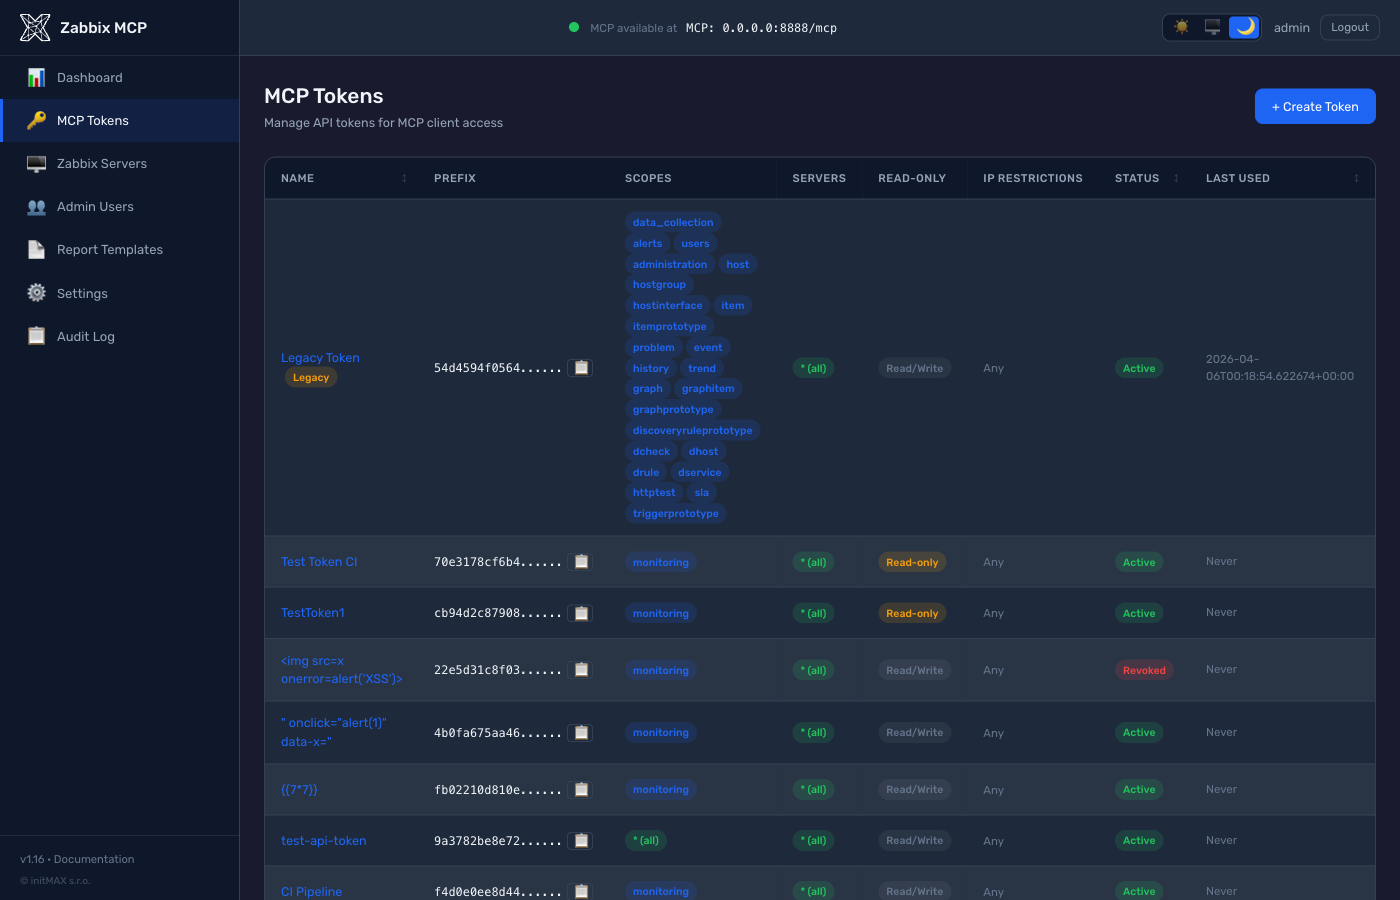
MCP token management
Each AI client authenticates with its own token. Tokens can be restricted by:
- Scopes – which tools (API groups) the token is allowed to use
- Zabbix servers – which instances the token has access to
- IP restrictions – which IP addresses are allowed
- Read-only mode – protection against unintended changes
- Expiration – automatic token expiry
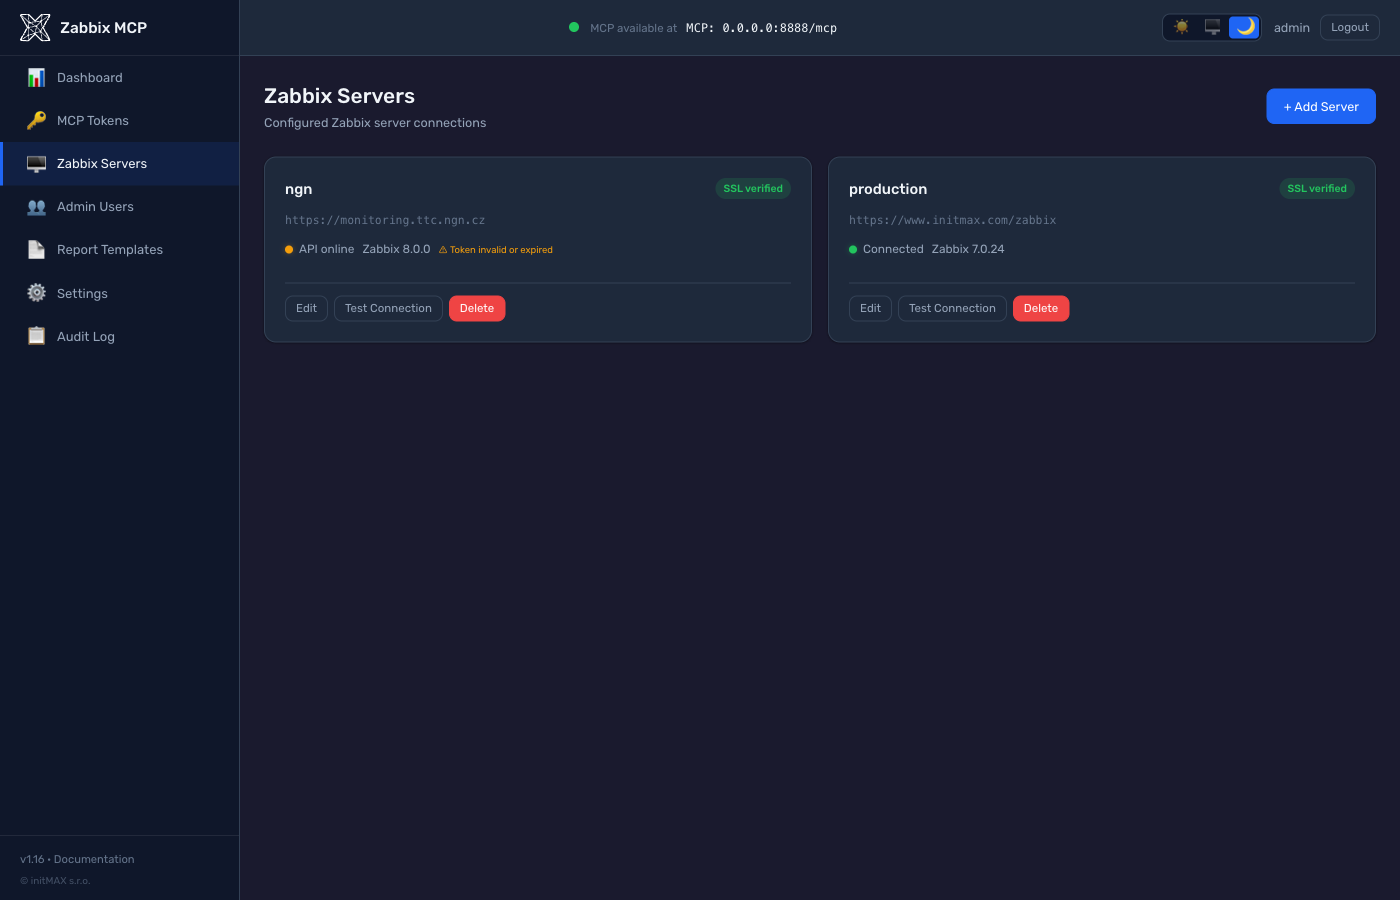
Multi-server support
Connect multiple Zabbix instances simultaneously – production, staging, test environments. Each server has its own connection status with optional SSL verification.
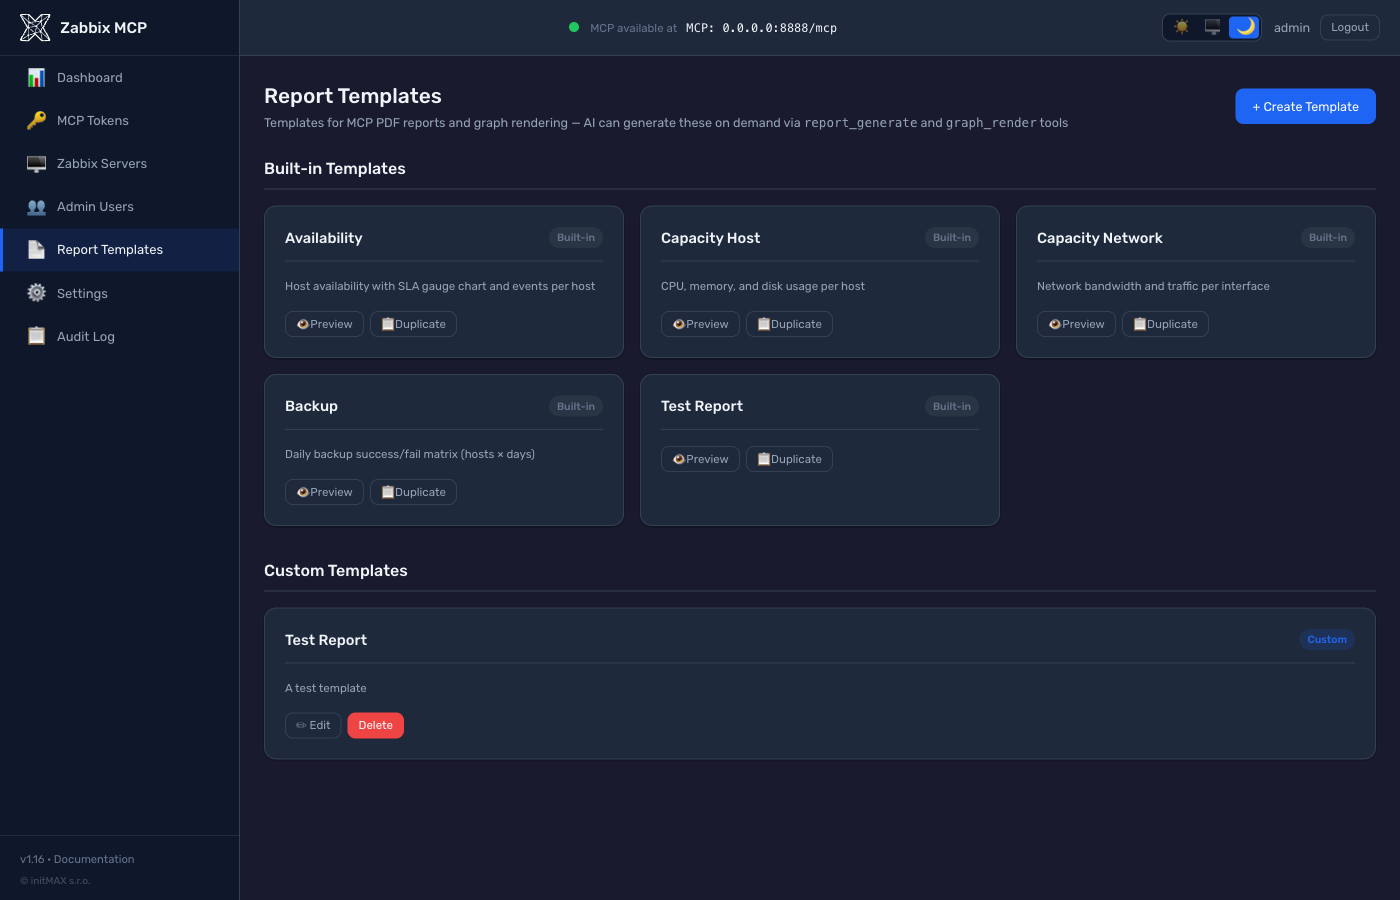
PDF reports and templates
The AI assistant can generate PDF reports directly from Zabbix data on demand. PDF generation happens server-side – LLMs cannot create PDFs on their own. This also saves tokens, as the server assembles the entire report without needing to transfer raw data through AI. Built-in templates (Availability, Capacity, Backup, and more) are available, and you can also create custom templates.
Complete settings
All configuration – TLS, CORS, rate limiting, tool exposure, report branding – is available directly from the web interface. You can upload your own logo, set your company name, and adjust other branding parameters. After changing the configuration, simply restart the server with one click directly from the admin portal.
Compact output mode is also available, which saves tokens. Instead of returning all dozens of fields from the Zabbix API, the server returns only key fields. The AI assistant can request full details at any time using the extend parameter. Example for host_get:
hostid, host, name, status
hostid, host, name, status,
description, proxy_hostid,
maintenanceid, maintenance_status,
maintenance_type, maintenance_from,
ipmi_authtype, ipmi_privilege,
ipmi_username, ipmi_password,
tls_connect, tls_accept, tls_issuer,
tls_subject, tls_psk_identity, ...
Extension tools
In addition to complete standard Zabbix API coverage, the server adds 6 custom extension tools:
Security
Security is critical when giving AI access to a monitoring system. Zabbix MCP Server includes a range of protective mechanisms:
- Read-only mode – per-server and per-token write protection
- Two-step approval –
action_prepare+action_confirmfor safe write operations - Rate limiting – protects Zabbix from flooding (default 300 req/min)
- Token scopes – granular control over which API groups are accessible
- IP restrictions – whitelist of allowed IP addresses
- TLS – HTTPS support with custom certificates (trusted certificates recommended – some AI clients have issues with self-signed certificates)
- Audit log – complete record of all actions
Compatible AI clients
Zabbix MCP Server works with any MCP-compatible client. Tested with:
- Claude (Anthropic) – Claude Desktop, Claude Code
- ChatGPT (OpenAI) – via MCP plugin
- GitHub Copilot – VS Code extension
- Cursor – AI-first editor
- OpenAI Codex – CLI agent
- n8n – workflow automation
- JetBrains AI – IntelliJ, PyCharm, and more
Configuration examples for the most common clients:
Claude Code (CLI):
# HTTP transport, with token
claude mcp add zabbix -t http -e http://your-server:8080/mcp -h "Authorization: Bearer zmcp_your-token-here"

# HTTP transport, without token
claude mcp add zabbix -t http -e http://your-server:8080/mcp
Claude Desktop (claude_desktop_config.json):
{
  "mcpServers": {
    "zabbix": {
      "type": "http",
      "url": "http://your-server:8080/mcp",
      "headers": {
        "Authorization": "Bearer zmcp_your-token-here"
      }
    }
  }
}
VS Code + GitHub Copilot (.vscode/mcp.json):
{
  "servers": {
    "zabbix": {
      "type": "http",
      "url": "http://your-server:8080/mcp",
      "headers": {
        "Authorization": "Bearer zmcp_your-token-here"
      }
    }
  }
}
Detailed guides for all supported clients (including Cursor, Codex, n8n, JetBrains, and more) can be found in the documentation on GitHub:
Quick start
Linux server installation
git clone https://github.com/initMAX/zabbix-mcp-server.git
cd zabbix-mcp-server
sudo ./deploy/install.sh
The installer automatically sets up everything needed and displays the access credentials at the end:
✓ === Installation complete ===

  Next steps:
  1. Edit config:      sudo nano /etc/zabbix-mcp/config.toml
  2. Start service:    sudo systemctl start zabbix-mcp-server
  3. Enable on boot:   sudo systemctl enable zabbix-mcp-server

  Endpoints (listening on 0.0.0.0:8080):
    MCP endpoint:   http://192.168.1.50:8080/mcp
    Admin portal:   http://192.168.1.50:9090

  ╔══════════════════════════════════════════════════════╗
  ║              Admin Portal Credentials                ║
  ╠══════════════════════════════════════════════════════╣
  ║  URL:       http://192.168.1.50:9090                 ║
  ║  Username:  admin                                    ║
  ║  Password:  Xk9mP2vL4wQn7R8s                         ║
  ║                                                      ║
  ║  Save this password - it will not be shown again     ║
  ╚══════════════════════════════════════════════════════╝
Then simply start the service and log in to the admin portal, where you can add a Zabbix server, create MCP tokens, and configure everything else via the web interface – no need to edit configuration files.
sudo systemctl start zabbix-mcp-server
sudo systemctl enable zabbix-mcp-server
Updating to a new version:
cd zabbix-mcp-server
git pull
sudo ./deploy/install.sh update
Docker installation
git clone https://github.com/initMAX/zabbix-mcp-server.git
cd zabbix-mcp-server
cp config.example.toml config.toml
nano config.toml                      # fill in your Zabbix URL and API token
docker compose up -d
The default configuration listens on localhost only. To change the port or make the server accessible on all interfaces, create a .env file:
cp .env.example .env
nano .env
In .env you can set:
MCP_HOST=0.0.0.0– listen on all interfaces (default: 127.0.0.1)MCP_PORT=8080– MCP endpoint portADMIN_PORT=9090– admin portal port
After starting the container, you can verify its status:
docker compose ps
docker compose logs -f
Upgrading to a new version:
git pull
docker compose up -d --build
Additional installer commands
sudo ./deploy/install.sh generate-token claude   # generate a new MCP token
sudo ./deploy/install.sh set-admin-password       # reset admin portal password
sudo ./deploy/install.sh test-config              # validate config.toml
sudo ./deploy/install.sh uninstall                # complete removal
sudo ./deploy/install.sh install --with-reporting # install with PDF reports
sudo ./deploy/install.sh install --without-reporting # install without PDF reports
Documentation and community
All project documentation is on GitHub – you’ll find detailed installation guides, configuration reference, examples for all AI clients, and security recommendations. The GitHub repo is also the main place for community communication:
- README – complete documentation, configuration, list of all tools
- INSTALL.md – detailed installation guide for Linux and Docker
- CHANGELOG – list of changes in each version
- Issues – bug reports and feature requests
- Discussions – ideas, questions, and sharing experiences with the community
The server is open-source (AGPL-3.0), supports Zabbix 5.0 through 8.0, and is production-ready with TLS, rate limiting, and a complete audit log. We appreciate any feedback – whether it’s a ticket, an idea in discussions, or a star on GitHub.